
Welcome back to another Pro-Follow update! Right now I’m juggling three different Pro-Follows. You can read the latest about building the in-law addition with Steve Wartman, and my most recent article about the bathroom remodel with Joe Bianco at those links. Today we’re back with Mike as he continues building and installing new built-in cabinets at Fred and Kim’s house. In case you missed it, you can read the first part of this series which covers measuring and building the rough base cabinets, countertops and shelves.
If you remember, Mike is a huge fan of Kreg products and his inventory is pretty extensive. A good bit of this article is about building the face frames for the cabinets, and Mike used a Kreg Precision Beaded Face-Framer for that process. I’ll be reviewing the face-framer so look for more details in the near future.
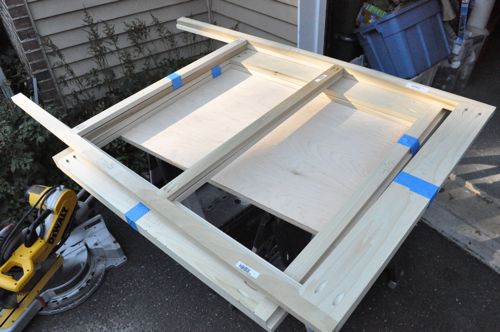
Step 1: Measure the Frame
To build the face-frame, Mike began by measuring the base cabinets and shelf units to get an exact size. Next, he cut the stiles and rails to size from 1 x 2 Poplar.
Pro-Talk: Stiles are the vertical pieces of the face-frame and rails are the horizontal pieces.
Pro-Tip: Verify that all the 1 x 2 stock is exactly the same dimension before starting because even slight variation can result in misaligned joints.
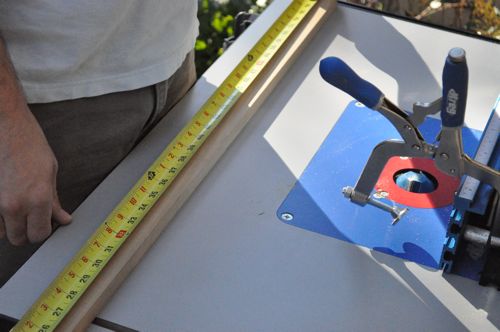
Even though Mike had measured the cabinets and shelves, he had to make adjustments to account for the notches. For instance, if you’re building a drawer front, the overall width is usually 15″. However, each rail measures 12-1/2″ (15″ less the width of 1 x 2″ stiles on each side, plus 1/4″ notch on each side). Kreg offers some typical examples to better understand calculating the right lengths in the manual.
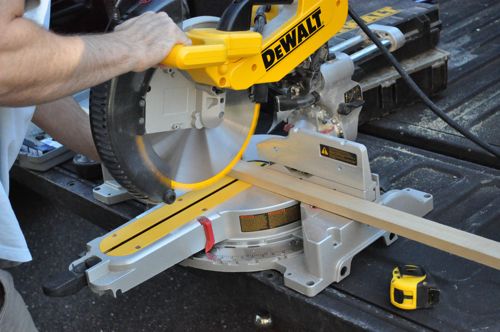
Once Mike had all the necessary pieces cut, he examined each one to find the best looking side and designated it as the face. Mike taped the faces together on matching pieces to ensure a consistent cut and to better prevent tear out.
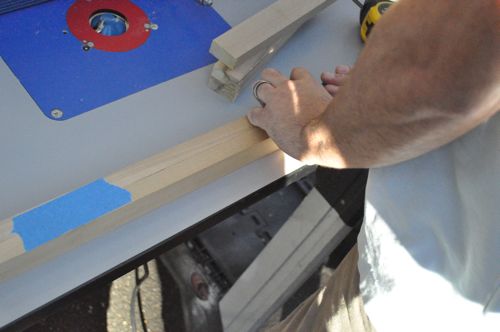
Step 2: Cut Notches
The Precision Beaded Face-Framer works in conjunction with a router, and after everything was ready, Mike grabbed some scrap to tweak the setup. This took a little time because it’s very important that everything is exact. For instance, if the router bit is too shallow, the pieces can rock back and forth, and if the bit is too deep, there will be a gap.
The face-framer enables a user to make accurate plunge cuts with a router, notching the stiles and rails into a perfect joint. It’s called a beaded face-framer because after cutting the notches, a user can route a bead with perfectly mitered corners. Again, look for the in-depth review in the near future.
Mike cut notches into the stiles where the stiles and rails join together. The picture below depicts the notch cut at the top and bottom of a stile, and you can see he’s holding the workpieces firmly against the fence and router stop.
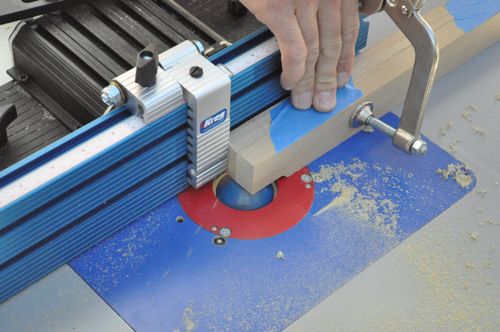
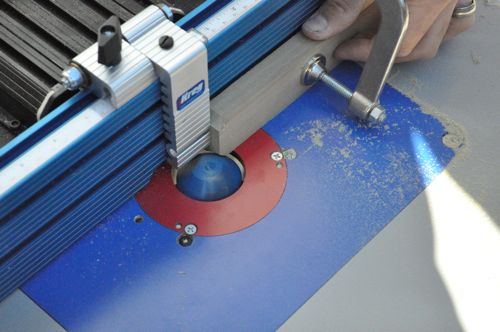
This is a look at the notch Mike cut in the middle of a stile.
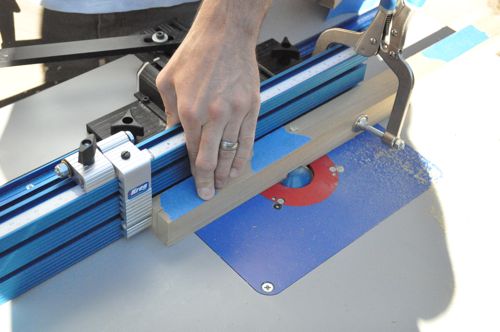
Here’s how Mike cut the notches for the rails.

Step 3: Route Bead
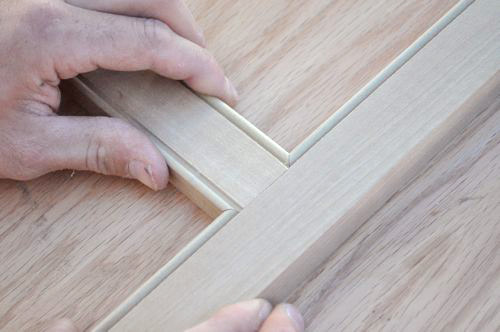
After Mike finished cutting all the notches, he replaced the face-framer with his router fence and setup a 1/4″ beading router bit.
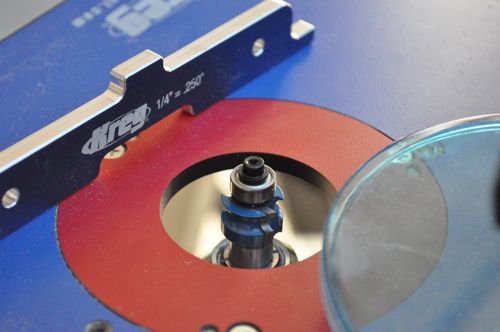
Mike ran the inside edge of each stile and both sides of each rail through the router.

Step 4: Drill Pocket Holes and Assemble Frame
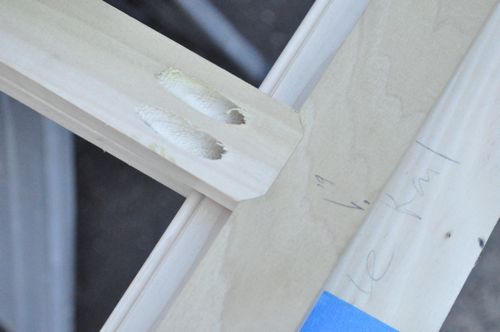
Mike setup his pocket hole station and drilled pocket holes in all the rails.

Mike clamped each joint so that the two pieces were flush before driving the pocket screws.

Pro-Tip: Set your drill/driver clutch to a lower setting to avoid over-driving the pocket hole screws.
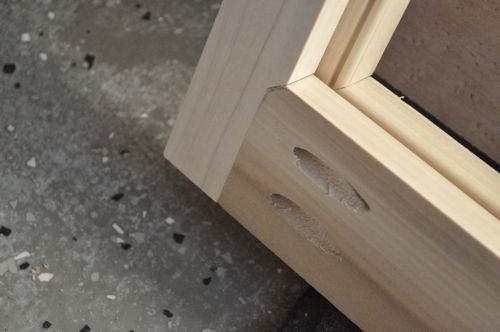
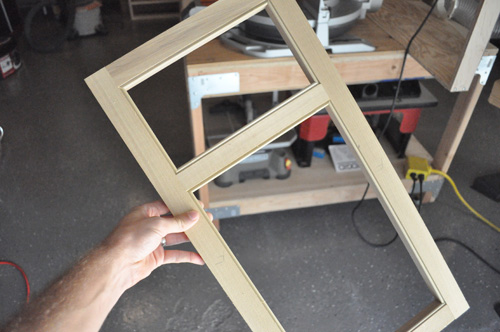
Here’s a picture of a cabinet and drawer front Mike made from some of the leftover 1 x 2, and you can see how nicely all the corners and beads line up. Without the face-framer, this would have been a long, arduous process involving intricate cuts on a table saw and gluing a separate bead afterwards.
Step 5: Attach Face Frame to Shelves
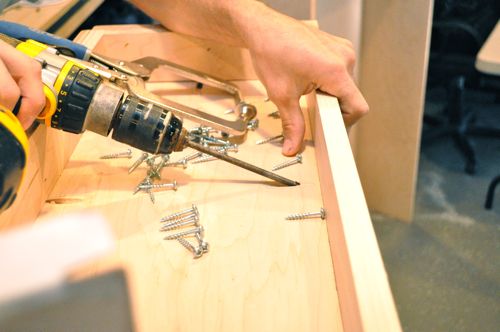
Mike clamped the face frames to the shelves and secured everything with pocket hole screws.
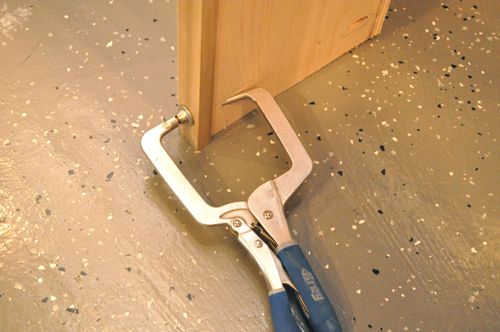
Pro-Tip: If you’re using a Kreg Right Angle Clamp (shown below), you can drill extra pocket holes for positioning the clamp and never drive any screws through them.
Step 6: Add Edge to Countertop
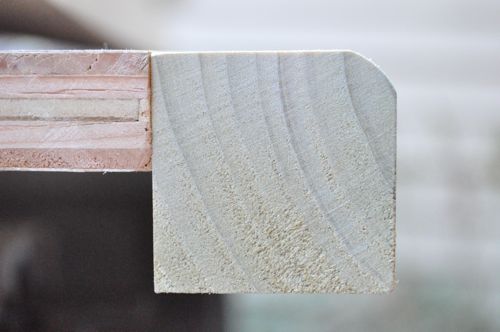
Mike routed an “eased edge” onto some 2 x 2 poplar and attached it to the countertop with pocket hole screws.

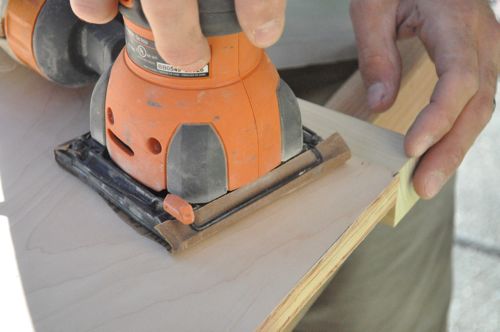
He sanded the countertop smooth and will fill any gaps later with wood filer.
Step 7: Attach Face Frame to Base Cabinets
Mike set the base cabinets in place and attached one side of the face frame using a piece of 1/4″ plywood scrap to ensure an accurate reveal.

Next, he temporarily pulled the cabinets out to drive the rest of the pocket hole screws into the face frame.

On the left side Mike found that he needed to add a small fill piece between the wall and the face frame because the wall was so out of square.

He secured the fill with pin nails.

Step 8: Add Plywood Veneer to Base Cabinets
Next, Mike cut pieces of 1/4″ plywood to fit the exposed sides of the base cabinets. This veneer will conceal the pocket holes and better hide the gap between the built-ins and the brick.
Mike cut the plywood with a table saw and used a utility knife to trim the veneer for a tight fit against the brick.
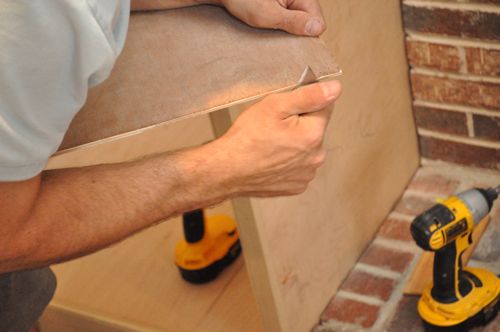
He used the pin nailer again to secure the veneer.

On the left side, Mike created “furring strips” to pad the veneer.
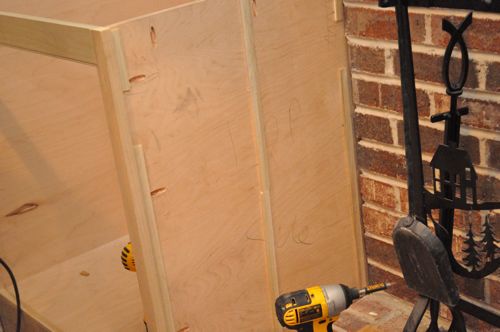
Next, Mike set the countertop in place, but he did not screw it at this time.
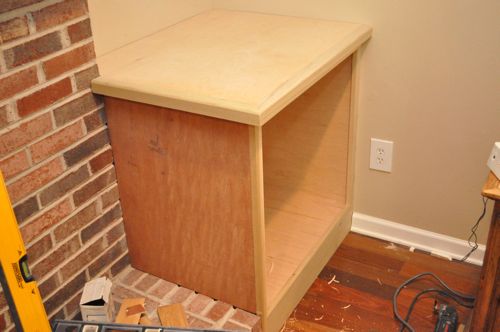
Step 9: Mark Location of Shelves and Attach to Countertop
Mike set the shelves on the countertops and adjusted them so that they were square and even with the mantle.
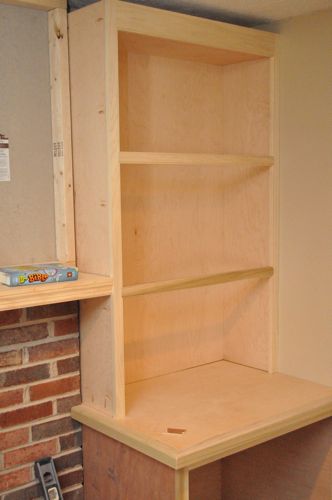
Mike drew lines where the shelves were located and then pulled the shelves and countertops back out.
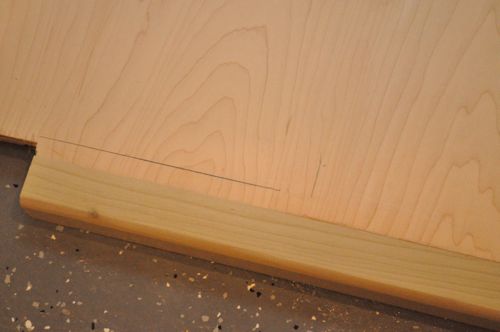
In the workshop, Mike set the shelves in place according to his lines and secured them with pocket hole screws.

Then the shelves and countertops went back on top of the base cabinets.
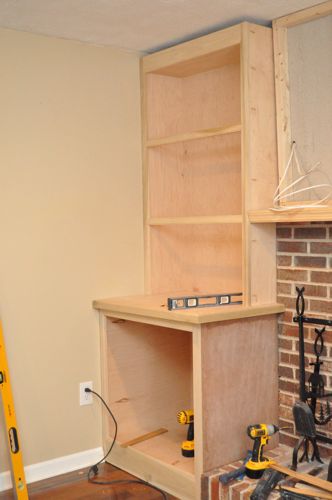
Step 10: Add Veneer to Shelves
Just like with the base cabinets, Mike cut a 1/4″ plywood veneer and pin nailed it in place.
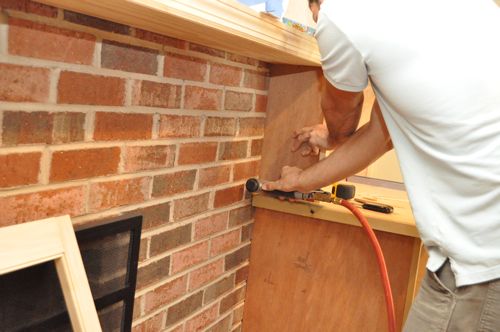
Step 11: Attach Shelves to Base and Wall
Mike drilled a few pocket holes in the base cabinet to secure the countertop to the base.
These built-ins don’t really need to be anchored to anything else. They fit very snug, and between that and the caulk (when they get painted), these built-in aren’t going anywhere. Even so, Mike drove a couple of screws for good measure. He put one near the top that will be concealed by crown molding, and he put one through the base into a stud in the wall.

That wraps up today’s Pro-Follow. Look for that Kreg Precision Face-Framer review in the coming days, and I hope to share an update on the in-law addition soon too.


It’s looking good so far. Mike’s got a good thing going with all the Kreg stuff – but there are other ways too. I would have spent more time with biscuits, splines, and a lot of glue.
That’s the beauty of these Kreg products. They simplify the joints making it sooo much easier and faster.
I was a little skeptical on the Kreg joints being strong enough to make me comfortable with the finished product. After handling the cabinets during install, I am sold on pocket holes & screws. While I think it’s indisputable that a glued tongue and groove joint would add tremendous strength in some cases, these pocket holes ended up being perfectly fine for the job. I’m a convert to Kreg.
Quick question on the Kreg face framer piece (I know that an in depth review is coming, but my router table purchase is today/tomorrow).
Would the Kreg piece fit on a tabletop router table? I am trying to decide between a full size table insert or just a secured tabletop unit.
Thanks for the write-up, this is a good one!
The face-framer is supposed to work with “almost any full-sized router table”. It attaches in lieu of the fence with T-bolts so make sure your table has t-slots or you’ll have to install some.
Go with a table that allows a standard square shape baseplate. Then you can get a router lift. A router table and lift was really a game changer for me in terms of the quality of work I could turn out.
Nice job so far. looks like another post i’ll book mark or search for when we get a house.
I didn’t think of this on the first post, but is there anything to worry about with the heat of fireplace affecting the wood?
Good question. I looked through the codes and examined some nearby houses with similar setups. There are some rules if you’re within 12-18 inches of the firebox opening around here. None of our wood components are that close to the firebox. The mantle sits about 19 inches above the opening, and the cabinets on either side are more than 2 feet away. Our fire box is also particularly deep, which gives me some comfort that there is little to no risk with this installation.
Looks great! I have heard of some people using a minimal amount of glue as a backup method of securing wood while also using Kreg joints. Was there any glue involved?
Mike didn’t use glue as a backup and I also questioned whether it was necessary. Obviously time will tell, but right now the joints are exceptionally tight. After installation and painting, my suspicion is we won’t have any issues. The only thing I have some concern over is changes in expansion/contraction due to humidity changes throughout the year. Hopefully we don’t see anything dramatic since the bulk of the components are plywood and shouldn’t really move much.
I’ll just add that Kreg indicates that glue is optional too. Hopefully that means they’ve done some good testing, and we can trust their claims.
It’s really starting to look good. The bead that he added to the face frame was a very nice touch.
I liked the bead a lot – and the fact that it is done on the same piece of wood is a real time saver.
I liked the bead myself. I’m building beds for my daughters. I may use the beading around the drawer faces. I need to hurry up and finish my router table.
Wow, that is some really great carpentry. This guy is a pro.
I have the Kreg router table and am really happy with it. I have the pocket hole kit as well, but have yet to put it to use. That beading kit is awesome. I’ve seen Norm do it the old way (attaching the beading afterwards) and it was a lot more tedious.
We have the same sort of space you are doing built ins and always thought that this would be the bets use of that space. I need to find a local “Mike” he does a nice job!
I used to be one of those “doubters” about Kreg Screws. Now that’s almost all I use unless I can’t affectively hide the pocket hole. I do however recommend gluing the joints whenever possible as it makes for an even stronger joint.
This article shows you that the sky’s the limit with pocket screws. Once you build a few cabinets with them you realize how well they work and how versatile they are. Nice job guys.
This is great! Is there a “Part 3” for this tutorial? Thank you!
Thank you for sharing the details here! Is there anyway you could provide a front-on photo of the entire setup – taking the photo from directly in front of the fireplace? I’m interested to see how it all comes together. Our setup would be similar as our fireplace/mantel will be inset with the cabinets on either side extending further out in order to be deep enough for our media equipment. Thank you so much for your response in advance!
I have two openings on each side of a fireplace. I want to build bookshelves with cabinets on the bottom and shelves on top. my dimensions are 53″ wide 28 3\8″ deep and 8′ 10″ high. I haven’t accomplished any woodworking in years so I’m very rusty. Do you have any detailed plans or ideas?
Is there a part three to this?
Has anyone found a part 3/”after” post for this??
Jaclyn
Follow this link
https://www.oneprojectcloser.com/built-ins-and-fireplace-makeover/
Can you share the link for the final product? Would love to see this completed but I can’t find anymore related posts and no search function on your site. Thanks!