
Wainscoting is a great wall application for dressing up kitchens, bathrooms, dining rooms and more. It’s also a great do-it-yourselfer project because with the right tools and proper planning, anyone can achieve great results. This post focuses on bead board wainscoting; we have another focused on board and batten wainscoting.
If you’re not sure how to tackle this project, what better way to learn than straight from a professional contractor? Today’s Pro-Follow showcases carpenter Steve Wartman and his crew as they install beadboard wainscoting in a small kitchen eating area. Stay current with all of our Pro-Follow articles by becoming an email or RSS subscriber.

Materials List
All these materials can be found at your local home improvement center.
- Beadboard Wainscoting
- Chair Rail
- Baseboard Molding
- Shoe Molding
- Drywall Adhesive
- Caulk
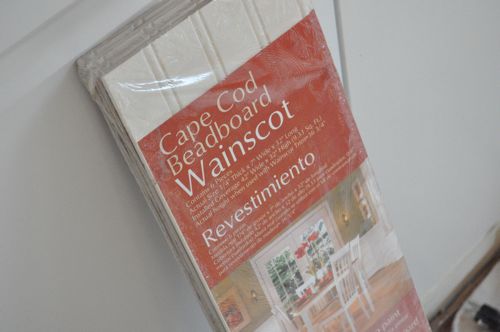
Wainscoting: True wainscoting is a solid wood product. However, less expensive alternatives like medium density fiberboard (MDF) and vinyl wainscoting are available. Vinyl in particular is a great option for areas with moisture (like the bathroom), and it’s easier to work with than MDF. However, it carries a higher price tag. Manufacturers often offer specific chair and baseboard molding options that make installation easier. This walk-through utilizes white, MDF wainscoting with the included chair rail.
Drywall Adhesive: Steve and his crew used OSI Formula #38 framing and drywall adhesive to glue the wainscoting.
Caulk: The guys used a latex, paintable caulk like DAP ALEX painters caulk.
Tools
- Table saw
- Miter saw
- Brad nailer
- Pin nailer
- Air compressor
- Level
- Caulk gun
- Jigsaw
- Coping saw
* While these are the preferred tools, many can be substituted. For instance, a hammer and nail set can be used in lieu of the brad nailer, and a circular saw can replace a miter and table saw.
The Challenge
The biggest challenge when installing wainscoting is keeping everything lined up. Ideally, each piece would fit tightly against the adjacent pieces, and all the terminations would perfectly align. Unfortunately, floors are often not level, walls can be uneven and corners are not always square. To address these issues, it’s important to know how to make adjustments and hide imperfections.
Step 1: Mark Lines
The guys began this project by marking a level line around the room at 35-1/2″ which takes into account other features of the room like countertops. This line represents the top of the chair rail which measure 2-1/2″ wide. The beadboard product measures 32″ tall, and if you do the math, means there is a 1″ gap at the bottom. This gap will be concealed by baseboard and provides space for any height changes in the floor.


Pro-Tip: Wainscoting (including the molding) is typically installed in one of three height ranges. Chair height measures 32 – 36″ off the floor, bathrooms range 38 – 42″ off the floor, and shelf height ranges 54 – 64″ off the floor.
Pro-Tip: If you’re working in a bathroom, make sure the wainscoting is taller than the vanity.
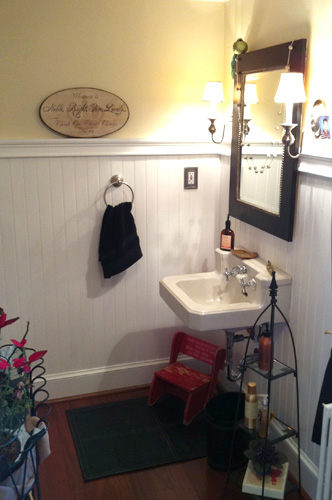
Here’s an example of wainscoting in a bathroom.
Step 2: Plan the Layout
Setting up boards to plan the layout is a great way to avoid mistakes, and this is a critical step to achieve aesthetic corners. The goal is to avoid odd-looking corners by intersecting the two walls at a wider bead. Furthermore, you want the reveal to match on both pieces.
Steve and his crew laid out sections starting at the most prominently visible corner, working around the room. They shifted the setup so that each corner finishes on a wider bead and that adjacent pieces showed a similar reveal. Keep in mind that all the corners will have a butt joint and corner pieces will need to be cut so that the exposed reveal matches.
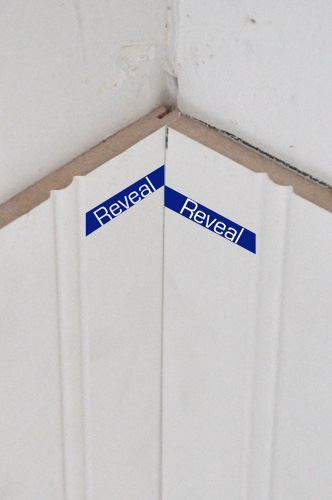
A small portion of the beadboard is concealed on inside corners and this presents an opportunity to hide imperfections. For instance, if the corner is out of square, you can hide a small gap.

Step 3: Rip Beadboard
With the layout set, Steve and his crew could rip the boards to size with a table saw.


Step 4: Nail & Glue
The guys put down a thick bead of drywall adhesive on the backside of each piece of beadboard. Following their lines, they slid the tongues and grooves together.

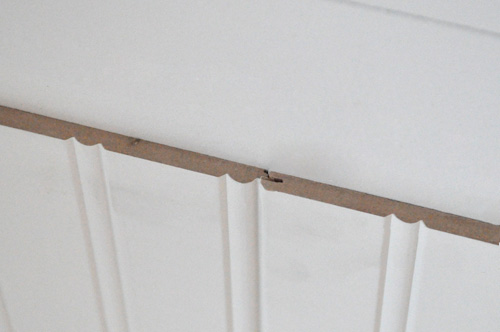
Steve and his crew placed a brad nail at the top and bottom of each wide bead. This will later be concealed by the chair and baseboard molding.


They followed that up with pin nails, angled and placed along some of the smaller beads.

Step 4a: Outside Corners
This installation didn’t have any outside corners. That’s not always the case and if you reach an outside corner, there are a couple different ways to handle them. The final product for this kitchen will be a white beadboard wainscoting which means that paint and caulk can conceal cut edges. For that reason, cutting the tongue off one piece (and again matching the reveal) and creating a butt joint around the corner will look just fine.
Other options include purchasing a piece of molding that fits the outside corner overtop of the beadboard or running the beadboard flush against some 1x material and mitering that at 45° to turn the corner. Another innovative idea, is to glue a dowel into the corner that duplicates one of the smaller beads. Check out the “Related Content” section for the link.
Step 4b: Inside Corners
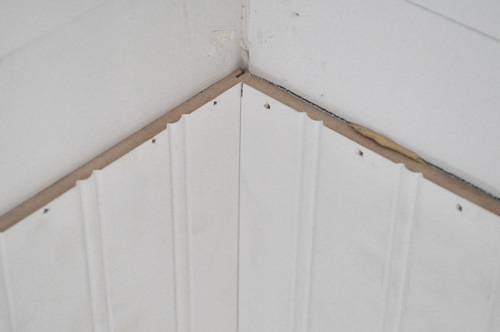
For inside corners, Steve’s crew would run the first piece into the corner, and if the corner was out of square, it would have a small gap. However, the next piece of beadboard would conceal that gap.
Step 4c: Cut Around Outlets
Whenever they guys came to an outlet, they removed the faceplate and marked lines just above and below the screws securing the receptacle to the box.

Next, they used a jigsaw to cut out the opening.

They would back out the screws securing the receptacle to the box which would allow them to fit the next piece of beadboard in place.

Once the beadboard was nailed, Steve’s crew would screw the receptacle back into place flush with the beadboard and replace the cover.

Step 4d: Terminating at a Door Casing
Ideally, all the beadboard will terminate at a door casing because it makes for an easy transition. The beadboard, chair rail and baseboard all sit flush against the casing. The only hitch is getting that last piece of beadboard into the groove and tight.
To accomplish this, Steve’s crew would fit the last two pieces together before gluing and nailing them to the wall. The would also use a beater block to gently drive the beadboard into place.


Editors Note: You’ll notice that some of the wainscoting ends in open space. This is a challenge because there’s no easy way to terminate the chair rail, beadboard and baseboard. For this install, Steve used a thin piece of 1x with a beveled edge on top.

Step 5: Install Chair Rail
Steve choose to use the manufacturer’s recommended chair rail, and it makes the install easier because the beadboard tucks up underneath a small lip. That overlap presents another opportunity to hide an uneven edge in case you needed to gradually fan pieces to align with an edge or casing.


For a tighter fit, Steve’s crew cope cut the inside corners.
Pro-Tip: For more information about cutting inside corners, check out the two helpful tutorials in the “Related Content” section.
Pro-Tip: Be careful cutting MDF as it tends to chip.


The guys also double-checked that everything was still level before using the brad nailer to fasten the chair rail to the wall.

Step 6: Install the Baseboard
Since the guys left a 1″ gap underneath the beadboard, they cut strips of leftover beadboard to fill the gap. This prevents the baseboard from angling inward when they nail it.
Pro-Tip: For a full tutorial on installing baseboard and shoe molding, check out the link in our “Related Content” section.


Step 7: Caulk all Joints
Before priming and painting, the guys used a paintable, latex caulk:
- between the chair rail and the beadboard
- between the chair rail and the wall
- at the corners
- between the beadboard and baseboard
- at all the terminations
- any visible brad nail holes

Finished


This looks great! Joy & I just did a similar project in our 3×6″ half bath last year, but we used the 1/8″ 4×8′ MDF sheets that HD and Lowes sell for around $20 each, cut them in half to get 4×4″ sheets, then trimmed a little to get a good height from the baseboard and up to the chair rail. We purposely ignored recommended heights here and went with looks and functionality (like you said, above the sink), and it worked out well. We did look at the same Cape Cod Beadboard but may have strayed away from it due to cost, I believe.
Ditto here! Ran the headboard above the back of the sink splash but below the light/wall switches and wound up with a perfect height. But no body said anything about the supply line for the toilet. Baseboard was taller than the original and it centered over the supply line. Can’t really see it so I did what any DIY’er would do. and now you can’t see it either! 🤣
On Money Hunters on DIY they used drywall that had a wainscoting impression already built in. Not as good looking as real wood wainscoting, but much cheaper apparently. Good if you are on a really tight budget and need to put money elsewhere I suppose.
I’ve also seen a paintable wainscoting wall paper online, but have never seen it in stores. I think one of the other blogs I follow used it in their half bath. Their pics looked good, but I don’t know how it would look in person. I’ve used one paintable wall paper from Lowe’s and was very happy with it, but some of the other ones they had looked puffy and squishy…if that makes sense. But, the wallpaper would be another low cost alternative to the real thing.
Curious as to why you say to install the wainscoting above the vanity?
We did not, mainly because the prefab pieces we purchased were 36″ tall.
I initially wanted the wainscoting to be about 5′ tall, but we couldn’t find any that height.
Not to hijack the question since you addressed Ethan, but in our case we installed a pedestal sink that did not have a backsplash like a vanity may have, so we thought to run higher with the beadboard for a) looks, and b) protection from water for the drywall. Our beadboard and chairrail go just slightly above the fixtures, so that hands can grab them easily without hitting the molding.
It’s just for the look. Most bathroom vanities are around 34-36″ tall and putting the wainscoting under that can look awkward. With that said, you also need to take things like the vanity backsplash and outlets into consideration.
What else did they do in that room? I noticed the wall changed colors after the wainscoting went up.
They also went through the tedious process of removing wall paper. They followed that up with a skim coat (using a striping method that was very interesting), sanding and then painting.
Interesting they dont have an end piece for situations like that. They should come up with one.
cool. I never like using glue to attach stuff to walls. If you ever want to remove the bead board, the wall behind it will be totally wrecked! I guess you just have to make sure you like the bead board well enough that you never take it down!
Great timing on this – I was planning on putting this up in our entryway this spring, and my biggest question had been about what to do with outlets. This answered that simply enough. Thanks!
I have another question though, that goes along with Reuben’s comment – why do you need the glue, too? It seems like there’s a lot of nails in there. Is it because the nails aren’t really into any wood? Maybe I just answered my own question 🙂
Hi Joe. Glad you liked the post, and I hope it helps you with your project. If you want to send in some pictures, I’d like to add them to the end.
The glue is to ensure the boards don’t move. Most of the nails won’t hit anything except drywall, and they’re only brad / pin nails. I’d hate to remove the beadboard afterwards, but I’d also hate to see ’em come loose.
Can you install beadboard with just the drywall glue and not use the Brad nails or pin nails if all they are hitting is drywall? I’m going to be installing it in my bathroom.
Nice, detailed tips about hiding imperfections. Thanks for the great job you do educating with OPC!
I’d think that with the little lip on the chair rail and the whole baseboard holding the beadboard, you wouldn’t need much more than the pin nails in the drywall. What chance is there that MDF is going to expand enough to buckle and pull away from the wall? I could maybe see adhesive being necessary if the walls weren’t straight or had other surface imperfections that would keep the beadboard from being set flat against the entire wall.
I highly recommend using a reliable 360′ laser level that goes around the room. Lesson learned when one area of the floor was unlevel so there were some extra cuts required. Just set up the laser and pop a chalk line and you are set.
Re: the trim pieces.
One has a rubber or latex piece attached to it. Is that the molding or the chair rail?
Thanks.
Thanks for this article; very helpful. In the process of remodeling my bathroom and wondering if it is possible to do vinyl wainscoting on cement/concrete walls?
I have read that wood paneling or wainscoting should sit in the room for 24-48 hours to acclimate to the temperatures. Does this MDF product have to sit since it is not natural wood? Thanks!
question – what size/guage/length brads were used to hold up the wainscoating boards? I was going to use the 4’sheets as oppesed to the 6″strips… thanks!
I have MDF beadboards with 0.25 inch (6.35 mm) in thickness, but the width of groove on the top rail/cap is 0.315 inch (8 mm). The gap is about 0.065 inch (1.65 mm), which is not good to hold the beadboards to the wall. Any good idea? Thank you so much.
In Step 4 (Nail & Glue), what size of brad nail (1-1/4″ or 1-1/2″? ..) is used? and in Step 5 (Install Chair Rail), what size of brad nail is used to fasten the chair rail to the stud (2″, or 2-1/2″? ..)? Thank you so much.
I’d like to know the answer to the questions (2) about nail/brad sizes
I am going to install on a ceiling that had staple tile. So the furring will be ok to glue to that I would not have to install drywall on the furring strips
Thanks so much for this fantastic tutorial. Did my whole bathroom by myself this weekend without any catastrophes, meltdowns, or injuries and the room looks AMAZING. I wish you had tutorials for all the projects I’d like to complete around here, LOL. Thanks again!
How do I find the “related contents”? I am not seeing it.
Thanks
My beadboard with chair railing is 48 inches tall due to 9 ft. ceilings and a partial wall on one side. Problem is I have one outlet that is 51 inches from the floor so part will be “in” the beadboard but the rest will not. Is there a way to do this without actually moving the higher so it clears the beadboard?
What did you do here? I thought about framing the the outlet…?
how do i finish off the bead board at the top of the stairs using only one piece side only?
[…] BEANBOARD WAINSCOTING […]
I will be installing beadboard with a 4″ horizontal MDF headers and a 1 1/2″ cap board. In he middle of the room are 3 windows with apx. 3″ of drywall between them. Do I carry through with the horizontal MDF and cap on it too?
Vinyl beadboard? Really?
I am planning on installing beadboard on one small kitchen wall that also has baseboard heating. Does any modifications need to be taken with the type of adhesive or cutting the bottom of the beadboard?
I cannot understand how you can reattach the outlet to the original electrical box after the beadboard is installed: the box is now recessed behind it. I used a box extender to do this but the article does not refer to anything like that.
The beadboard I installed was 1/8″ thick. The screws holding the outlet were more than long enough to allow the outlet to sit on the beadboard rather than the drywall. Easy peasy.
Where did you get the upper trim with the piece etched out that fit over the BB?