
This is a post that ran originally almost exactly two years ago on One Project Closer, our main site. Since then, I have made a couple of additional types of barrettes and added their tutorials (complete with LOTS of pictures) to the original post. So even if you saw the original post, read ahead to see what new stuff I have been up to!
A friend of my daughter’s always has the cutest barrettes in her hair. One day, I complimented them to her mother, Colleen, who said they were home-made. Since I enjoy crafts, I thought it would be a fun activity to make some for Izzie. Finally, now that she is three and has some hair, we actually get to USE the barrettes rather than just display them on her pretty Ballerina Barrette holder that I made for her.

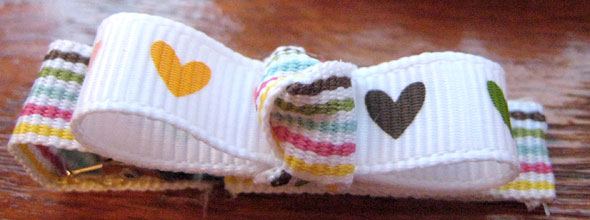
How to Make Fabric Snap Barrettes
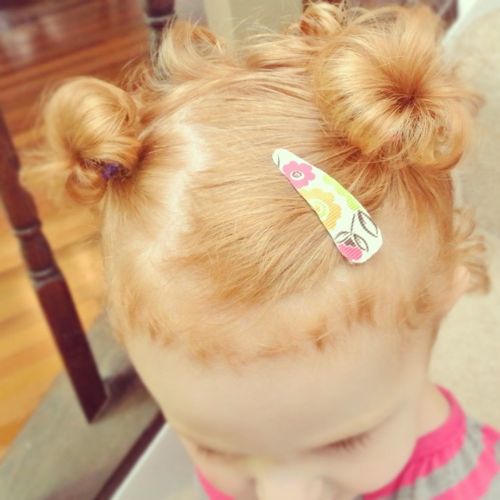
These are a no mess up kinda barrette to make and are wonderful for fine (or very little) hair because they “snap” shut and grooves prevent the hair from easily slipping. They are fairly cheap – I found them at Hobby Lobby and my local beauty supply store for around 20/$1. Hobby Lobby had the best assortment of sizes, so I will probably stock up there in the future.
Materials:
- Metal Snap Clips
- Ribbon or thick fabric
- Hot Glue
- Fabric scissors
- Clear Nail Polish

Step 1: Cut Ribbon
Cut a length of ribbon (or thicker fabric) a little longer than your barrette. Use ribbon (non satin) or thicker fabric to smooth the bumps of the hot glue beneath.

Step 2: Glue the Ribbon to the Barrette
Start first at the wider part of the barrette, with the barrette open. Put hot glue on the upper 1/3 – 1/2 edge of the barrette while it is open, then quickly place the ribbon on the barrette. Press firmly and allow it to dry.


Snap the barrette closed, then put hot glue on the remaining 1/2 of the metal barrette and quickly press the ribbon down. Do not use too much glue or it will make it difficult to open your barrette. Also, it is important to glue in two stages, with the barrette both open and closed in order to ensure the ribbon is able to cover the entire barrette when both open and closed.

Step 3: Cut the Ribbon
Turn the barrette over, looking at the back, and carefully cut the ribbon around the barrette.

Step 4: Seal the Edges
Seal the edges of the ribbon with nail polish to prevent fraying. Be sure to use a THICK clear polish or the ribbon will absorb the polish. My favorite polish is Setche Vite, for both barrettes and nails! 🙂


Step 5: Add embellishments
This step is optional, because the ribbon alone makes for a very cute barrette, but you can also add homemade flowers, buttons, or bows to sass it up! Check out my detailed tutorial to make your own fabric flowers.
You’re done! When you first open the barrette, it may stick a little because of the glue, but don’t worry, after you un-stick it, the glue will help the barrette not slip!
How to Make Ribbon Barrettes
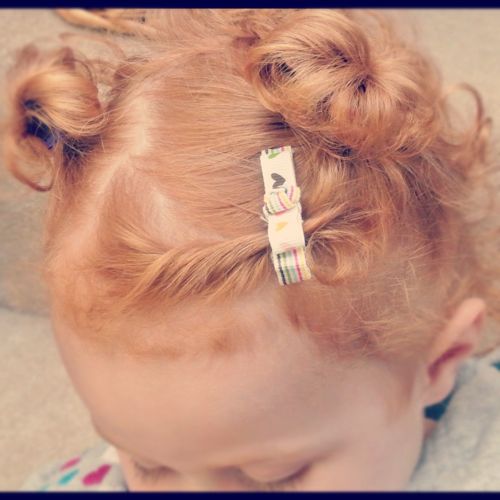
Materials
- Two-prong Metal, Curl Clips or Snap Clips
- Ribbon
- Glue gun with glue
- Optional: Buttons, small flowers, beads, etc.
You can make the basic barrette with either a metal, two-prong clip or a snap clip. Both look very cute and stylish, but function differently and will hold different types of hair. The snap will hold finer hair better and the two-prong clips hold thicker and greater amounts of hair. I will outline the process for both below.
The Basic Snap Barrette:
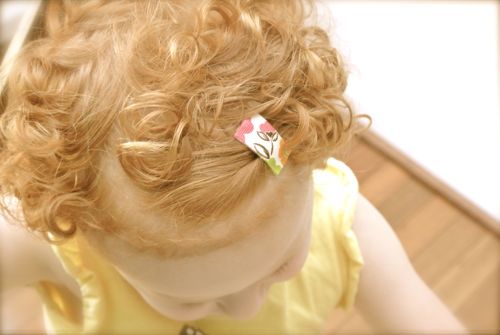
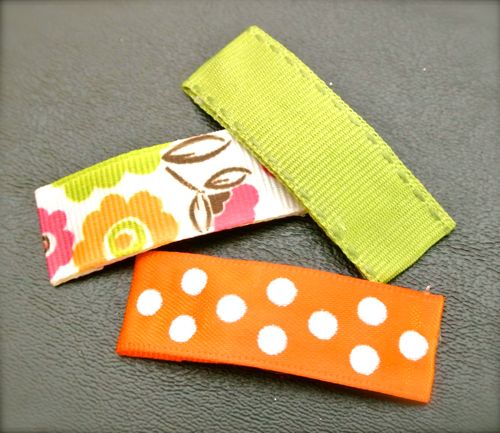
This barrette lays flat to the head and is so simple to make. Depending on the size of the clip you use and the type of ribbon, it can be as bold or unobtrusive as you want.
Step 1: Cut the Ribbon
Cut the ribbon about 2.5 times the length of the clip. You may want to wrap the clip without glue to measure the precise length first, or you can just trim the edge at the end.
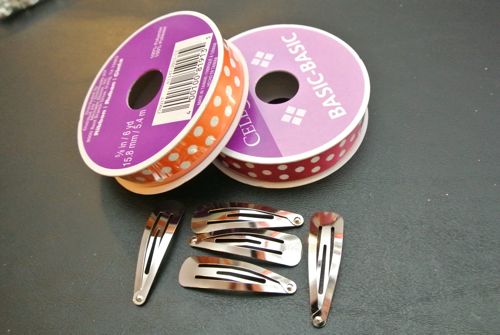
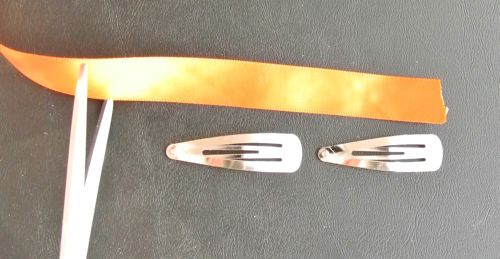
Step 2: Glue the Ribbon
Place one end of the ribbon in the open barrette, ribbon facing downward. Snap the barrette shut.
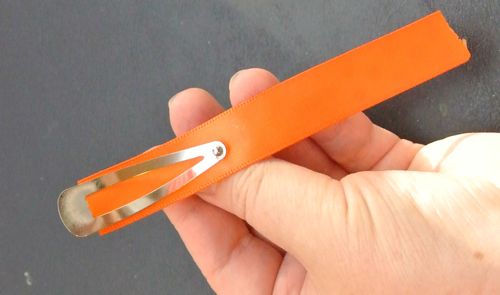
Then, place glue on the top of the clip and the ribbon surrounding it. Quickly fold the ribbon over to cover the upper side of the clip and glue, pressing firmly until cool. Don’t worry if some the glue spills out the sides.
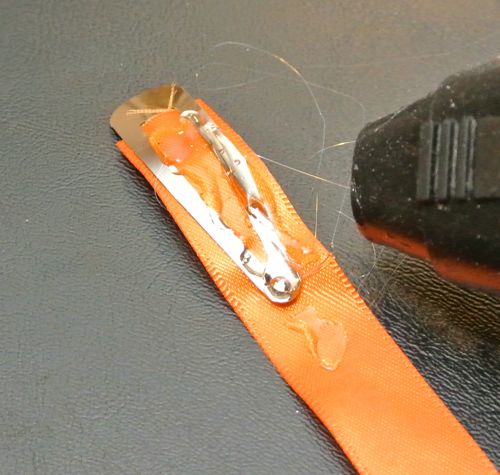
Turn the barrette upside down and glue the top of the barrette, folding the remainder of the ribbon around on top of the barrette. Press firmly until cool.
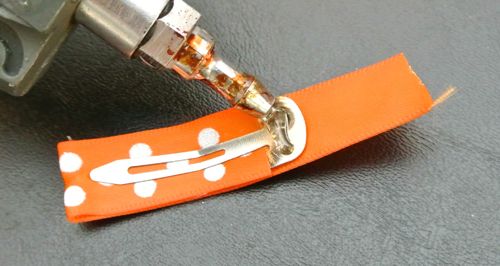
Step 3: Finishing Touches
Trim and remove any excess ribbon and glue.
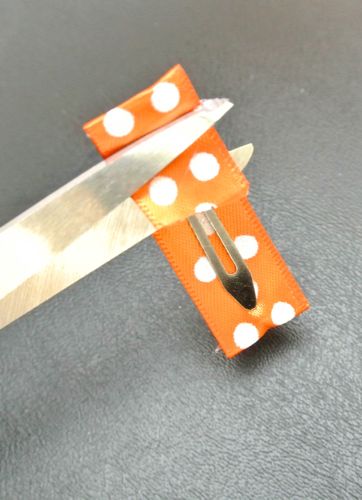
The basic two-prong barrette

Step 1: Cut the Ribbon
Cut the ribbon about 2.5 times the length of the clip. You may want to wrap the clip without glue to measure the precise length first, or you can just trim the edge at the end.
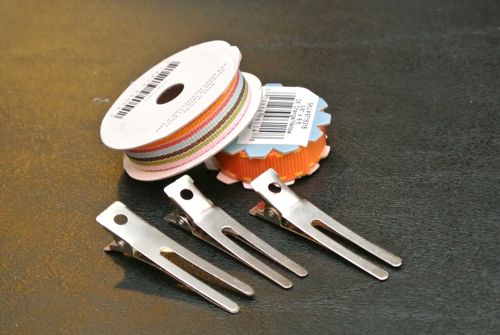
Step 2: Glue the Ribbon
Place hot glue on the underside of the first 1.5″ of ribbon. Quickly place the ribbon in-between the two sides of the clip, glue side up. (tip: I use a baby comb or piece of cardboard to place under the ribbon before gluing so the glue doesn’t burn my fingers. I remove the comb once the ribbon sandwiches the clip, in order to press the ribbon flat with my fingers. Glue should be soft, but NOT cool.)
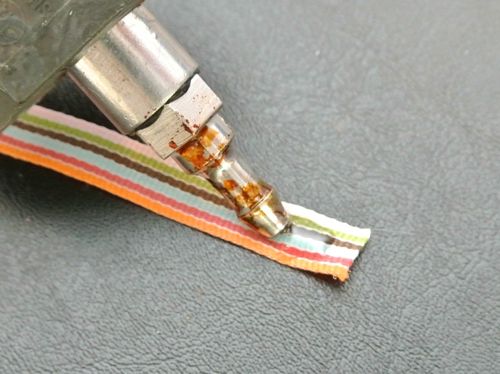
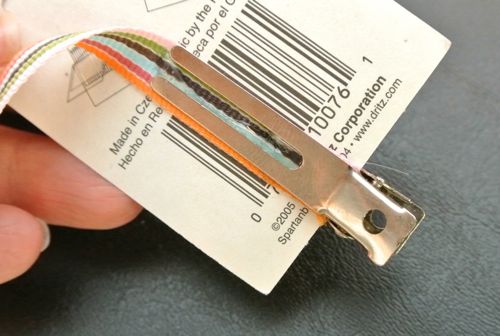
Before the glue cools, place more glue on the top side of the clip and fold the ribbon over the end of the clip, pressing the ribbon sandwiching the metal clip firmly together.
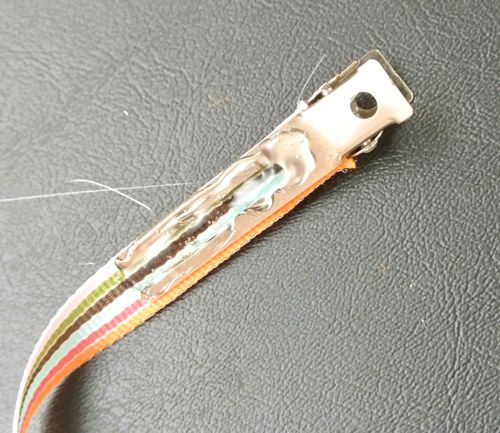
Place more glue on each of the two outer sides of the end of the clips, quickly wrapping the ribbon tightly around the end of the clip, pressing the ribbon to the clip until cool.
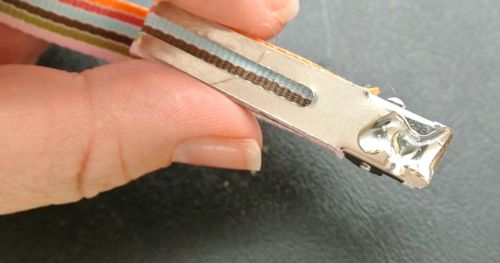
Step 3: The Finishing Touches
Cut the ribbon before the bottom prongs separate, and seal the ribbon with a very small bit of glue. (option: wrap the ribbon around the underside of the clip for a more polished look. However, this may cause the clip to more easily slide out of the hair. It also uses more ribbon, costing more money without looking any different once placed in the hair). Gently remove any excess glue.
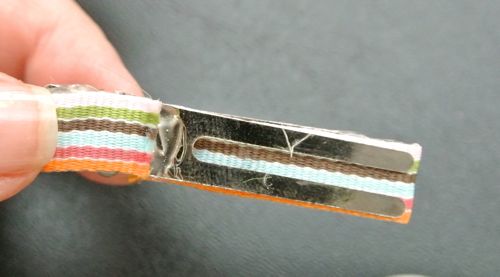
For a barrette with a bow:
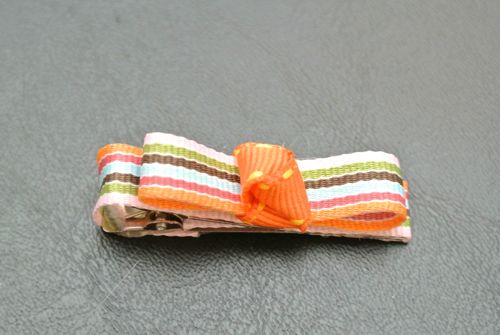
Step 1: The Basic Barrette
Following the above steps for making a basic snap or two-pronged barrette.
Step 2: Cut the Ribbon
Cut a length of ribbon slightly less than twice the length of the clip. (tip: try using different patterns and colors of ribbon for contrast)
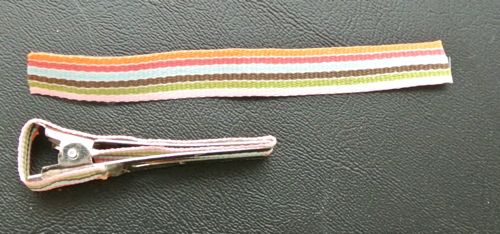
Step 3: Glue the Ribbon
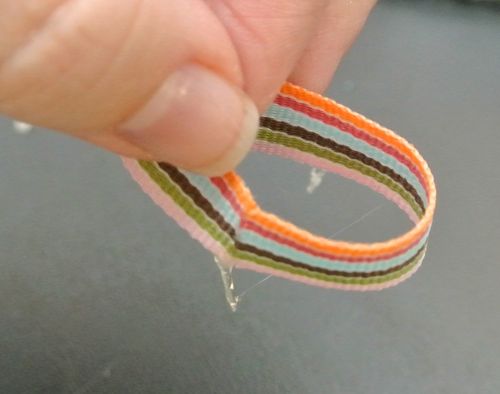
Place a small amount of glue on one end of the ribbon and attach it to the other end of the ribbon to form a loop. If the ribbon is single sided, the finished side should face out. Place a small amount of glue of the inner seam of the loop, and press the opposing side to it.
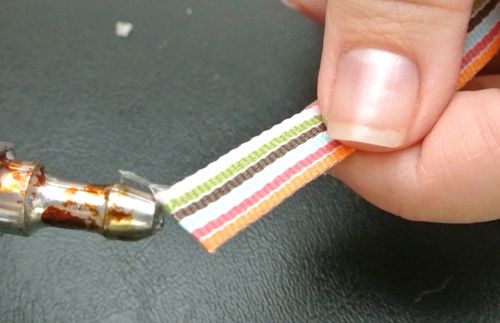
If using fabric knot at the center of bow:
Using a separate piece of ribbon, tie a small, single knot.
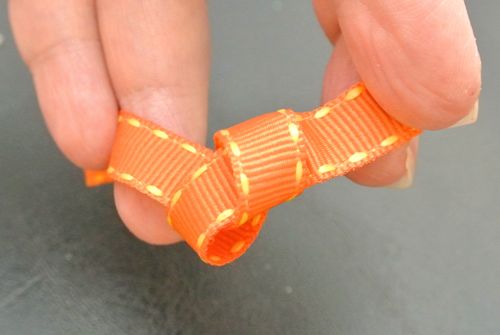
On the underside of the bow, place a small amount of glue on the underside of the center of the bow (on the seam), and quickly wrap the knot around. Glue again to place the other side of the knot.
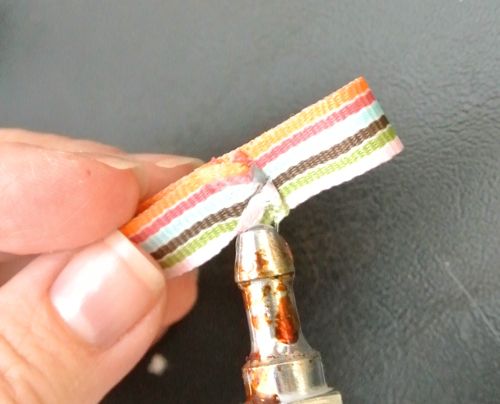
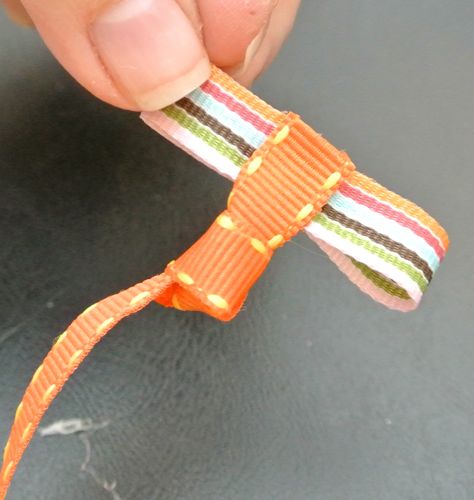
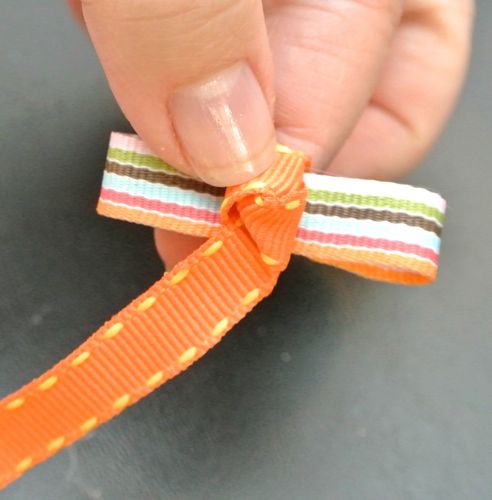
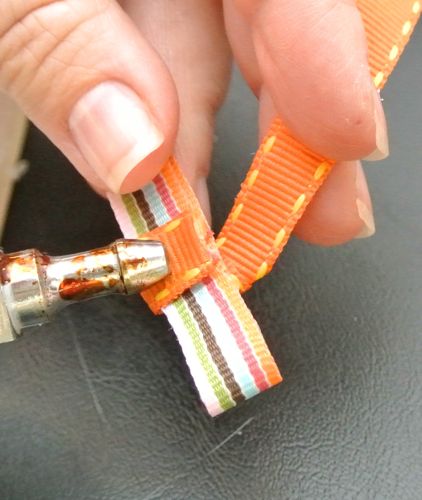
On the underside of the bow, place a small amount of glue and press the bow firmly to the center of the ribbon wrapped barrette.
If using a button, bead, or flower at the center of the bow:
Place small amount of glue at the center of the top of the bow and press decorative piece on top. (tip: use the extra buttons from old shirts instead of buying new ones)
Step 4: The Finishing Touches
Gently remove any excess glue then glue the bow to the fabric covered barrette.
Why MAKE instead of BUY?
It’s easy to buy these in the store. They are very popular and can be bought at Target, Walmart, or Amazon.com for $5 – $10. But, not only is this a fun activity that you can do with the kids on a rainy day, but you can save lots of money. Plus, if you make your own, you can have barrettes to match every outfit!
I bought 5 small spools of ribbon in the dollar bin at Target (all five ribbons in one package for $1!) and the clips at a local Beauty4U (hair product discount store). Ribbon is easy to find – in addition to Target, Michael’s and Joann Fabrics sell cute ribbons starting at $0.99. The clips were much harder to find. I went to every store imaginable before finding them at Beauty4U, costing $1.29 for 12 clips.
What do you think? Have you ever made your own barrettes?
As Always, thanks for reading!
Jocie
Don’t forget to check out our weekly Link-up Parties every Friday, where you can submit your own DIY projects and crafts!


How cute….I tried to make homemade scrunchies before….some turned out and some didn’t.
If it’s any consolation, Izzie will have hair at some point….just look at Mary….you can tell her age by looking at how much hair she has or doesn’t have
L-O-V-E love it! So cute. Now I’m going to have to bring her wardrobe to Jo Ann Fabrics so she can have all matching barrettes.. Not to brag, but my kid’s go hair 😉
Wow what memories this brings back. Very cute Jocie. When our little girl (she just turned 27 Saturday while in S.Korea with the Air Force) was in elementary school I used to make all her hair gear. I still have loads of ribbon left over that never got made into barrettes. I’m waiting for a grandbaby girl {wink} so I can make her some.
Back in the eighties balloons were popular on barrettes too. They were wired on to the metal barrettes. That might be something fun to try. They were adorable too.
HaHa! I had barrettes with balloons on them! My mom always used the larger kind that you pinch open…not sure how else to describe them. We had tons of fun making them with her to match our outfits. I think we even did them for one of my birthday parties.
LOL! we must be in the same generation because i had the balloon ones too, but also the neon shoe string barrettes! 🙂 maybe we should start a come-back?!? 😉
well detailed post. I’ll add it to my “in-case-of-daughter” file 😉
Super cute! We use those snap barrettes every day, we’ll have to try these ideas! I did adapt your painted keys ideas and painted some of the snap barettes with thick opaque nail polish. They turned out really cute 🙂 I buy the clips at walmart in the sewing section. they call them binding clips and are $3.00 for 50 clips!
I should have thought to look at Walmart for the clips, great idea! And i will totally try the nail polish on the barrettes. How did it work when you open and close them – does the nail polish crack?
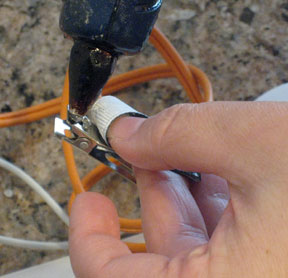
a tip… instead of cutting out around the triangle and using nail polish, you can use a wood burning tool to cut and seal all in one step 😉
I “borrowed” dad’s wood burning tool recently, so I’m going to try this!
Her hair is amazing! I wish my girls had my red hair!
Love the clips, so going to make some soon:)
I know, I wish I had her hair too! I had strawberry blonde hair when I was little but the curls came from ethan! 🙂
Dear Jacie and Kim,I am your italian follower, from Rome.
Thanks to your post, I have made some hair barretters.
I wrote on my post your web site details and direct link to this post so that italian readers can follow you as well.
Thanks for the attention.
Greetings.
Martha