
Today we’re featuring a guest contribution by Jeff Williams, one of our regular readers. If you’d ever like to submit an article for review, shoot me an email!
Over the last couple of years my wife and I took on a huge exterior transformation to turn our ugly house into a lovely home. You can see the 2 years compressed down into 20 minutes on DIY Network’s show Sweat Equity.
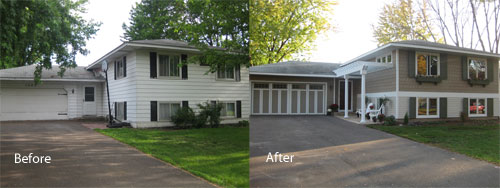
We added insulation, windows, and siding. That made for a lot of materials on site and most of it was shipped on pallets with one of them being a 4×10 foot monster. Instead of just tossing it on a bonfire I decided to make it into a planter box.
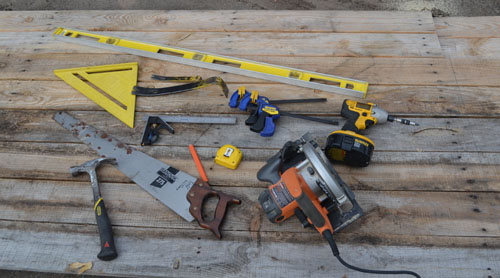
Tools and Supplies
- Pencil
- Tape measure
- Combo square
- Speed square (used as short saw guide)
- Level (long saw guide)
- Quick clamps
- Pry bar
- Circular saw
- Hand saw
- Drill/driver
- Hammer and nails or framing nailer
- Pocket hole jig and 2 1/2″ screws
Step 1: Decide how to cut up the pallet
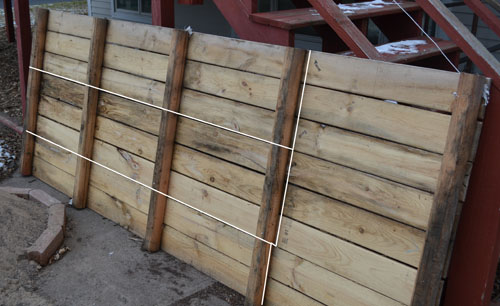
My goal was to maximize the planter. The white lines on the photo below is how I decided to cut it up. The 3 plank sections are the sides, and the 2 plank piece is the bottom. The remaining cutoffs will be used to close in the ends. One thing to note, the bottom is cut 1-1/2″ shorter than the sides to allow for the ends to overlap the bottom.
Step 2: Cut up the pallet
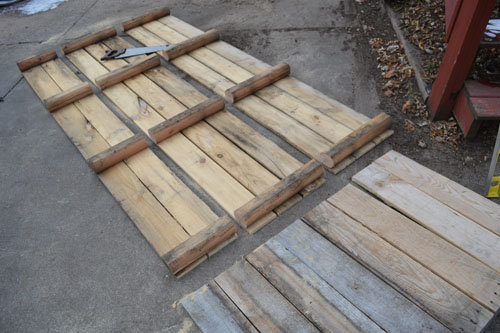
I used both my circular saw and hand saw to cut the pallet up into the major pieces. The circular isn’t able to cut the full thickness of the pallet so I finished up the cuts with the handsaw. I could have cut halfway through the beams and then flipped it over, but it was almost as fast to use the hand saw. Wear your safety glasses during this step, and use a carbide tipped blade in your saw. There may be a nail or two that has gone in crooked. Your saw will cut through it but it will spark. Go slow and be careful. You can pull visible nails that may be in your way.
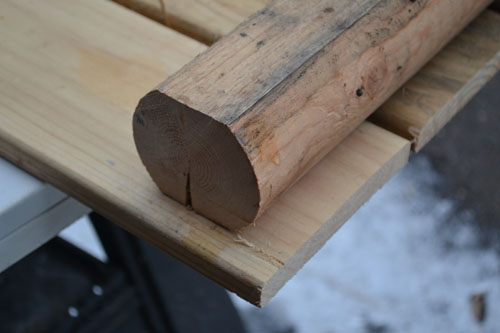
Step 3: Mark and Cut off 3/4″ from side beams
I wanted the bottom of the pallet to be mostly hidden from view. By cutting off 3/4″ off the beams on the side pieces the sides would overlap the bottom.
Step 4: Join sides to bottom with pocket holes
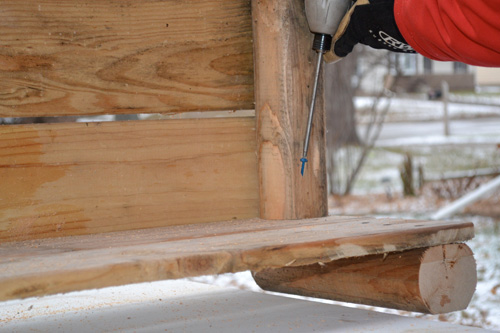
The more I’ve gotten into woodworking the more often I find myself using pocket holes. They were the ideal method for this project given the size of the beams. I had epoxy coated screws leftover from building the pergola, and they are great for exterior uses.
Step 5: Cut and attach the end planks
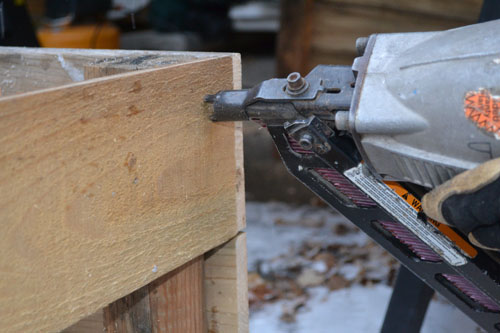
The prybar is used in this step to first remove the plank cutoffs from the last piece of beam. Spiral shank nails are used in pallet construction and can be tough to remove. Take your time or risk splitting the planks. Then stack the planks and gang cut them on the miter saw (or one at a time with the circular saw). Finally I powered up the pancake compressor and secured the sides with #8s in the framing nailer.
Step 6: Plant (or if it happens to be winter Stand back and admire your handy work)
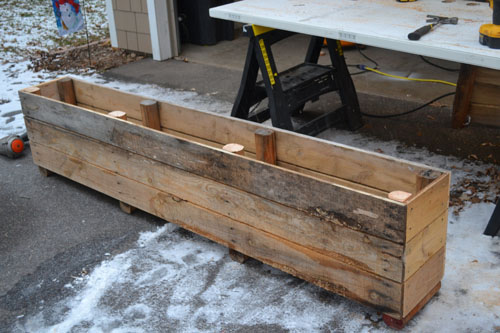
I built this thing in the middle of winter. It was 10° out! I didn’t admire it for long. I dragged it to its future spot and flipped it over to keep out the snow. Before planting I’m going to seal the exterior with a spar polyurethane and then line the inside with a rubber membrane (a cut off of EPDM roofing would work well). One thing to note, this planter is pretty big. If I filled it completely with dirt I wouldn’t be able to move it. The plan is to put either packing peanuts or sections of drain tile in the bottom before filling with dirt.


Jeff your house looks great! And I like the rustic look of the planter
The house really looks great. Are you concerned about the long sides of the planter bowing out once you get it filled with dirt?
I wasn’t but I’ll probably add some perforated steel strapping below the top of the dirt. Wet dirt can exert quite a bit of hydraulic pressure.
Put a wagon-style steering and big lawn and garden wheels on it, and you could move it anywhere, full or empty.
Good idea. Beats having to haul in the skid loader every time the wifey wants it somewhere else.
nice job on the house and the planter. Way to recycle/repurpose.
Nice work on the house.
Empty water bottles make a great filler for larger pots and planters like that. They take up a decent amount of room and weigh next to nothing.
Good idea and it fits in well with the project plan of spending $0.
It could also serve as a rustic coffin! Haha
And won’t you want some holes in the bottom to drain excess liquid out?
The planks have gaps in them already. If I line it with EPDM then I would need some holes through that though.
I love them! Those planters are adorable! I want to make one now!
Two of those, fastened together with a 4 X 8 on top, some skids underneath could make an interesting toboggan. Then you could use them in the winter! Seriously, nice job with that design.
I love the look- new project for the Huney Do List!
Wow Jeff, what an amazing transformation on the exterior of your home. It’s like the frog that turned into a Prince! Too bad it wasn’t as easy, you know just a kiss from a Princess, but again WOW!
They turned out fantastic! The front of your home looks gorgeous with the planters. Megan
I’m always wary of using pallets. One of the companies I used to work for had to fumigate all of their pallets. For this purpose, It would probably be great. I’ve seen some plans using pallets for furniture pieces. That would worry me unless I knew where the pallet came from.
JMPlye, Hmm…some pallets are fumigated? I was thinking of using Jeff’s idea to make an herb garden, but maybe pallets shouldn’t be used for edible plants? What kind of companies fumigate pallets? Do you think pallets that carried things like flagstone would be fumigated? Maybe I should ditch the pallet idea for edible plants & stick to using only for non-edible plants.
Jeff, love your planter. I read JMPyle’s comment about fumigated pallets & that concerned me as I was planning to use the planter for edible plants. I was also wondering about lining it with EPDM. I looked up the content of EPDM & it looks a little scary for edible plants. Do you know if the EPDM chemicals would leach into the soil & contaminate edible plants (don’t want to go toxic!), or should EPDM only be used for non-edible plants. Any idea on a safe liner for edible plants? Heavy shadecloth maybe? Love your house…I am still remodeling my home hit by Hurricane Katrina 7 years ago.
EPDM comes in a fish/plant safe formulation. It’s sold as pond liner. That would work for you if you’re concerned. Good luck with your remodel!
Look for pallets with HT stamped on them. Those are Heat Treated and should be safe.
Thanks JustME…I’ll look for the HT!
You’re welcome. I just recent learned that myself.
Cool way to use old pallets! Also, I loved what you did with your house. Gave me a couple of ideas for my own home.
This is an amazing idea! I’d never thought about how to recycle old pallets into this cool planter. I really loved your house transformation.
Thanks for giving me this great idea.
What a creative way to repurpose old pallets! Also, I really liked how you decorated your home. It gave me a few ideas for my own house.