
We are back from Jamaica and had an amazing time!! We had more sun and beach time than we expected with Hurricane Ernesto scheduled to hit Jamaica while we were there. I came home with an amazing tan, too! Later this week, I’ll share some pix and stories, so stay tuned.
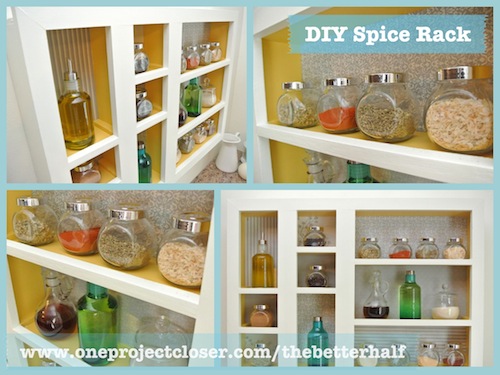
Well, Ethan has finally broken down and given me what I always wanted…a nice rack. A nice SPICE rack, that is! LOL!
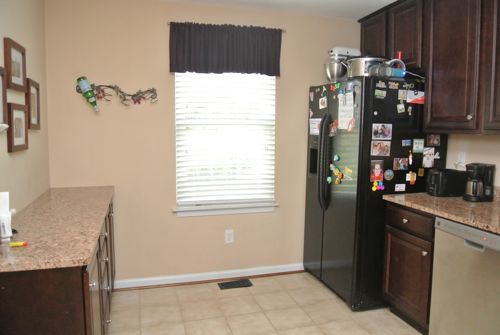
A few weeks ago, I posted about my ongoing kitchen renovations. One of our faithful readers, JustMe, commented: Have you thought about building a shallow “hutch” of sorts for over the base cabinets? Because of the length of the area you could incorporate a bulletin/chalk board as a family message center with shelves on either side to store your spices. They are better off not stored so close to the heat of the stove/oven.
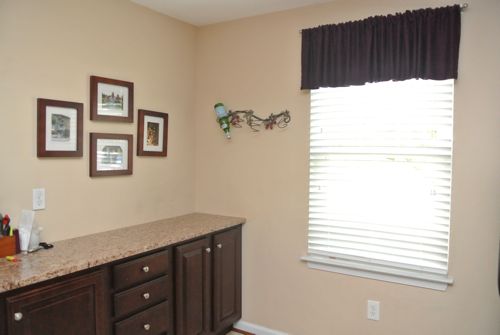
Our Before Kitchen
Brilliant! Why didn’t I think of that a long time ago? Insert head slap.
So I searched around on Pinterest for spice rack concepts that I liked. I saw some wall built-ins that were super pretty and also one made of pallets that had different size and shaped compartments. I liked a combination of those two concepts – more formal like built-ins, but varies size and shaped compartments.
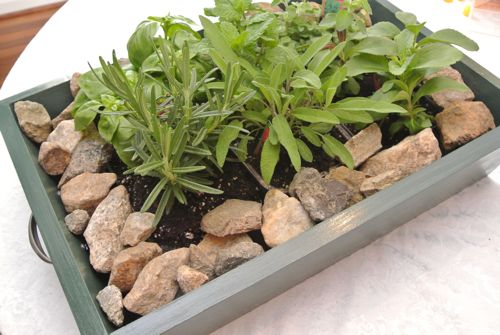
Ethan has been delving more into wood working lately and was willing to try his hand at creating my vision. Sometimes this isn’t always the best thing for our marriage. I have a vision in my mind that I don’t communicate very well. He works really hard, thinking he has done what I asked. Then I am bummed because it doesn’t match my vague feeling (shock). How Ethan puts up with me is a mystery. I think God gave him an extra dose of patience and grace just for me! This last happened to my wanna-be casserole dish turned herb garden/planter. It did turn out pretty wonderful though.
Despite my communication problems, Ethan was willing to undertake the project. For a tutorial on how to construct your own custom spice rack, check out Ethan’s post over on OPC, the main site.
Once Ethan had constructed the spice rack, he handed it over to me, without the back attached. Even if you don’t want to make your own spice rack, you can follow these same steps for any store bought rack, shelf, or book case!
Step 1: Trace
Place the rack onto the wood backing, and trace the interior compartments with a pencil. Be sure the backing is perfectly aligned with the edges of the rack or your backing will show through later.

Step 2: Pick Your Paper
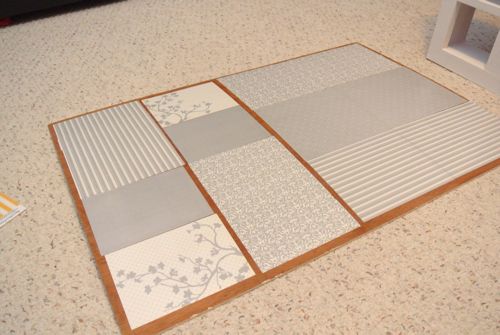
This was probably the most time consuming step for me. I bought bunches of different, pretty scrapbook papers at Michael’s in shades of yellow, cream, and gray. I laid them out on the plywood to see what different combinations would look like and played around for a good 45 minutes. I was also a little distracted watching the Olympics, so it really doesn’t have to take this long. haha
If you think you have a placement you like, place the rack on top of the backing, paper in place but not glued. See what you think? Does it look too busy? Are patterns too similar right next to each other? Does it need more color? Less color?
I ended up not using any yellow paper because it just looked too busy and the difference in colors seemed to distract from the rack.
So I started over again with just grays until I was happy with it.
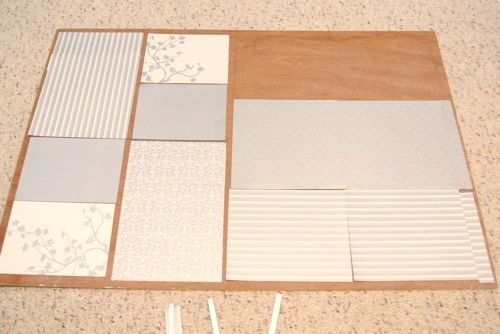
Step 3: Cut
Once you know where you want the paper, measure each opening and cut the paper to that EXACT size. If you have extra room around the compartment edge, you can cut your paper a little larger. I used a Creative Memories personal trimmer to make sure my cuts were straight.
If your paper is not wide or tall enough to fill the space, no worries. Just cut more paper of the same design to fill the remaining space.
Step 4: Mod Podge
I know you’re saying to your self that I may have a Mod Podge problem. You are probably right and I should seek out a support group. But for now my addiction continues.
If you have not made your own rack, you can remove the backing from any bookshelf, rack, or shelf and complete this same process. It would also be easy to add ply wood to a rack or shelf that does not come with a backing.
For this part of the project, work with one compartment at a time. Using my home-made Mod Podge, apply a thick coat using a foam brush to one compartment.
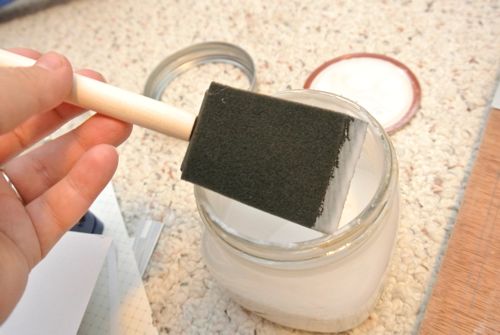
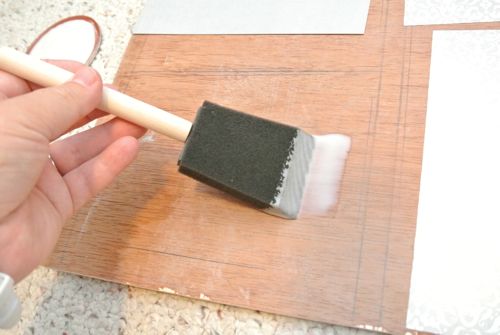
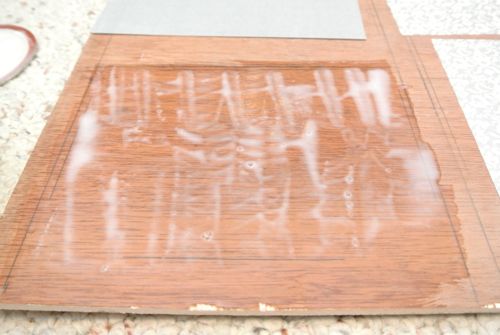
Place the scrap book paper for that compartment onto the board. Move it around a little to work out any air bubbles, but be sure the paper matches up and/or covers the compartment outlines.
Once the paper is in place. Apply a thin, even coat of ModPodge on top. Pay special attention to the edges and corners. As you apply the ModPodge, look for air bubbles, using your hands to press any bubbles out to the edges. Don’t ModPodge cleans up quick. 🙂
Repeat this process for all the compartments.
Once dry apply a second, thin coat of ModPodge.
Step 5: Paint
If you made your own spice rack, like us, it obviously needs a good coat or two of paint. I didn’t have a lot of the wall color paint left over from painting the kitchen, so I opted to prime it first rather than too many coats of the paint/primer I used on the walls.
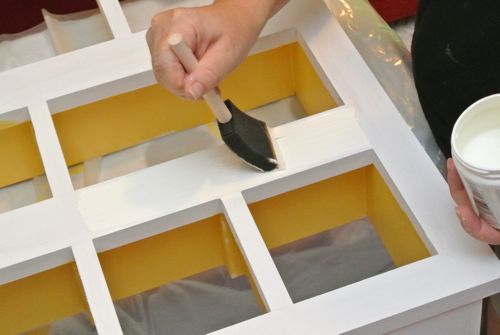
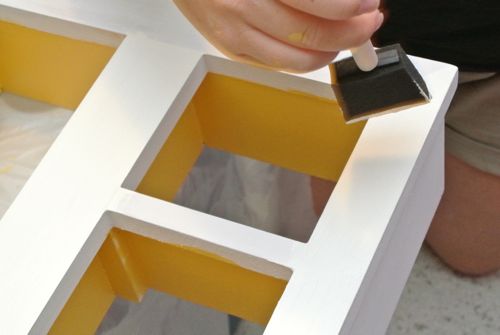
I applied two coats of primer (although one probably would have been enough). Then I painted the face and sides of the rack cream, the same color as the walls. After a lot of deliberation and hesitation, I painted the inside of the spice rack compartments yellow. I call it my “peek-a-boo yellow” because when you look at the rack from the front, you only see the cream color, but as you move to the side “Peek-a-boo,” or “Peek-a-doo” if you’re Izzie (I obviously spend too much time with my girls, sorry!).
Step 6: Fasten Backing
Once the ModPodge and paint are all dry, you can fasten the backing to the rack. Ethan screwed in the four corners first. Be very careful that the backing is lined up exactly how it was when you traced your compartments!
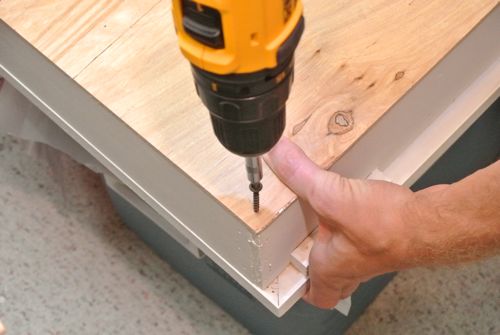
Then, we used finishing nails around the edges and some in the center to make sure the backing was flush to the rack.
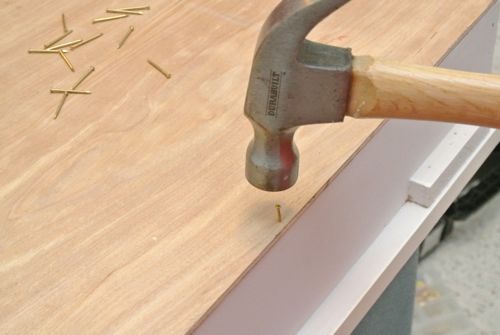
Step 7: Hang That Rack!
We wanted to make sure that the rack wasn’t going anywhere since it will be holding all my spices and a lot of glass. So, Ethan measured and inserted dry wall anchors into the wall. He then screwed through the backing, in the four corners of the rack, into the dry wall anchors. It would have been a little easier if the studs had lined up with where we wanted to hang it, but oh well. The screws into the backing are barely noticeable, so no biggie!
Step 8: Fill It and Show It Off
The other day, Kim and I took a Better Half field trip to Ikea where I bought a bunch of glass jars and containers. I filled them up and placed them on the rack. I love you, Ikea (and your free child care).
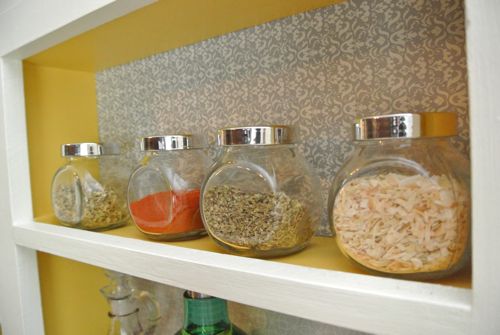
I am in love with the piece – it sorts steals the show now. My cousin and a friend came over the other night and one asked where I bought it! Yes, its homemade but it looks professional!!! We have victory! (maybe I have been watching too much Olympics)
Now that its hung, I am debating painting the exterior sides yellow. What do you think?!?!?
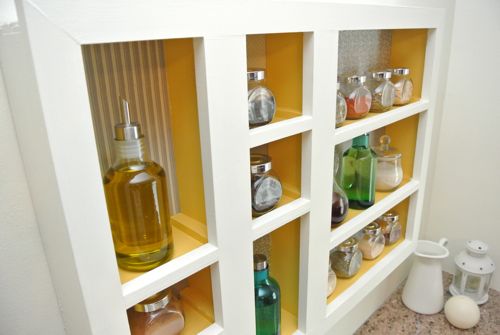
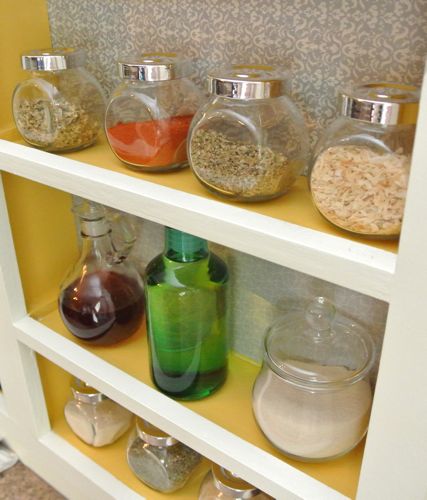
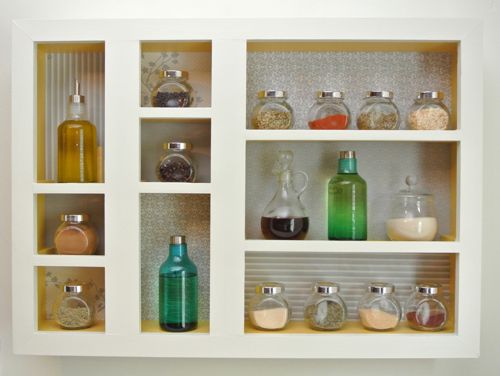
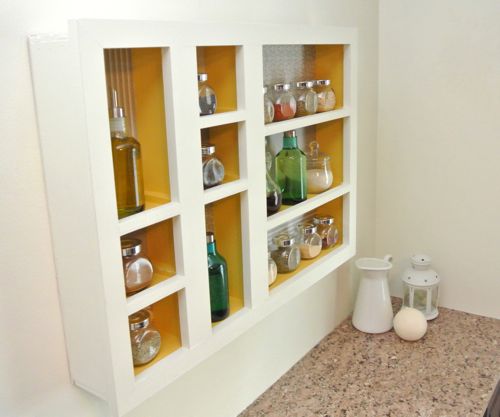
Is my peek-a-boo yellow too over the top? Should I paint the exterior sides yellow?
As Always, thanks for reading!

Don’t forget to check us out on Facebook and Pinterest!
I’ve linked up this project at: DIY Show Off, Craft-O-Maniac, Positively Splendid, House of Hepworths, Doodles&Stitches, At The Picket Fence, The Dedicated House


ok, so now I have to add to my list of priorities in a man: “woodworker.” Seriously, who can live without one? :O) I love it Jocie. Probably my favorite project thus far!!! Keep it just as is… no yellow on the outside. Keeping the color subtle is really nice and keeps the clean white kitchen look.
Thanks, Nomi! my fav too!
Very nice concept: built-in spice rack of varing size allows you to have storage for bulk spices as well as smaller shelves for less common ones.
bonus points for acknowledging the disconnect between your vision and the communication of it and your husband’s interpretation of that vision/communication.
Thanks, Icarus. Ethan really did a nice job!
Oh my, I would have expected the rack joke from the guys at OPC, not the ladies at The Better Half. It looks great. You guys make a great team.
We Better Half girls like to keep it spicy. hahaha! 🙂
I love the color combo, the yellow really adds a pop!
Thanks, Jen!
Oh my gosh I remember you liking my idea, but to see you took it and ran with it literally brought tears to my eyes. I am SO flattered Jocie! You and Ethan did an awesome job on it.
Yay, I’m so glad you saw the post. I almost emailed you ahead of time to let you know it was running, but ran out of time. 🙂
I’m glad I saw it too. We’ve been pretty busy around the house lately so I’ve been spending less time online. This morning I thought it was about time to check in and see what I’ve been missing here. I’m so glad I did!
I forgot to mention that I love the way you used paper to back the different sections. I did that years ago in a little miniature display “house” shelf using fabric.
I like the Peek-a-boo effect. If you decide you don’t want the exterior to match the walls you could paint it a light grey to match the paper backing. It would still be nuetral on the outside with that pop of color on the inside, but I don’t know if the grey on the outside works with the rest of your kitchen plans.
I thought about gray too…but interesting idea. 🙂
It looks great! I’m going to save these plans for making a liquor/glassware cabinet in the future. A few potential upgrades I might add:
1) make the backing (and possibly the shelves) out of mirrors
2) doors on the front…maybe glass ones? Not sure on that because I wouldn’t want too much light exposure for the liquor
3) lighting on the inside!
Your project definitely got me excited about my future plans/project though. Great job!
Ethan and I debated glass doors too, but figured the rack would be out of the way enough (out of reach of little fingers). i love your ideas though.
Never ever – the backing is PERFECT made exactly in this way, it´s the best part of the rack!
And the rack itself – wow, I really love it! The whole concept and ALL THE DETAILS! It´s really great job!
Love the tag team approach. My wifey and I also tag team on wood projects. I build and she decorates. Patience and grace is always a part of our projects too.
fortunately ethan has plenty of both patience and grace. 🙂
I like the yellow on the inside, but agree with other readers… leave the outside like it is. Very well done to both of you.
Thanks, Poiboybf. i think you share the popular opinion. 🙂
looks awesome!! I like the idea of painting the sides gray… but you are the fashionable one of the fam… either way it looks awesome 🙂
thanks, ern!
Thats a nice rack I think its great the way it is. This looks very pinterest like too.
Thanks, MissFixIt! All these compliments to “my rack” are going right to my head. heehee
Wow, nice rack! I like the look of the yellow on the sides. It adds a touch of color without being too dominating.
What kind of seal do those Ikea spice jars have? Is it a screw top, is there a rubber seal, or is it open to air infiltration? I might be interested in getting a few myself but need something that will keep out air fairly well. Thanks.
Its a screw on, rubber seal top. It seals pretty well, but probably wouldn’t take much of a beating. Mine are tucked up out of reach of kids, but I wouldn’t give them to the kids to play with. 🙂
Another great project! I’ll be featuring it Thursday!
Yay! Thanks, Melanie. You made my week!
That is so cool! I love how it turned out. Thanks for linking it up at Doodles & Stitches 🙂
Nice Job! Dream on about that title, though!
I want one! 🙂 I hate my spice cabinet. It is such a mess and so hard to see/ find everything I need. One day…..Steve’s “honey-do” list is increasing! haha
Love your spice rack! Awesome job!
Absolutely love this.