
Welcome to OPC’s The Better Half. My name is Jocie, and I love to craft and DIY my home into something wonderful. I hope you enjoy this tutorial on how to make fabric flowers. It’s been a popular article with over 220K pins and growing! If you enjoy this article, check out some other recent crafts and consider subscribing to The Better Half (email or RSS). Also, feel free to share this tutorial on Facebook and give it a +1. All the buttons float along the left side of your screen. Thanks!
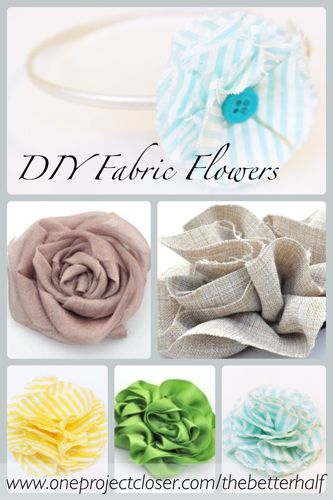
Making your own fabric flowers is great because they are very popular, you can use them for lots of different things, and it is way cheaper to make them than to buy them. For example, I found some fabric flower headbands at Target recently for approx. $8, but was able to make my own headbands for about a $1. I used fabric flowers on our DIY lampshade and I’ve also made barrettes, pillows, and picture frames using fabric flowers. Some may say I’m obsessed. lol. It’s also great for up-cycling old fabrics like an old t-shirt, ripped tights and ribbon.
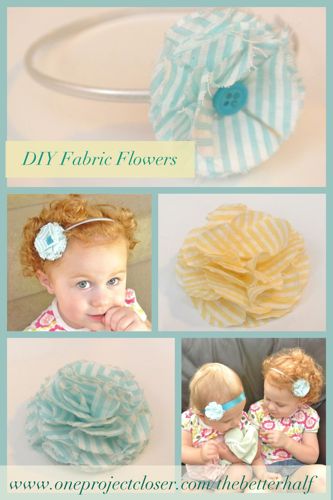
Click here to skip ahead to specific tutorials:
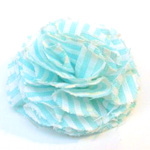
How to Make A French Pouf (Flower)
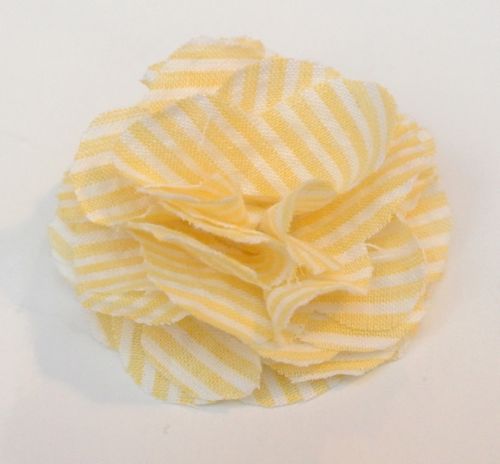
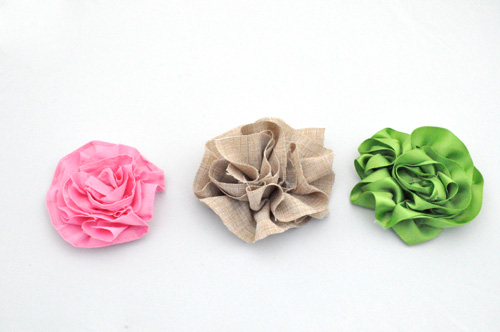
Here’s the same style of flower with a different fabric, an old bandanna.
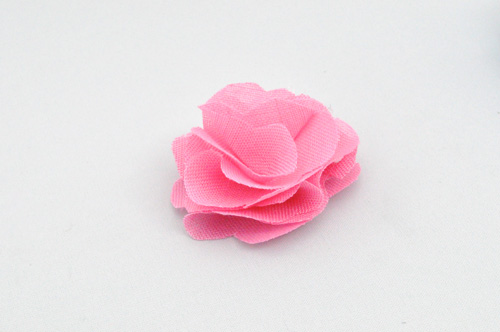
And another made of felt.
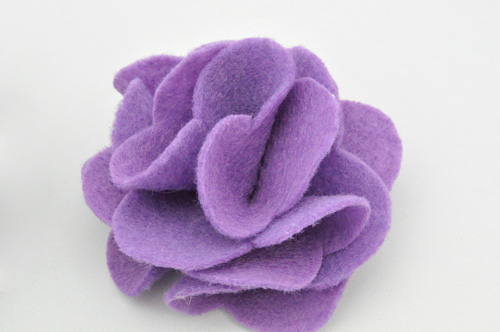
This is a very simple and pretty flower called a French Pouf. What I really love about this flower is that you can dramatically change the look of the pouf with different fabrics. All three examples above look very different given their color and fabric.
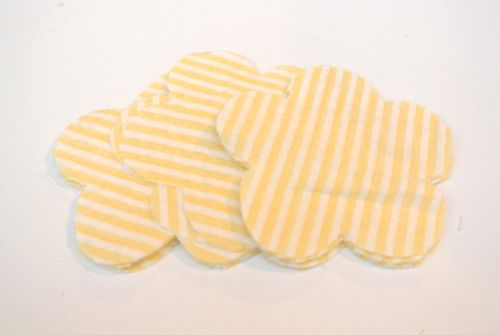
Start by cutting out five to ten flowers (depending on the thickness of the fabric). You want them semi-uniform so we’ve included some (downloadable) templates that you can print out and trace to make it easier.
Large | Medium | Small | X-Small
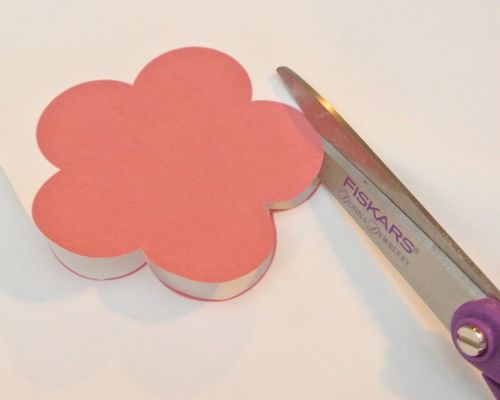
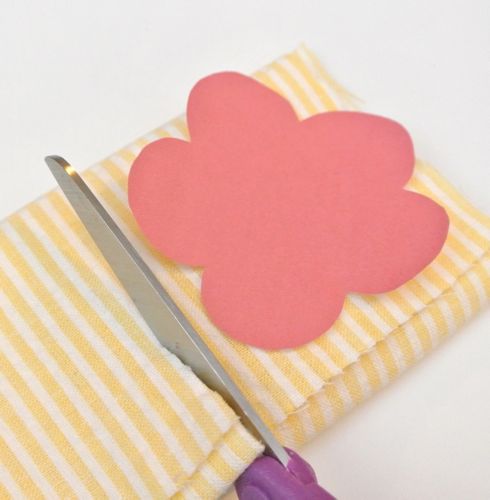
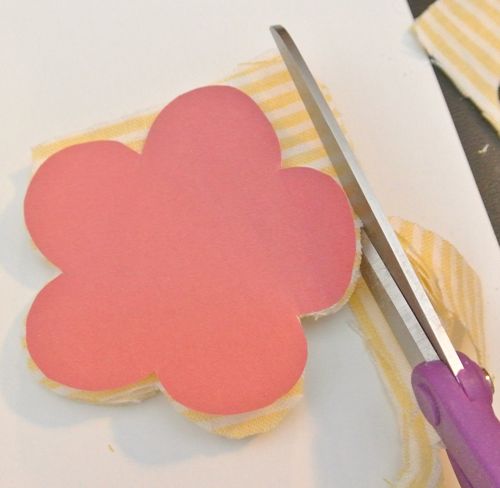
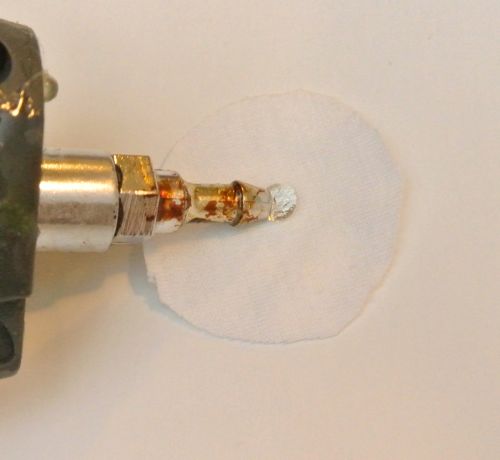
Put a dot of hot glue in the center of a small circular fabric scrap.
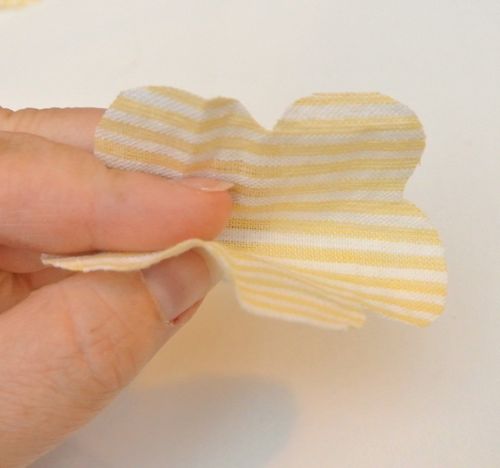
Fold each flower cutout in half and place two folded flowers on opposing sides of each other. Don’t burn yourself on the hot glue (cause that hurts).
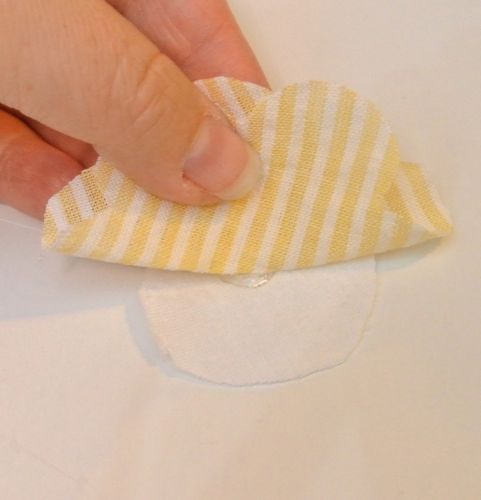
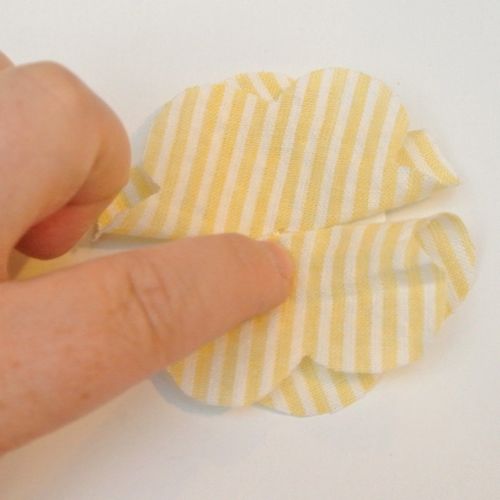
Rotating the flower base one-quarter and repeat the same process as above, placing a dot of glue in the center and then layering two more halfs on opposing sides.
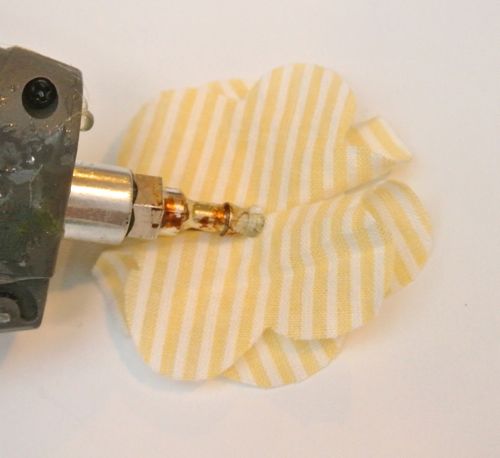

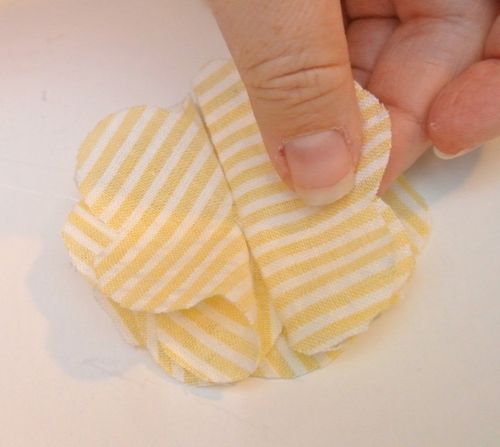
Depending on how dense you want your french pouf, continue layering until you are happy with it! I layered about 8 folded flower cutouts.
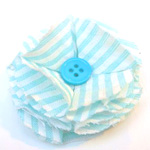
You can stop here and glue a button or gem to the center for a more casual type of flower. I made one for a headband for Izzie and it turned out really cute!
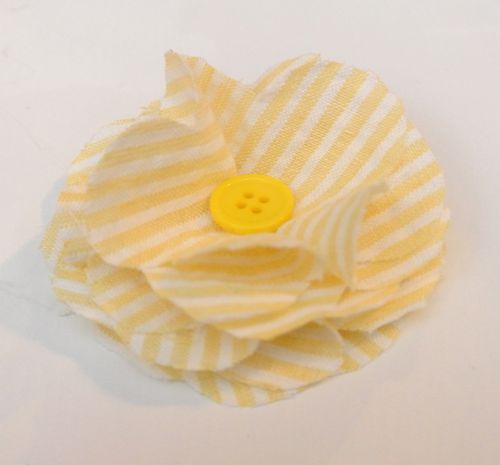
Then, for the top of the flower, fold a flower cutout in half once and then push the two outer folds inward. Do this for two flower cutouts.
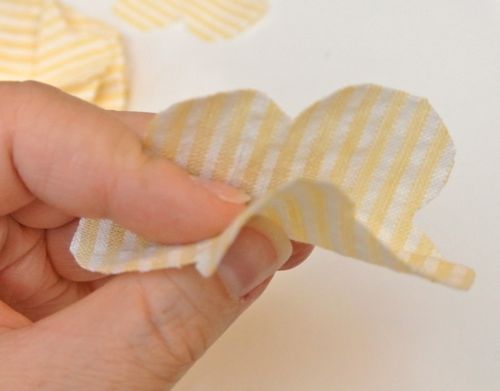
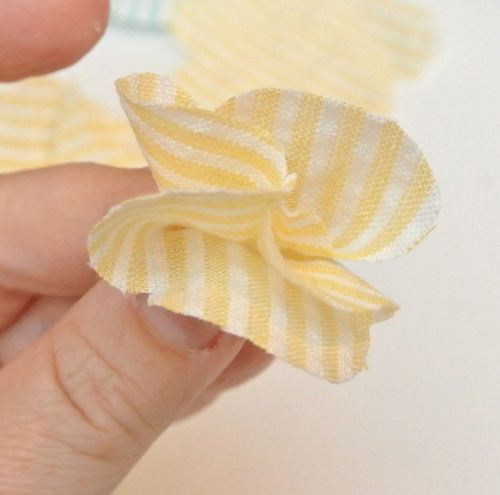
Place a dot of glue in the center of the pouf and gently press the two folded flowers into the center, points down.
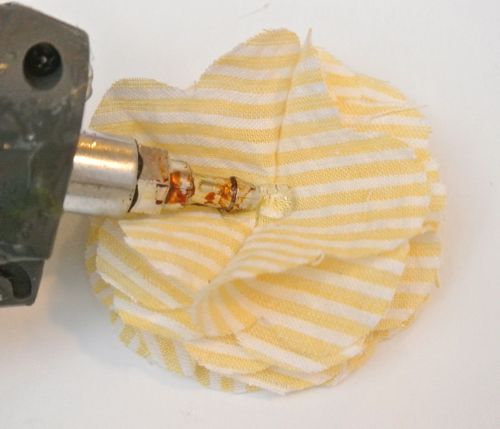
Viola!

Making A French Pouf (Circle)
In this picture, my precious girls are both wearing homemade French Poufs (circles). Lucy’s headband, on left, was made with an old onesie. Izzie’s barrette, on right, was made with an old t-shirt layered with tulle.
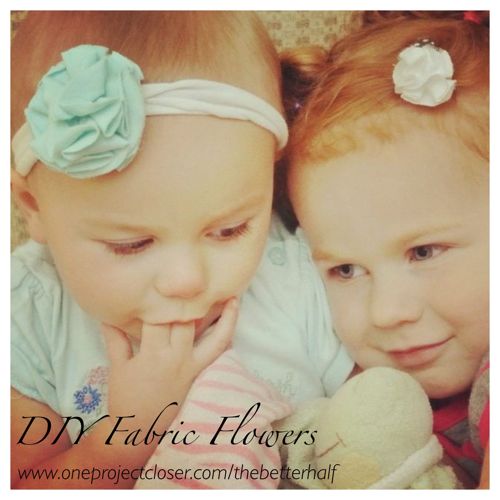
This flower was made using a lightweight cotton fabric that my friend, Ruth gave me because I loved it so much.
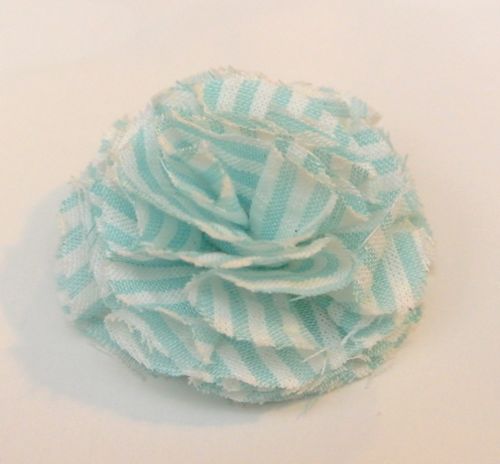
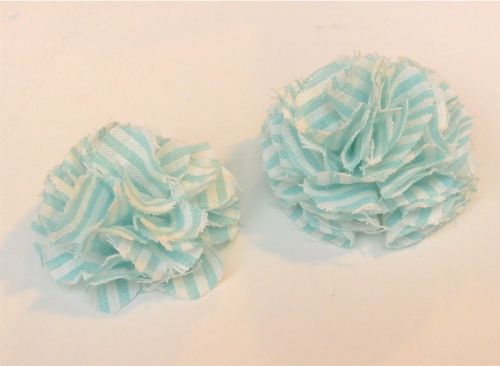
This is a variation of the French Pouf, but using circles rather than 5 point flowers. This is quicker to make because it takes less time to cut out circles than flowers but it also appears slightly more dense. Here is a side by side of both poufs, circle on right, flower on left.
Just like before, you can dramatically change the look of the pouf with different fabrics. This flower looks great using old shirts! Also, you can add layers of tulle with any fabric (or just use tulle by itself) for a dressy and more whimsical pouf.
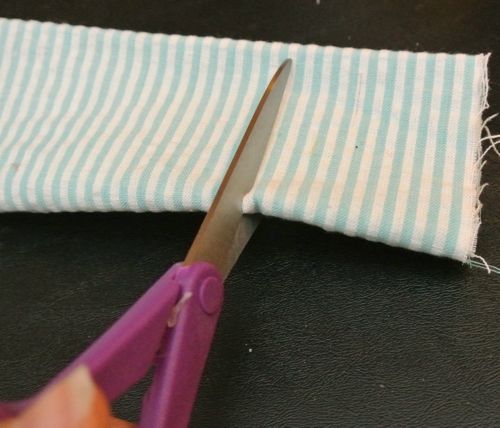
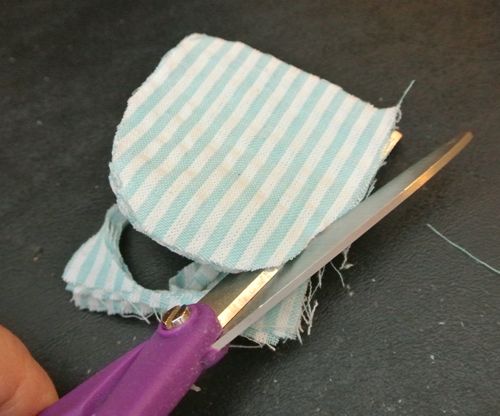
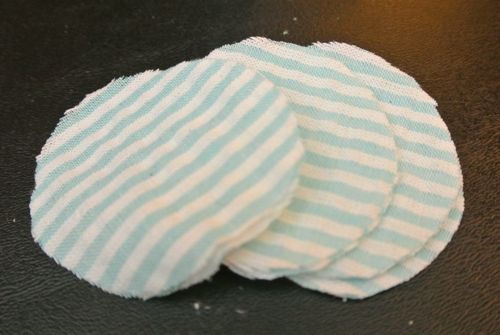
Start by cutting 8 -10 circles. The size can vary depending on how big you want your flower to be. The number will depend on the thickness of the fabric. If using a thinner fabric, like a bandana, or a larger flower, you will need more circles. They don’t need
to be exact either, once the flower is made, imperfections will be hidden.
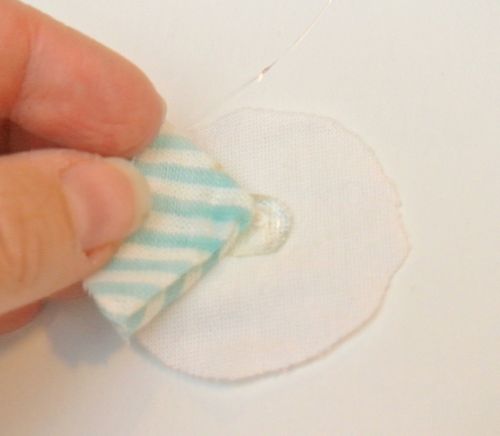
Put a dot of hot glue in the center of a small circular fabric scrap.

Fold a fabric circle in half and then fold in the two outside folded edges.
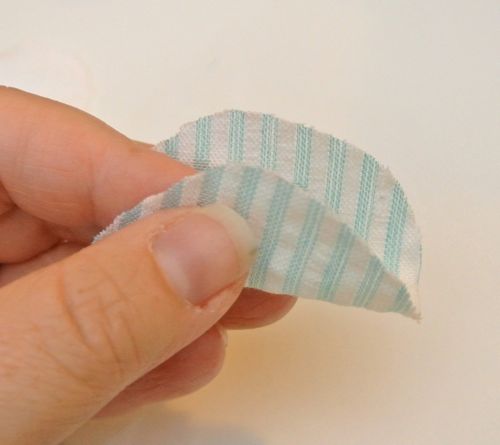
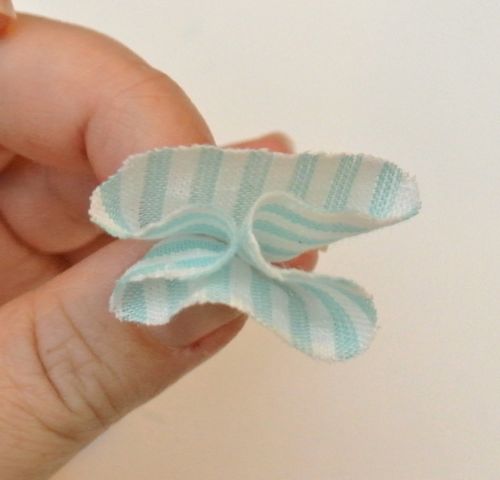
Do this with four circles and then place them flat, points facing in on the glue dot.
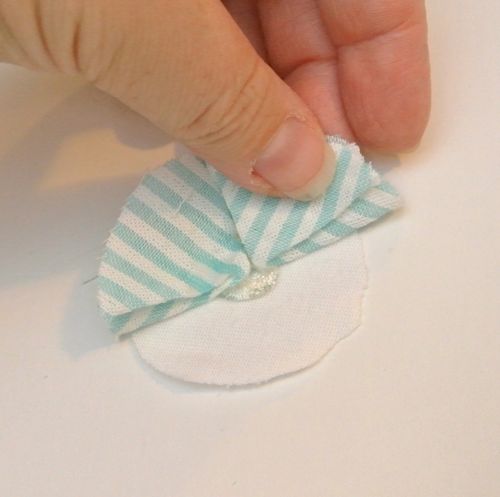
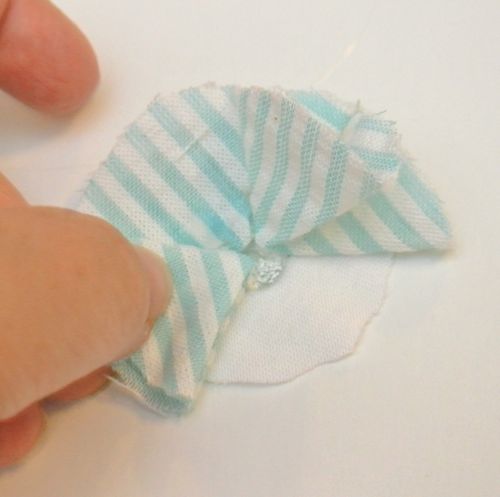
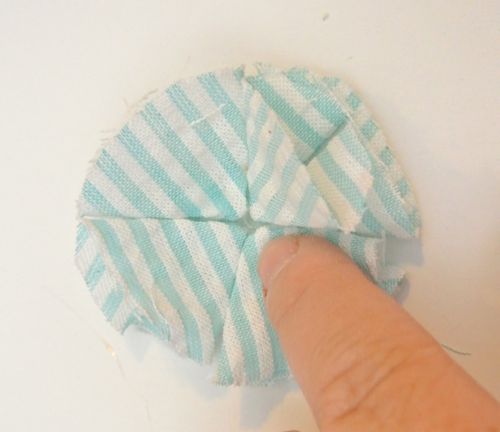
Rotating the flower base one-quarter and repeat the same process as above, placing a dot of glue in the center and then layering four more quarters.
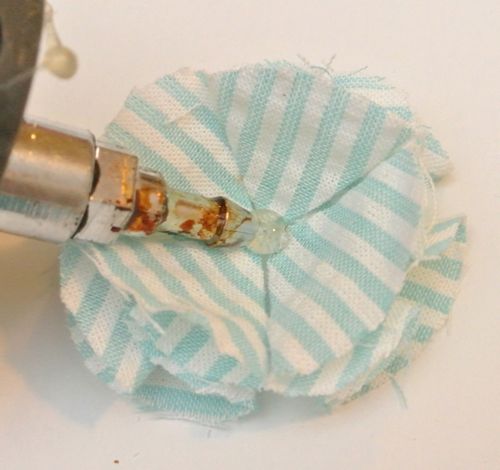
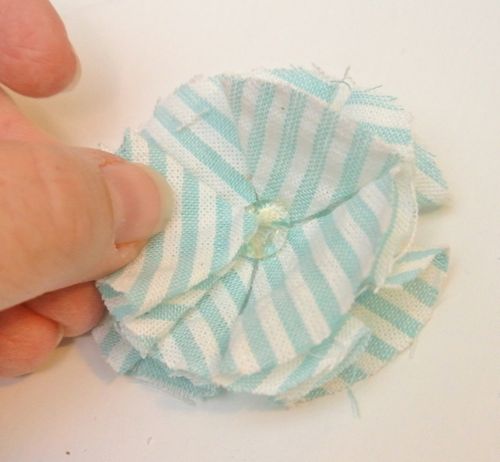
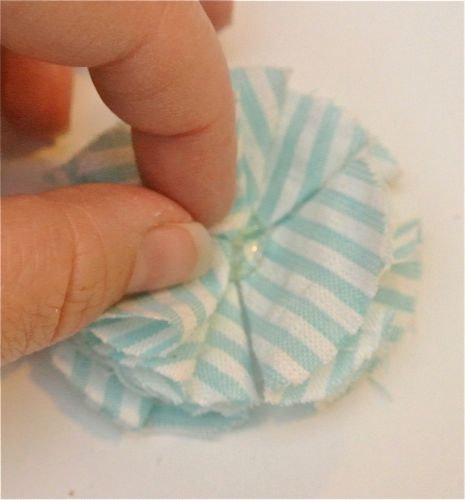
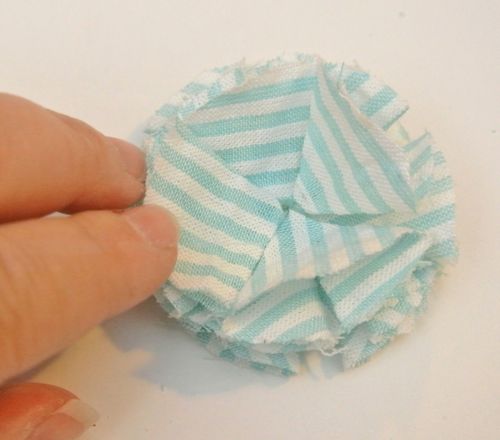
Depending on how dense you want your french pouf, continue layering until you are happy with it! I layered about 8 folded circle cutouts.
You can stop here and glue a button or gem to the center for a more casual type of flower. I made one for a headband for Izzie and it turned out really cute!
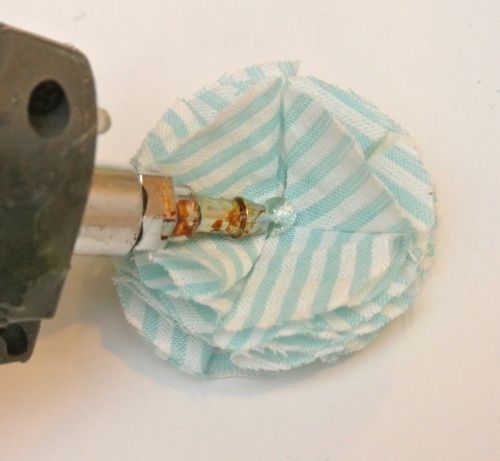
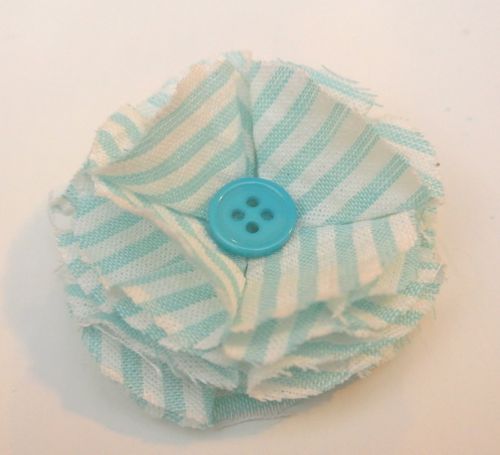
Then, for the top of the flower, fold a flower cutout in half once and then push the two outer folds inward. Do this for two more circle cutouts.
Place a dot of glue in the center of the pouf and gently press the two folded flowers into the center, points down.
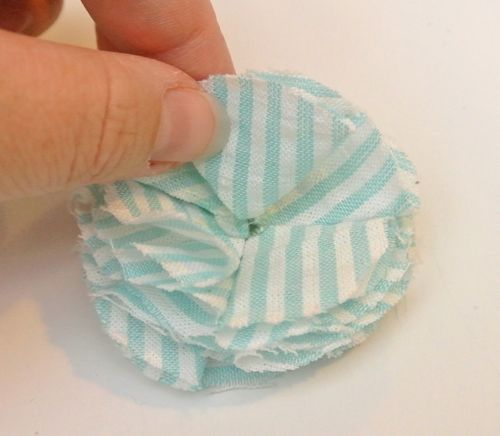

Making Rosette Flowers
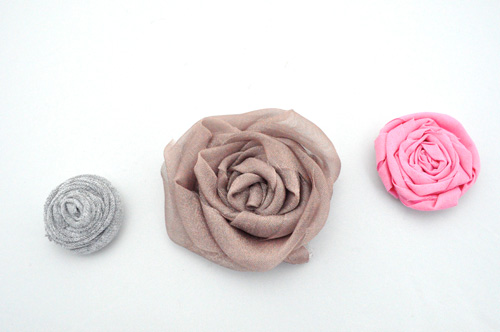
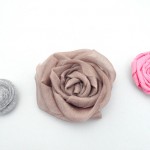
These rosettes are much flatter than the other flowers we’ve shown you. Rosettes are what I used on our lamp and look great with any fabric. Tights and t-shirts make great rosette accents on shirts, hats, and headbands.
Similar to the ruffle flower, start with a long strip of fabric and fold it in half lengthwise.
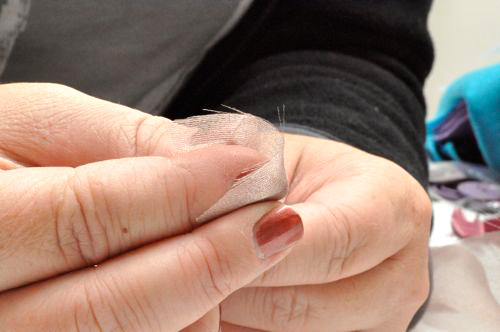
Start with one end and roll it in on itself.
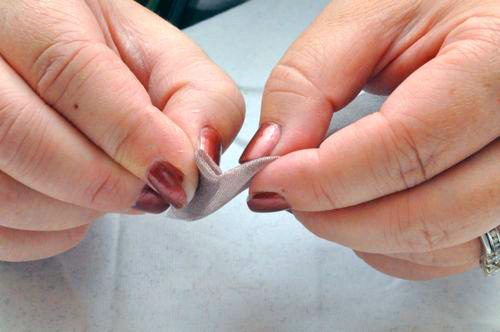
Keep wrapping the fabric around.
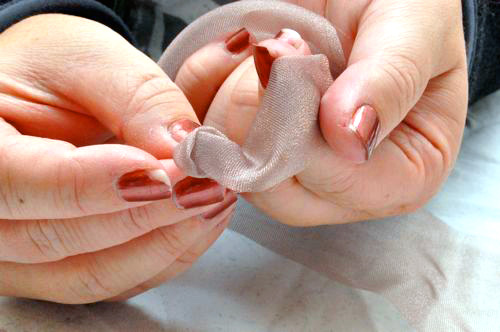
For a more texture in the flower, twist as you go.
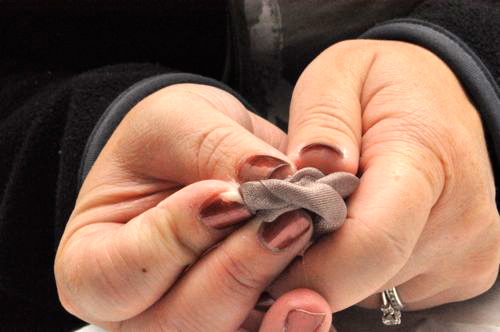
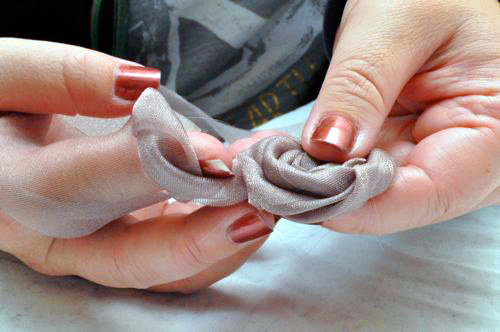
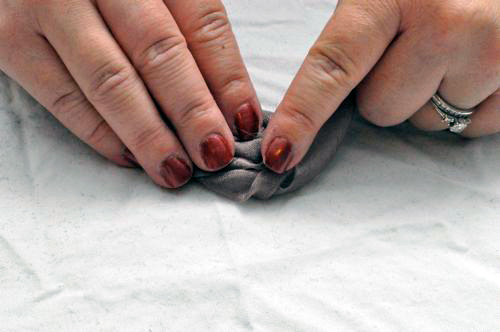
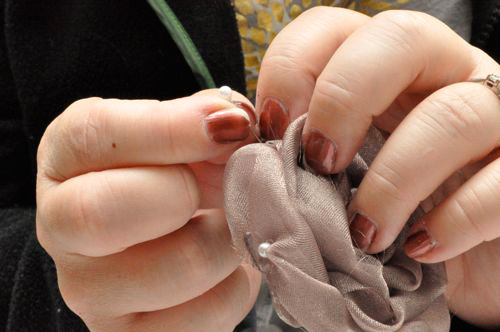
When you reach the end, insert a few pins to hold everything in place.
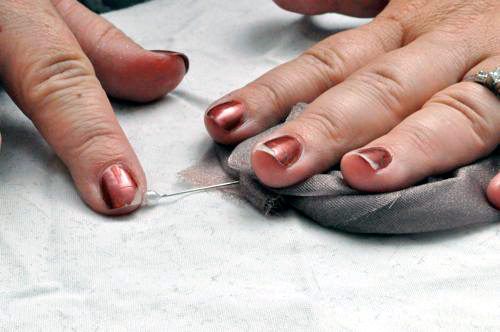
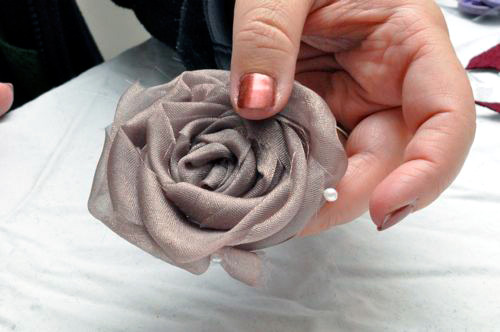
Hot glue the backside, and hot glue a piece of fabric for backing.
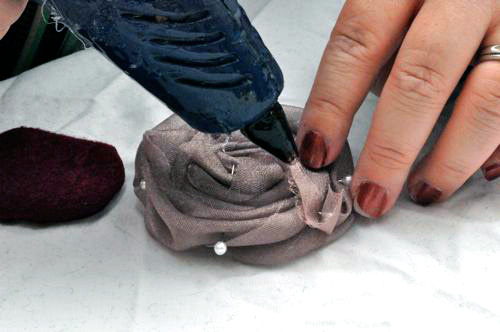
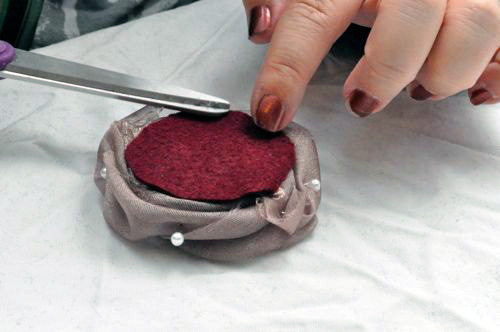
Remove all the pins, and you’re done!

DIY Ruffled Fabric Flower
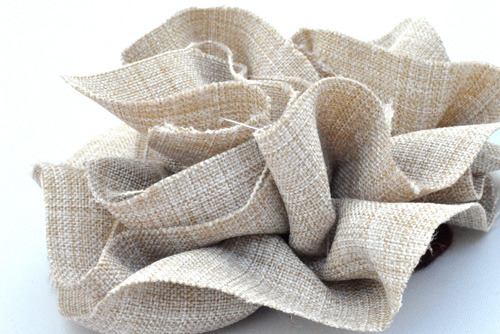
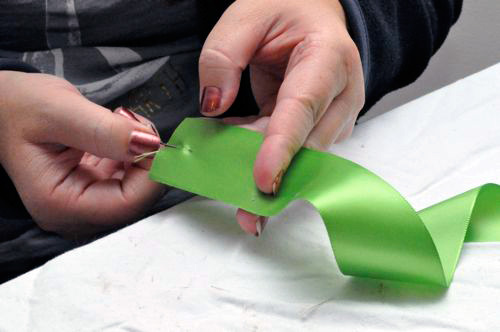
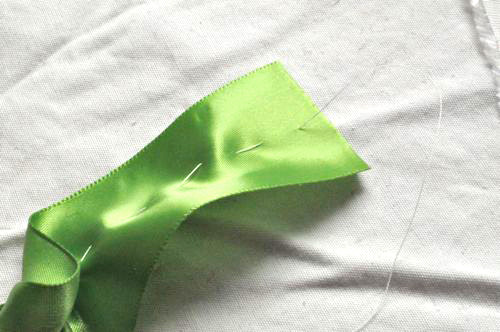
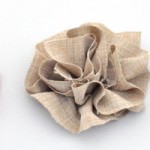
Start by cutting a strip of fabric. Longer strips will make for larger (diameter) flowers and wider strips will make for a taller flower. Thread a needle lengthwise through the middle of the strip, and tie off one end. This thread will allow you to bunch the fabric and create the ruffles. If using a sewing machine (much faster technique), use the longest stitch and do not back-stitch.
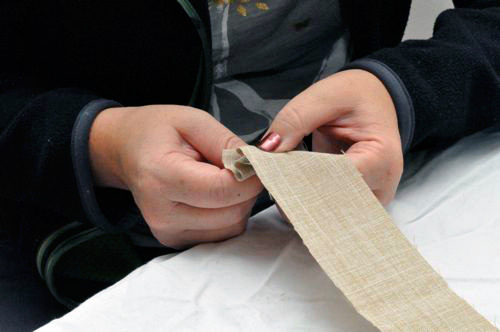
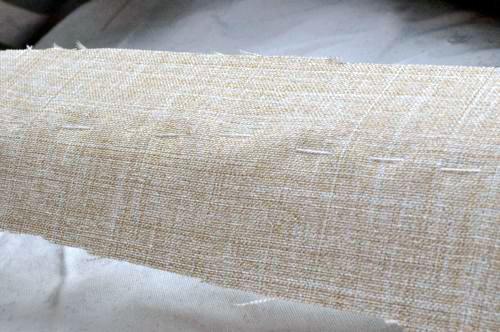
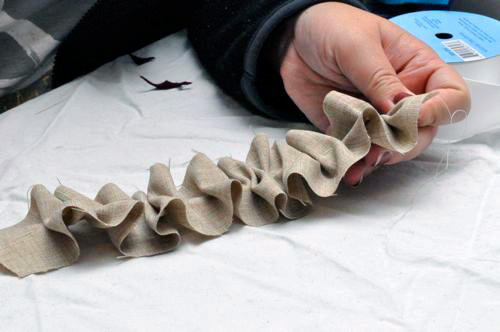
Take one end and fold the fabric in half lengthwise along the string.
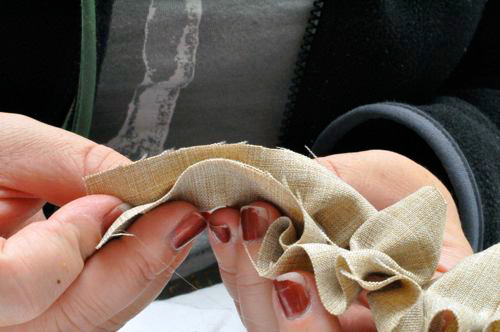
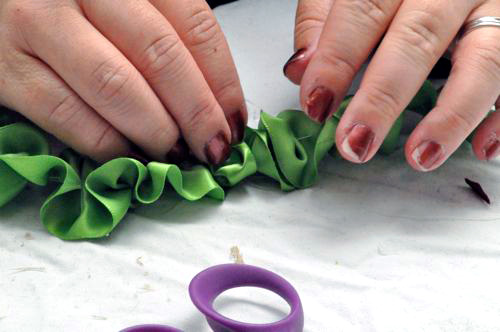
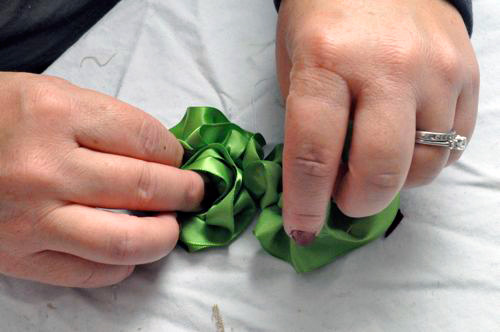
Begin wrapping the end around itself to create the center of your flower.
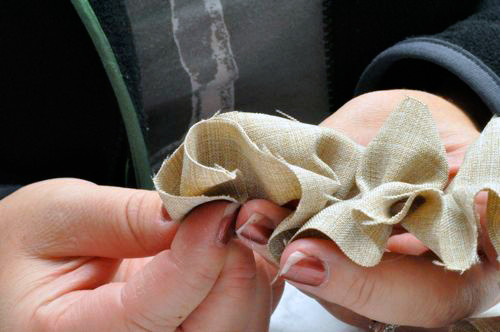
Continue winding the fabric around, and when you’re finished, insert pins to hold everything in place.
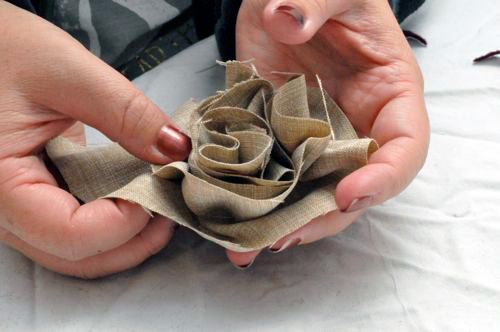
Flip the flower over and glue the underside with a hot glue gun.
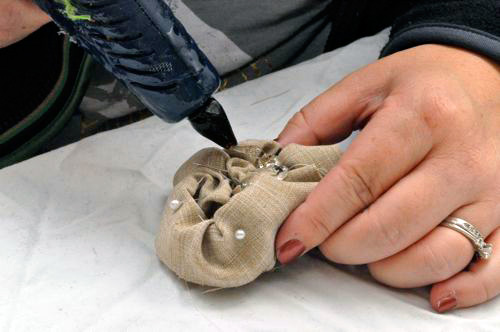
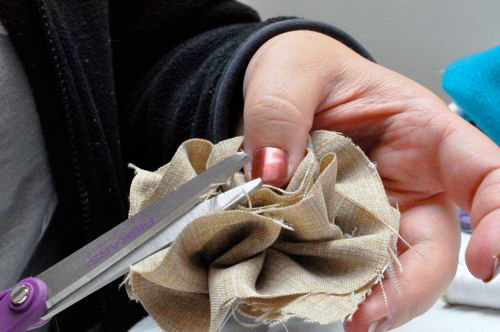
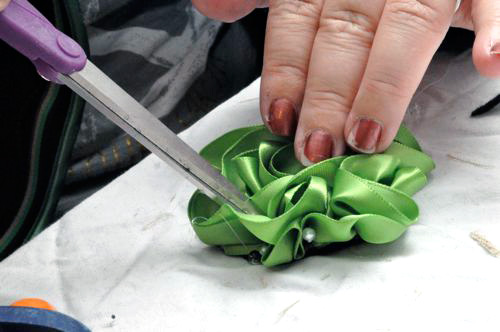
Remove the pins, ruffle the fabric and trim any fly-aways.
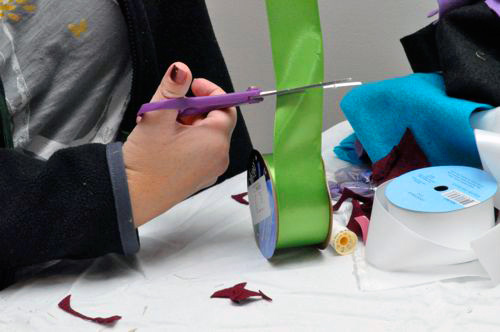
Here’s the same type of flower done with green ribbon.
Easy right?
We hope this little DIY fabric flower tutorial helps you out.
Any crafty people out there have tips to add? What is your favorite flower and fabric to use?
As Always, thanks for reading!

If you love DIY projects and a good deal, check out our awesome coupons for your local Home Depot and Lowes!



Thanks for the fun tips! I haven’t made these kind of flowers before, so I’ll have to give them a try now that we’re expecting a little girl.
I really like making these beaded satin flowers for barrettes and headbands.
http://jonesdesigncompany.com/create/5-days-of-favorite-projects-day-1/
Great tutorial. These would be cute as bows on presents at Christmas time.
I have lots of Christmas fabric just waiting for a project.
Those are cute I like the felt ones a lot.
Amazing….. thanks for these Tips , they are so easy to follow , i thought i ill never be able to make fabric flowers like those, but this article describes everything ,,, Thanks very much for the hard work . Thumps up
Thanks for the great tutorial on making fabric flowers. These may very well come in handy for our daughter’s upcoming wedding decorations.
Hmmm, I’m thinking these would make cute buttons/pins. You may have to me know if it’s a fashion faux pas :O)
I love this current trend. Its a fun way to dress up a headband or even an out-dated sweater. I’ve seen the tutorials on line before, but love that you did all 3 in one post!
would you please send me the flower template? Thanks
Yay, I am going to try this tonight. I have boxes of old fabric. :0D
Love this… thank you so much for posting this! I cannot wait to try them! Pinning this too!
Hugs, Jen @ f5
Thanks Jen!!
Very cute idea to use up some of the piles of fabric scraps I have! I love free crafts!
Thanks, Erin! I went to a first birthday party yesterday and used some scraps to make a matching fabric headband for the outfit i bought her. 🙂 it looked light i bought it to match! 🙂
Great tutorial~thanks for sharing. Will try my hand at making some of your flowers soon. Was just at Hobby Lobby yesterday picking out material for some flowers.
Thanks so much, Jana! feel free to send along pix! We would love to see your flowers and what you use them on!
Since you’re a new reader, I wasn’t sure if you’ve heard about our reader rewards program. You can earn free stuff, like craft supplies and Hobby Lobby GC, just by commenting on posts. Feel free to check it out – https://www.oneprojectcloser.com/project-rewards/
This is such a stellar collection of tutorials! Now that I have a little girl who just NEEDS to have flowers in her hair at all times, I’m totally pinning this. 🙂
Thanks so much Kelly! I have way to many headbands, bows, flowers, etc now! lol, i guess there’s no such thing when it comes to fashion.
Thank you so much for the fantastic tutorial. I can’t wait to try this.
Thanks, Candace! If you make any you really love, post them on our Facebook page!
Mine turned out WONDERFULLY. Thank you so much!
Yay, Regina! Feel free to send some pix, I’d love to see them!
Awesome timing since I had bought the templates and read their directions. I was like, ” Duh!”. I am a new grandma and will enjoy making them for my granddaughter.
So glad it was helpful, Mary Jo! I love making them because it a quick project with great results. I actually just made one yesterday!
Thanks, Jocie! My girls and I will be doing LOTS of crafts next week, and this is on our schedule to try – seems a good beginner craft to share some Mother-Daughter bonding time 🙂
So fun, Ann! Make sure and check out how to make fabric headbands – they are super cute to go with the flowers!
https://www.oneprojectcloser.com/making-flower-headbands/#comment-128168
Do you have to purchase the templates? I clicked on them and it takes me to some google site not a template? I cant wait to get started!!
Hey Lisa,
I just tried the links, which are jpegs, and they worked fine. you do not have to pay for them – everything on our site is FREE! JPEGs will open in your default program, which for me is google docs, but if you check your downloads folder, you can open it with a right click and choose the program you want to view it with. does this help? 🙂
Thanks for visiting and hope to see you back! we also offer rewards, gift cards, and tools for our readers. if you’re interested check out: https://www.oneprojectcloser.com/project-rewards/
-Jocie
I actually found your pin last week & love all of these flower tutorials!! Thank you!!
Thanks, Michelle! and thanks for visiting! hope to see you back. 🙂
Thank you sooo much for the tutorials! I’ve been making fabric flowers, but you have given me great ideas and ways to make them easier! Thanks, again and God Bless!
Hey Marie! So glad it was helpful and happy flower making! Hope to see you back at the site again!
Thank you for the tutorial im going to do a lot for my baby!
happy fabric flowering! 🙂 Thanks for visiting!
Does the fabric need to be double sided? (new to the fabric world!)
depends on the looks you want. for a more shabby chic flower, a single sided fabric would look very nice. It especially gives added texture to the rosette flowers.
Welcome to the fabric and fabric flower world, Chelsea and hope to see you back at The Better Half!
I will be doing some of these for Christmas gifts for my grandaughters. thanks for sharing.
Hey Dena, Glad it was helpful! Feel free to pass along any pix – we love to feature our readers! 🙂
Love this tute Jocie!! Such pretty styles of flowers! Lots of inspiration here! 😀
hi Jocie i really love all these flower tutorials.Thank you
I have been searching tutorials for flowers as i saw this cute headband with a flower i wanted to make for my niece and i couldnt understand the instructions for the flower part but you have made it seem so much simpler and now i have more than one flower idea to put on the headband THANKS u are my hero tonight.
These are so cute!
Your tutorials are great – very well documented and easy to follow. I have a friend’s new baby girl to craft for and I can’t wait to go raid my fabric stash to get started. Thank you so much for sharing!!
Thank-you so much for tutorial. I’ve only tried the circles ones so far. What I did try was going around the edges of some heavy silky looking fabric with a rolled hem with metallic thread. This took a little bit of time; but, was so easy and it made it very fancy! I love it.
Want to make flowers for my daughters Wedding!
Can’t wait to try these! My daughter just posted on fb “anyone know where I can find cute hair bows for me and my daughter?” lol Well, I guess I’ll volunteer 🙂
I found your fabric flower tutorial via Pinterest and had to stop by to read more. I’m so glad I did since yours is the first I’ve found that doesn’t involve sewing or fancy knots, two skills I’ve yet to master, lol. With two girls, I’m always on the lookout for ways to cut down bow/ribbon/hair expenses and should be able to save a ton using your tutorial….well, as long as I can get my youngest to bring the bows back from school that is. Thanks so much for sharing!
These are the simplest instruction I have ever found for making anything! Thank you the flowers are gorgeous!
HANDS DOWN BEST TUTORIAL EVER!!! I Can’t tell you how many posts I’ve read on fabric flowers and your tutorial is perfection. These little beauties are just what I’m looking for!
Thank you for sharing!!
for the ruffled flower, can you gather that too much?
The net cash accounts are identified to be primarily,
the trading of the genuine properties in the precise expiration times.
Lovely! Thank you for this detailed tutorial. You may have answered this question already, but I was wondering if flowers made with a glue gun are okay to use on a garment or should I use needle/thread to hold them together? I am hoping to add flowers to the hemline of an old skirt.
Love em. I would be so grateful if you sent me the template, thank you so much
Could you tell me which glue gun you used in the tutorials. It seems to give the perfect amount of glue for the job. Unlike many ive tried that just leaves blobs of glue every where….love your article & thank you very much
this is awesome. i love whoever did this. i have been looking for ways of making my own lapel flower. though this isnt a lapel flower, but that one with the greens would perfectly work
I am struggling with making the rosettes. I would just love it if you could add a couple photos showing how you wrap and twist the fabric after you create the center of the flower.
Thanks!
Susan
Was very enjoyable tutorial. I have 4great granddaughters. Will enjoy making the flowers for them.
When using hot glue. Is this washable? Thinking about using this on some hand bags that are denim. I don’t know how well hot glue would work. And when you wash them they seem to go flat?????
[…] showpiece white flower was made with a different technique – tutorial can be found here at One project closer Mr. Topaz thought this looked class but there’s a lot of fabric in one of those so I don’t […]