 This week’s Before and After is brought to you by Jane (aka ModerneMama) over at Beach House. Jane and Hubby just remodeled their bathroom in a fresh modern style… It’s quite the improvement. Jane’s also the first blogger to submit an article with its own name, and a good one at that.
As a result of Jane’s submission, OPC will make a $25.00 donation to Habitat for Humanity. Jane is also entered into our end-of-summer contest for a $50 gift card to the home improvement store of her choice! We’ll be voting on a winner in the last week of September.
Read on, leave a comment, then visit Beach House for more great material.
“How we Fought a Towel Rail and Won” by Jane

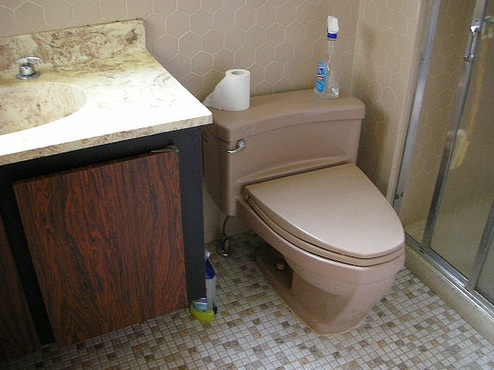
Bathroom Before
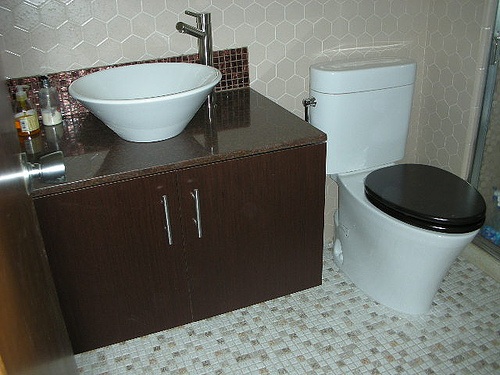
It started on Thanksgiving weekend nearly two years ago and with the simplest thing – a leaky faucet. Which we fixed. We fixed it so well that by the time we’d finished it leaked from the bottom rather than the top and both hot and cold water. Unfortunately, we didn’t notice this until, oh, irony, April Fool’s Day the following year, by which time the laminate was peeling off the vanity and water was pooling on the floor. We didn’t want to do any renovations in this room, we liked the floor, the shower worked (after many visits by many plumbers) and the tile work was in great shape. Plus, we simply didn’t have the budget for it. But we couldn’t leave it the way it was so we began a piece-by-piece renovation: new faucet, new vanity and countertop, new backsplash. It looked great. Unfortunately the toilet now looked old and quite gross next to the shiny new fixtures so we opted to replace that, too.

Bathroom – Nearly Complete
But by July 2007 everything was in and we were ready to declare the room done, except for one teensy-weensy little issue. We could not get the nasty plastic towel rail off the wall.

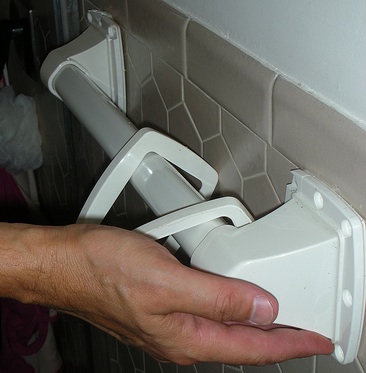
Towel Rail Before
We tried and tried but we couldn’t work out how we could get the towel rail off the wall without doing some major damage to the tiles. We really thought about this, believe me. We removed three of the screws holding the towel rail to the wall six times before I was convinced it would be worse to install the new rail than leave the hideous old one. But it was no good, it wasn’t going to come off without a fight and it wouldn’t be pretty when it did. So we left it. For an entire year.

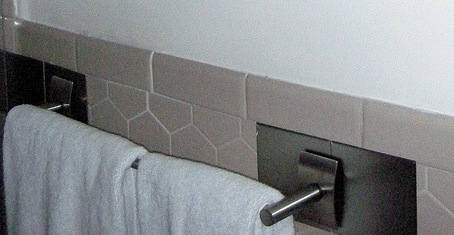
Towel Rail After
By August this year I was determined to get this thing done. We had the towel rail, after all, we just lacked a solution for the holes. The holes in the tiles that wouldn’t be covered up by the new towel bar. I couldn’t let myself be defeated by 18″ of plastic, could I? Then I had an “aha” moment and ordered a sample pack of stick on stainless steel tiles from the awesome. I documented what happened next here. It is a painful story but what I didn’t say was that we actually ended up ordering a total of five sample packs at $9 each before the thing was finished. See the after photos here.
Twelve months, plus a few days, at least six “tries” at fixing the problem, an extra $45 and a lot of sweat and cursing to swap out one towel rail. Sometimes renovation projects are simple and sometimes the littlest things take the longest time, cost you money than you ever imagined and drive you nuts. But the “Before and After” towel rail was, in retrospect, one of the best parts of the bathroom renovation and it’s certainly my favorite hack.
Thanks from OPC!
Jane, thanks so much for your submission to OPC. Your bathroom (and towel rail!) look fantastic – a great transformation to a very modern look.
Habitat Quick Fact
Check out Habitat’s Women Build Program that trains women from around the world to build homes! From Habitat’s site:
Women Build is a Habitat for Humanity International program that trains women to make a difference by building homes and communities.
Thousands of houses have been built by women crews around the world – by the end of 2008, more than 1,400 homes since Women Build’s official creation in 1998. Each year, hundreds more homes are added as affiliates, donors and sponsors discover the impact of women volunteers and their resources.
If Jane’s story about inspired you, consider matching our $25.00 donation to Habitat by visiting their online donation page.
Submit Your Own Entry
The Summer is quickly coming to an end; schools have opened up across much of the nation. Summer officially ends on September 22 this year, leaving only a few more weekends for you to submit your project for our event.
E-mail submissions in just about any format to oneprojectcloser@gmail.com. Best of luck with your projects!
What do you think? Leave a comment below and then click on over to Beach House to see Jane’s other fantastic reno work.


I love the hexagonal wall tiles! It’s a great transformation, too… everything flows very nicely.
The stainless steel tiles – so innovative!
I like the hardware on the cabinet, matches the faucet nicely. And I like how the faucet is offset. Love the stainless steel tiles. I might use that trick for a towel rack in my shower. The brazilian stone I installed in there is so hard it actually broke a masonry bit when I tried to drill some screw holes in it.
-Jon
The tile works perfectly with new fixtures, like they were meant for each other. Good for that first leaky faucet!