
It’s been a little while since our last Pro-Follow update so I’m excited to get back to it. For those just joining us, I’ve been shadowing pro contractor Joe Bianco and his crews as they remodel a basement, and if you’re curious what these Pro-Follows are all about, check out the details on our Meet the Pros page.
Here’s the progress on this basement so far:
Today’s Pro-Follow is all about preparing for tile in the bathroom, and laying tile around the bar area. Joe’s go-to-tilers are Jim and Rich from Diamond Tile. Before we check out the work they completed, let me bring you up to speed on what has happened since the last Pro-Follow update.
Check-Valve
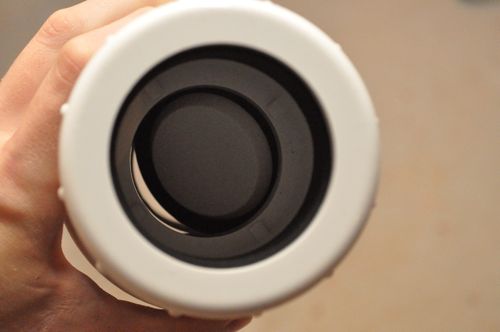
The plumbers installed a one-way check valve before the wet bar sink.

These valves have a flapper inside that only opens in one direction, preventing any back flow should the sewer line backup.
Frame Wet Bar
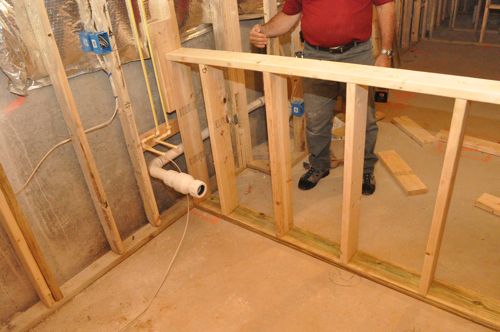
The bar will be a galley style bar, and Joe and his crew framed out a half wall for the one side. These framing members will house a few electrical outlets and support a countertop. The base cabinets and sink will sit in front of it.

Drywall, Doors and Trim
Joe’s crews hung, taped and finished the drywall throughout the basement. If you’d like to learn more about drywall, check out this Project Guide for Hanging Drywall.

They installed pre-hung doors, and you can see the paint swatches letting the painters know what color goes where.

The guys also installed all the baseboard molding.

Repairing a Damaged Concrete Floor in Preparation for Tile
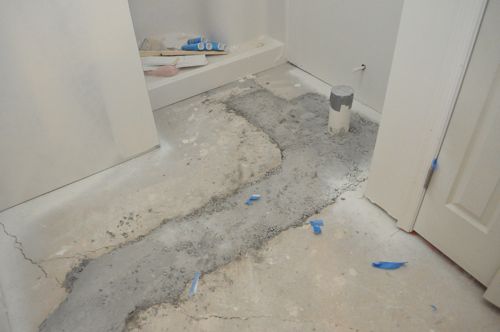
In the bathroom, the plumbing rough-in has passed inspection and the pipes have been covered. If you were with us for the beginning of this Pro-Follow, you know that the bathroom floor has a significant hump, and there is a large crack. Those factors and the uneven concrete over the plumbing mean the tile guys need to repair this floor before any tile is laid.
Step 1: Clean and Remove Loose Debris
Rich started by cleaning away loose debris and bits of concrete.


Step 2: Crack-Isolation Membrane
Next, Rich applied a crack-isolation membrane called Mapelastic CI. This product is a waterproof, flexible membrane that can move up to 1/8″ in plane, and it will help prevent the crack from extending up to the tile.

Rich applied a heavy coat of Mapelastic to ensure good penetration into the crack.

Next, Rich put a strip of Fibatape over the crack much like with drywall.


Rich continued applying Mapelastic over the entire crack and joint between old and new concrete.

Mapelastic has a dry time of about 30 minutes enabling Jim and Rich to continue with the floor preparations that same day.

Step 3: Mix Thinset Mortar
After everything was dry, the guys mixed up a few buckets of thinset.

Rich mixed it a little thinner than usual to make it easier to spread and screed.

Step 4: Screed and Level Floor
To even up the floor, Jim spread thinset and used a screed and trowel smooth it out.


Pro-Tip: When using thinset to even a floor, each application should be 1/2″ thick or less.
Pro-Tip: Thinset can shrink slightly as it hardens.

Jim feathered the edges to bring the floor even with the rest of the basement floor and the perimeter of the bathroom.

Step 5: Allow to Dry
It’ll take at least 24 hours (probably more) before the thinset is dry and the guys can begin laying tile.

Mark Guidelines
In the meantime, Jim and Rich began tiling the bar area, and they started by snapping chalk line guides. They like to measure the size of two tiles (with a joint) and create a grid. This allows them to eliminate the need for spacers because there are always an adjacent guideline to set the tile against.
Pro-Tip: The first guideline is typically measured off the longest, exterior wall because these are usually straighter and more square than interior walls.

Precut Tile
Jim and Rich are installing a beautiful, slate-looking porcelain tile manufactured in Italy.
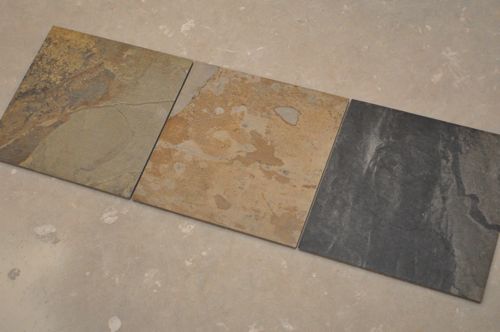
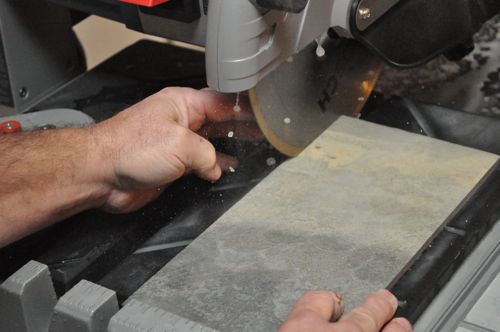
The guys always lay out the tile and precut everything before spreading any thinset. It makes the work go much faster. You can see they’re using the new Bosch TC10 wet saw. So far they’re really impressed with the TC10, and I’ll be sharing an in-depth review soon.

Pro-Tip: Porcelain tile is very dense and when cutting a thin edge off the tile, some blades can “shift” slightly. To ensure the blade cuts true, Rich puts opposite pressure on the blade with his finger.
Here’s a look at all the tiles ready to go.

Cut Transition Strip
The bar will have tile, and the rest of the basement will be carpeted. In this scenario, the guys like to use a Schluter transition strip to protect the tile from boots, vacuums, etc. from chipping. Jim cut the strips with a grinder.

Spread Thinset and Lay Tile
The guys began spreading thinset with a 3/8″ notched trowel.

They embedded the transition strips in the thinset, and back-buttered those tiles to ensure a flush height.
Pro-Talk: Back-buttering refers to the process of individually coating the backside of a tile with thinset.


Sponge Clean
As Jim laid sections of tile he would sponge clean any excess thinset.

Finished Bar Area
Here’s a look at the bar area after the tiles are laid. Soon the guys will be back to grout this tile and lay the bathroom tile.


These post really make me wish houses in New Orleans could have basements. Something about being below water level though…
Great info! We’re not finishing our basement for a while, but this is all very useful. I never knew how to repair those floor cracks.
I had no idea about crack either. The guys said they started using the Mapelastic about a year ago, and it’s worked out well for them. I’m not sure how they handled cracks before that.
Whoa. Rich’s trick of applying pressure to the back side of the blade sounds like a good way to lose a finger. DIY’ers beware: leave this trick to the pros! I’m just going to deal with a crooked cut and keep my fingers.
you do know tile saws dont have teeth right? it still doesnt sound exactly safe to me, but its not like he is pressing on a circular saw blade while its spinning.
It’s not something I expect to try any time soon, and I wouldn’t recommend everyone do it. Rich is definitely comfortable with a tile saw, and he’s mindful of the risks. So far he has all his fingers.
Looks good. Very smart to lay it all out and precut ahead of time. that probably reduces if not eliminates the surprises.
Looks really nice. What is the plan for the flooring in the rest of the basement. Pretty gutsy to do hardwood I’d think…
The rest of the floor will be carpeted
Your post could not have been more timely! I’m planning tile flooring in our mudroom and have lusted after the real slate look but am wary of the varying depth and flakiness of the material. Do you mind sharing the brand of tile you chose? Looks beautiful!
Hey Brittany,
Glad the article will be helpful. Stay tuned because tomorrow I’m covering all the details for grouting tile and finishing this beautiful floor. The tile brand was Edimax, and the guys got it at a local tile distributor. I don’t think you’ll find it at the local DIY center.
How much purpose does the Fibatape actually serve? I could see if the crack was quite a bit wider or something but by the time you get the other flooring over it would seem like it doesn’t serve much adhesive purpose
Would self-leveling compound have worked in preparing for the tile? The screed and trowel method would seem to be something that required some experence to get done right.
Self-leveling would have worked in this situation as well but some damming may have been needed to contain the slury where the feathering to the rest of the floor started.
what would be the process to lay the tile if the concrete floor had been painted previously?
All the paint would have to come up first- scrape, grind or chemical. No matter what, it’s not a fun or quick job.