
We’re kicking off this week with our next Pro-Follow!
But before I get started with all the details of Day 1, I wanted to let you know that Steve Wartman and his crew are continuing to work on the deck build we covered last week. We’ve had some difficult weather for exterior remodeling over the last few days, so Steve’s crew is focusing on several indoor projects at that home. Next up on the deck project is the installation of Trex trim and the railing system. As those sub-projects unfold, I’ll be bringing you the usual day-by-day coverage. Look for the next deck update in a few days, with the final How To Build a Deck article likely to run next week.
(You can see all of our in-progress pro-follows, including the deck project, right here).
Basement Remodel Pro-Follow Kick-off
And now, let me introduce you to a new, exciting Pro-Follow series: A Complete Basement Remodel. If you’ve been with us since last November, you’ll remember Joe Bianco, President of SDG Home Solutions, from our guide to build a concrete patio. I’m back with Joe as he starts work finishing a large, completely unfinished basement. Here’s Joe with a few details about this project. (Note: this video was shot at the beginning of Day 2, but we’re covering Day 1 below… so some of what Joe says you won’t know about yet).
Video Recap: Joe shares that his crew is well underway with the basement remodel. The framers have already finished, and right now the plumber is roughing-in the bathroom. This basement will have a large entertaining area, a bedroom, multiple closets, and a small wet-bar.
Project Overview
Here’s a diagram showing how the basement will be laid out. In the upper left there’s a small closet for the electrical panel and telco system (telephone, data, alarm). Moving counter-clockwise, there’s an entertainment area, followed by a bedroom with a large window. On the lower right, the HVAC closet is an unfinished space where the sump-pump and furnace are already located. The original builder provided rough-in plumbing for a half-bath, and to add the shower and wet-bar will require a bit of additional plumbing that I’ll be covering in Day 2. In the upper-right, you’ll notice an existing elevator and a doorway leading to another unfinished area.
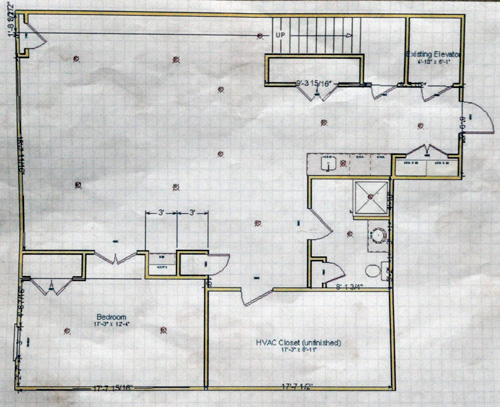
Pro-tip: For inspection purposes, it’s important to designate spaces in drawings appropriately. For instance, the bedroom is allowed to be labeled a bedroom because it features a large window which can serve as an emergency exit (or “egress”), a code requirement in most areas. The “closet” with the electrical panel is not labeled as a closet because the expectation is that nothing will be stored in that space, as that would constitute a fire hazard.
Step 1: Framing the Walls and Bulkheads
Before the framers arrived, Joe marked the concrete slab with a chalk line to identify the location of all walls and door openings. During this step, it’s important that lines are accurate, because the framers won’t be checking if corners are square or walls are parallel. They simply follow the guides marked on the floor. Joe checks and double checks these lines before the framers arrive.
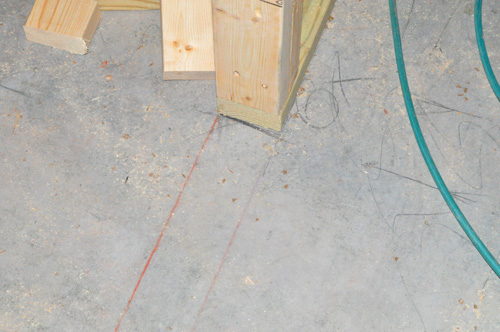
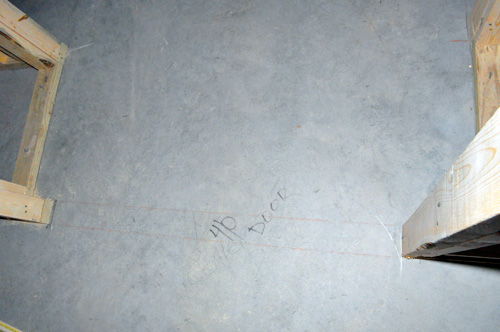
Pro-Tip: The size of the opening for a door is written as “feet/inches.” For example, a 4/0 door (read: “four zero”) indicates a 4′, 0″ door. A 2/6 door indicates a 2′, 6″ door. The framers will add an additional 2″ to the opening (1″ on each side) to allow room for hanging and shimming the door. So a 4/0 door opening will actually measure 48″+2″ = 50″ across.
I was really impressed with the framers. Four guys framed out this entire basement in about five hours. For a typical do-it-yourselfer, framing can be a multiple-day/multiple-week activity. The speed and efficiency with which these guys worked was impressive.
The crew built all the walls on the ground before standing them up. All the bottom plates are pressure-treated lumber to properly handle wicking moisture from the concrete slab. All studs are 16″ on center (oc). Placing studs 16 oc ensures that drywall joints will occur in the middle of a stud.
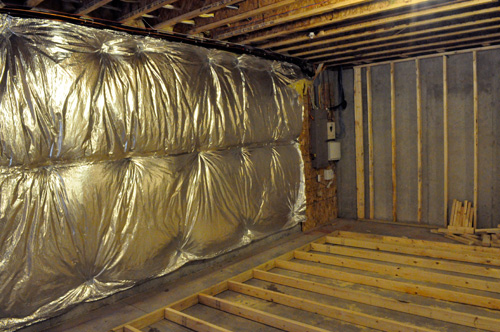
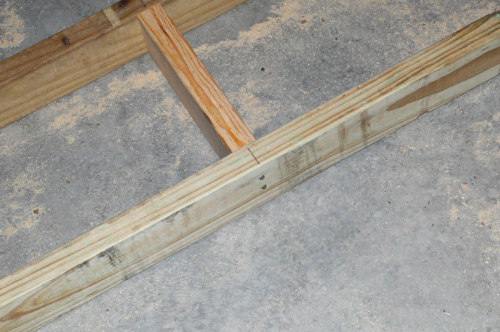
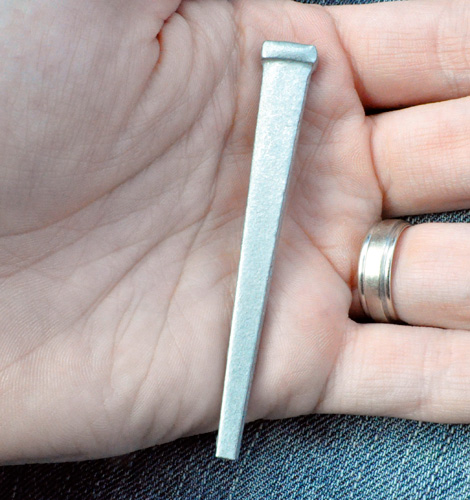
The crew drove cut nails to fasten the walls to the concrete floor.
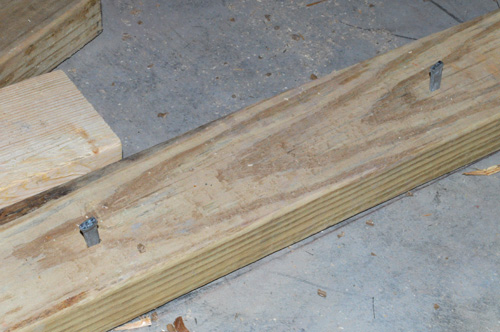
Pro-Tip: Powder actuated nailers are great tools for driving fasteners into concrete, especially when there isn’t room to swing a hammer. You can find powder-actuated nailers at your local home improvement store. Here’s a more thorough explanation of powder nailers.
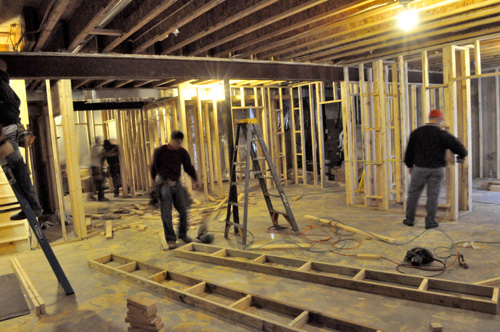
None of the walls in this basement will be load bearing, which eliminates any concern for building structural headers over doors or the lone window in the space.
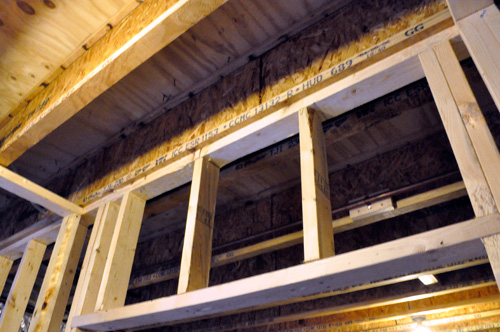

Pro-Talk: If you followed our shed-build series, you know that the short 2×4’s above and below windows and doors are called “cripple studs”, and the 2×4’s supporting the horizontal cross-member are called “jack studs”. All of the full length 2×4’s are called “king studs” or “common studs”.
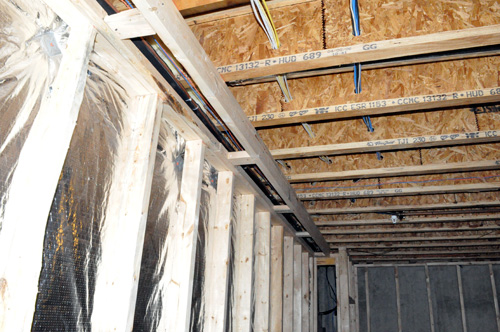
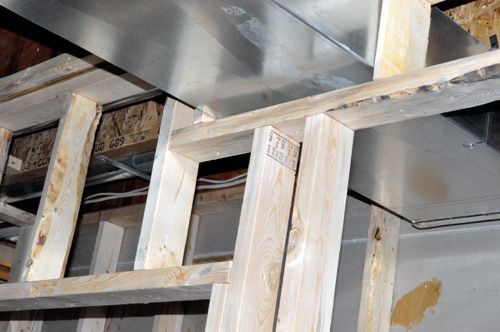
The crew also built several bulkheads (also called soffits) to conceal duct work and other utilities. Pictured below is a small bulkhead they built around freon lines that travel between the indoor air handler and exterior HVAC unit.
An important part of framing a room is providing a nailing surface for drywall, especially at each edge. That’s why you’ll see boards like the one in between the two joists pictured below.
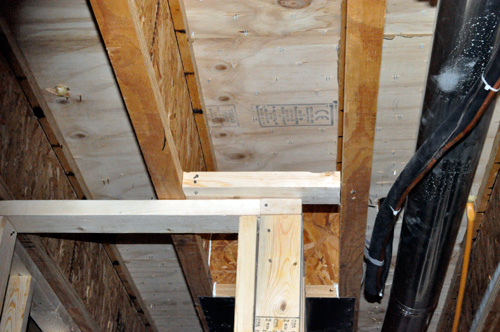
Pro-Talk: In framing, the term “nailer” is used to describe a board that provides an exposed edge. These are commonly seen on inside corners where drywall can be fastened.
There are a couple of other things the framers did that I found interesting. If you look at the picture below, you’ll see horizontal 2×4’s at the intersection of an adjacent wall.

When I asked why they did that, they said it’s more efficient, because it uses fewer studs. They use the horizontal boards to make the adjacent wall flush instead of stacking 2×4’s (long-wise) next to each other.
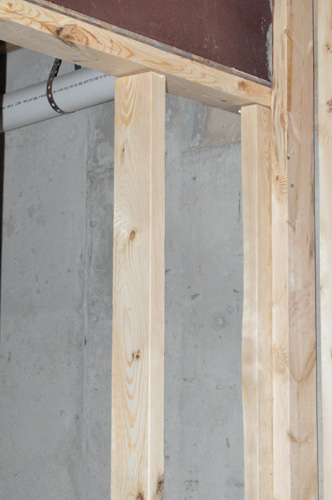
Another trick they use is to turn the last stud on an inside corner perpendicular to the rest, as shown below. Again, this saves them from having to use a second 2×4 in the corner as a nailer.
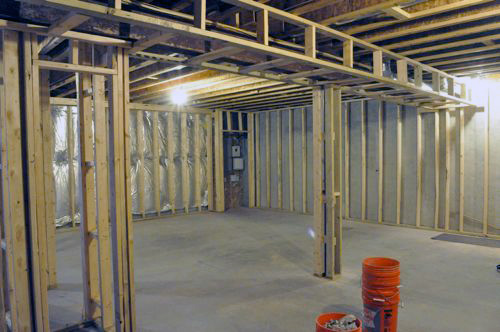
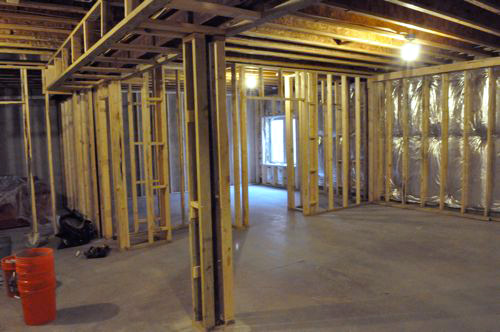
Here’s the basement framed out after they cleaned up. You can see in the picture immediately below that a major bulkhead was built around the HVAC equipment. The sides of that bulkhead were built on the ground and then lifted and screwed to the joists above. The boards that connect the two sides together are actually arranged horizontally, rather than vertically, to maximize clearance. These horizontal members are toe-nailed into the edge of the bottom board on the sides.
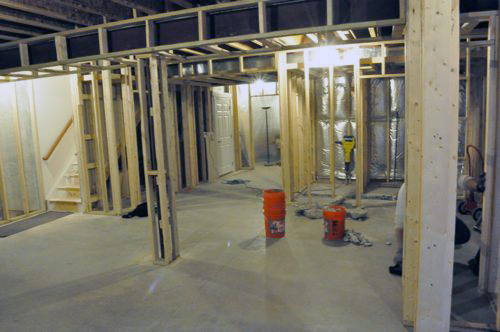
As you might have guessed, the next step will be plumbing the bathroom and wet bar. This is an interesting process because they’ll need to jack-hammer the concrete floor to move a drain.
Stay current with all of our Pro-Follow series by subscribing via email or RSS!


This is going to be a good one. When I framed apartment buildings, we used to use cut nails like above. I never did understand why, aside from cost. They can be fairly difficult to drive. When I first started, I got tendonitis in my elbow from swinging the hammer improperly on those things.
They really had to pound ’em in, and that’s why I mention the powder actuated nailers.
Another option is to use a hammer drill to drill through the plate and into the floor. Then cut a short piece of roll wire about an inch longer than the hole. Bend the last inch out at a 90 and stick it in the hole. Then pound in a 16 penny into the hole. Works exceptionally well for just a few walls or for temporary purposes (such as setting concrete forms on footings and using duplex nails).
Great post. looking forward to the rest of the series. I like the little Pro-Tips that stand out. Is that new?
They are new. Glad you noticed and like them!
Going to be a big project. Looks good so far, and looking forward to the rest.
My father-in-law and I finished my basement in about 14 months – framing the walls (and everything else) took significantly longer than 5 hours.
We used a powder actuated nailer to attach the bottom plates to the concrete floor, which was very straight forward and simple. What are the advantages/disadvantages to cut nails and nailers – why did they choose cut nails? William noted cost as one potential factor above.
I second the pro tips – they are a good addition!
Hey Haus,
I caught up with Joe and here’s his response:
The professional team chooses cut nails for speed, economy, and ease of use. A Ramset is one more tool to carry to the job and you have to buy dedicated nails for it, which are relatively expensive. They can reach for their hammer (already on their tool belt) and probably carry cut nails in their pouches. It takes a few serious swings to drive one into concrete, but framers swing hammers all day long and they can do it confidently.
For someone not as skilled or capable of using a heavy hammer, a Ramset works well. Best to use hearing protection and safety glasses with them 😉
what about damp proofing? water proofing? vapor barriers?
Hey Joe,
I’m not on the project with Ethan, but I’m always up for conjecture, so here’s what I think Joe may be doing…
http://www.energybooks.com/pdf/D1142.pdf
Also, I haven’t been to the house, but it’s fairly new construction I’m guessing (it has an elevator), and I’ll bet the block wall was completely dry. Primary concern for the barrier is to prevent interior vapor from contacting the cold block wall and condensing. One way that’s become popular for that is polystyrene rigid foam board completely taped and placed against the block. But, in a basement where the insulation is fastened to the block already, this method would be far more expensive. (you have to tear out the existing insulation) There’s a good debate online about where to install the vapor barrier. In our final article, I’ll try to put in some additional resources on vapor barriers, but in the meantime, what I’ve linked there is a good resource.
I’m guessing there is rigid insulation on the exterior of the foundation. For a retro-fit, interior rigid is definitely the way to go.
Great question. When I asked Joe about it, he said the existing insulation on the walls has foil on it which acts as a vapor barrier. The other walls are interior (abut to another home) so both sides of the wall have conditioned air.
This is definitely something I’ll be addressing further in the final how-to.
Cool. Looks like they really knocked it out in no time. This would have taken me months! I didn’t realize pros marked it out on the floor ahead of time so they didn’t have to measure while building.
Great project to follow. We’re planning on refinishing our basement this spring and we’re going to do it ourselves. I’ll be back to this post multiple times.
Couldn’t you also use Tapcons to secure the bottom board to the concrete floor… or is that too slow of a process?
Tapcons are definitely a viable alternative but can be slower unless using a decent rotary hammer with someone following behind driving the Tapcons.
Great info. I’ll be checking the link on vapor barriers, as I may take off paneling in our partially- finished basement to update. Also, great pics on the material/ time saving steps on the walls.
With having an unfinished basement seeing step by step process of it being done really helps a lot. We want to tackle this ourselves. Looking forward to the whole series.
I’d like to see a bathroom remodel pro follow too.
Diddo on the pro-tips. Lots of great info you wouldn’t normally get. Can I ask what the elevator is for and how many levels this home has? Seems like it would be an interesting feature for realtors if the home is ever being sold.
Any wood that touches cement should also be pressure treated or rot resistant like cedar or redwood.
The studs also need to be glued to the cement wall and/or double studded every 10′ for fireblocking depending on codes. This also prevents air circulation and thus condensation within the wall from large indoor/outdoor temperature difference.
You should also use sill seal foam under the bottom plates as a capillary break (wicking): “All the bottom plates are pressure-treated lumber to properly handle wicking moisture from the concrete slab.” This avoids moisture wicking rather than handling it.
Ian, pretty standard around here to use straight pressure-treated on the slab, almost universally in fact. I’ve never seen anything around here using sill seal foam under a bottom plate. As for studs glued to the wall: bad idea – moisture wicking from the wall into the stud would require pressure treated studs. I’ve seen no code requirement for the type of fire-blocking you’re talking about (which would be blocking the sideways spread of a fire).