
Welcome back to our next Pro-Follow update. Joe Bianco and his crew are in the middle of a basement remodel. If you’re just joining us today, start with Day 1 of this Pro-Follow before reading here. If you recall, the plan for this basement includes a bathroom with a shower and a wet-bar. Today’s post focuses on plumbing rough-ins for these elements.
If you’re new here and enjoy learning from contractors, check out our Meet the Pros Page to see details about how we follow professional contractors on actual job sites. Stay current on all our Pro-Follows by becoming an email or RSS subscriber.
Step 2: Basement Plumbing Rough-In
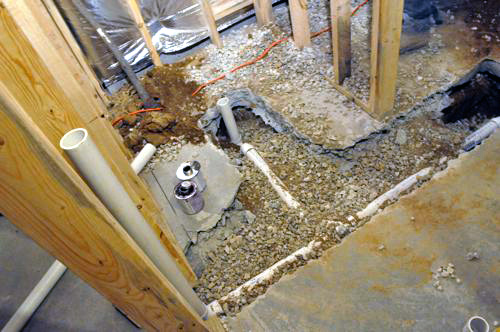
The original builder included rough-in plumbing for a toilet and shower; however, the homeowner wants the shower moved over about five feet. That seemingly small change will require a good bit of work, and we pickup with the plumber as he uses a jackhammer to dig a trench for the new drain line.
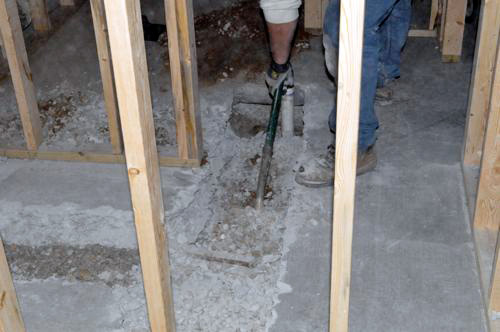
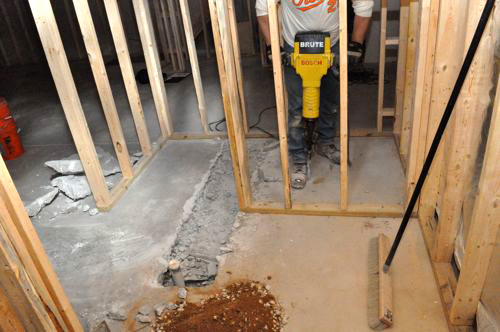
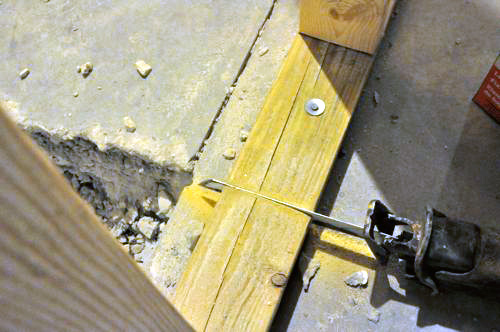
As you can see, he cut a path all the way to the wall. The wet-bar will be located on the other side of that wall, and the sink drain will connect with the shower drain. The plumber uses a Ramset nailer to drive fasteners through the bottom plate and a reciprocating saw to cut away a section big enough for a 2″ pipe.
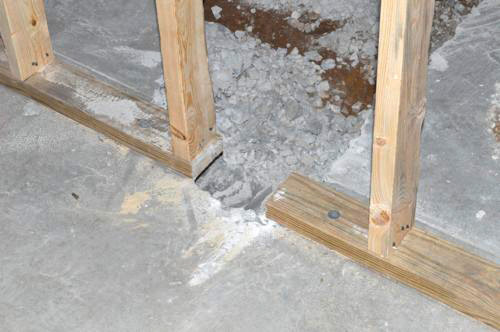
With most of the demo completed, the plumber unearths the old shower drain and cuts it away along with the trap underneath it.
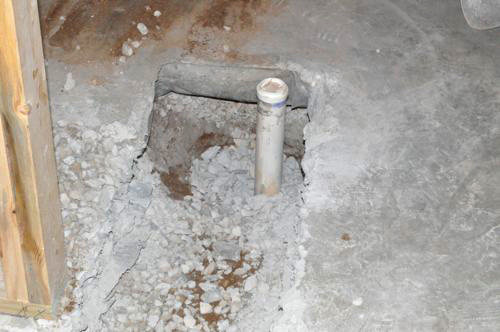
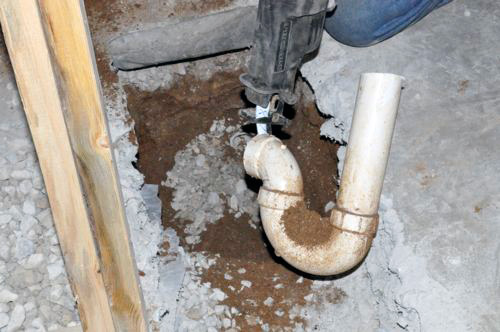
Next, he begins laying new, 2″ PVC pipe, and he starts with a couple of 45° elbows. PVC pipe is rated for pressure and non-pressure applications. This drain line will not be under pressure, so the plumber uses schedule 40, non-pressure PVC.
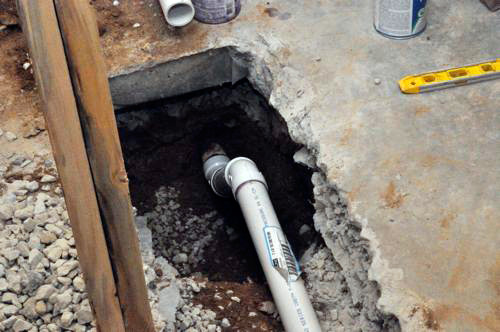
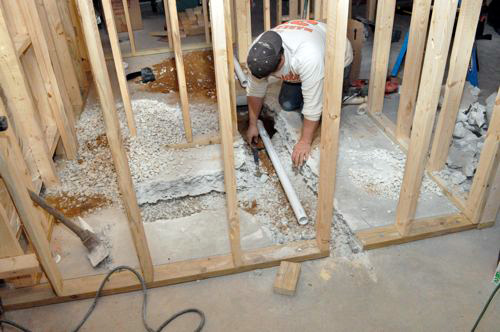
All fittings need to be properly secured by first applying primer, then PVC cement. With standard PVC cement, you’ll get about 15 seconds to set and orient the fitting before it bonds.
Pro-Tip: PVC primer is available in clear and purple. Pros use purple primer because the color makes it obvious to the inspector.

It’s also important to maintain a 1/4″ slope per foot so that water drains properly. The inspector will be looking for this.
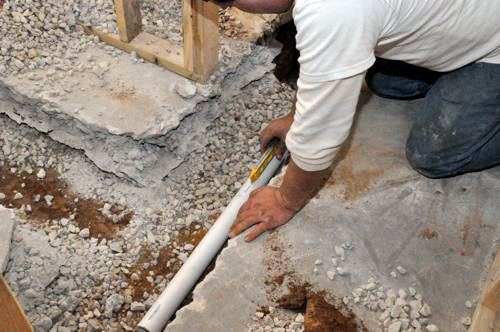
Pro-Tip: Vent pipes should also have a 1/4″ per foot slope so that water (like rain) will drain too.
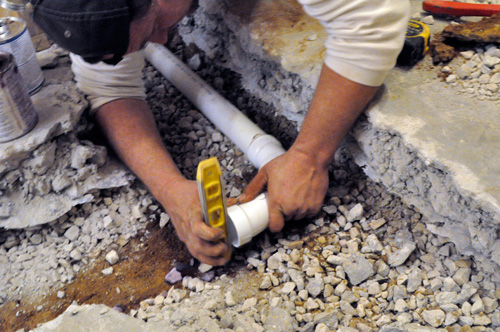
Checking level up and down ensures the fitting is oriented properly.
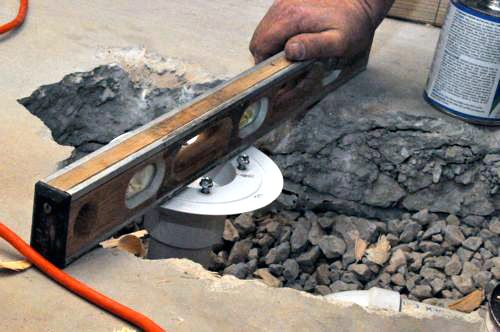
This picture shows the new shower drain and trap. The plumber is measuring across the opening to ensure that the assembly is centered in the shower.
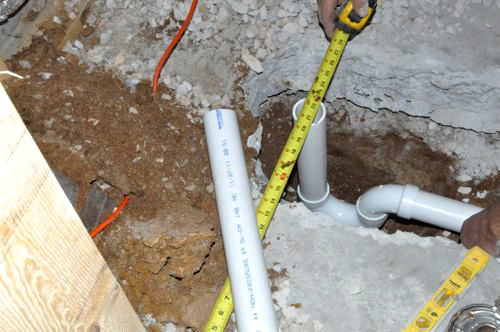
Here’s the progress so far. You can see the plumber has been able to use some of the dirt and stone to backfill, however the pipes can’t be concealed until the inspector give the OK.
The plumber cuts the height of the shower drain so that the flange sits level with the concrete.
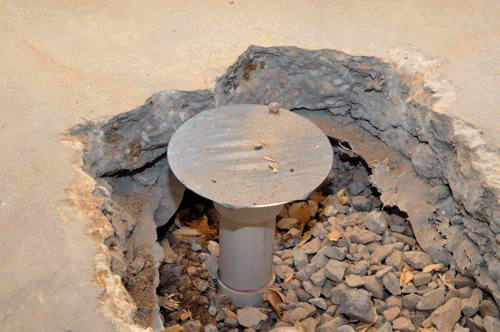
For now the drain and flange get covered. Eventually, a clamp ring will attach to those screws (pictured above), followed by an adjustable height drain cover.
With the shower drain in place, it’s time to focus on the wet-bar drain and venting for both drains. This picture shows the sink drain and an additional connection for snaking the drain should the need ever arise.
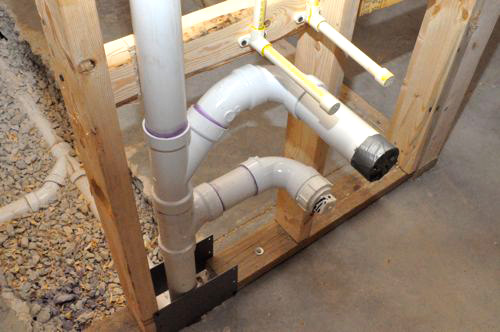
Pro-Tip: Most sink drains are roughed-in at 19″ off the floor.
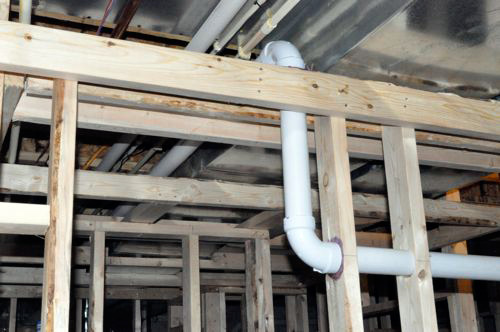
The PVC pipe continues up and, after some twists and turns, connects to the original vent pipe. Venting is important because it eliminates back-pressure from water draining (i.e. flushing a toilet). Without venting you might find sewage coming out of a drain.
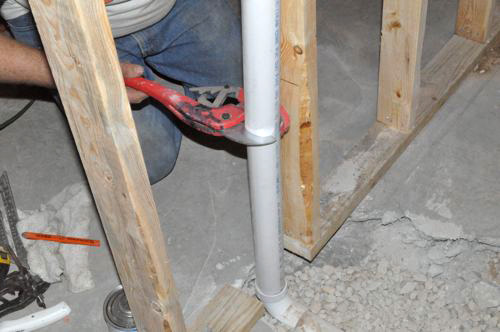
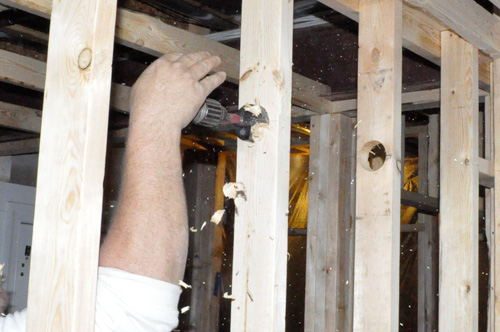
If you’re curious about some of the tools a plumber uses, he has these ratcheting PVC cutters, and a self-feed, wood bit for cutting through 2×4’s.
Do-it-Yourself Tip: You can Build Your Own Basic Plumber’s Tool Kit with tools available at most big box stores.
So far, we’ve focused on draining and venting. Now lets see how the plumber ran supply lines. For hot and cold water, the plumber used 1/2″ and 3/4″ CPVC pipe. You can see in the picture that it’s rated for 400psi at 73.4° F.

Pro-Tip: 1/2″ lines can only supply 2 fixtures. To provide water for the toilet, sink, shower and wet-bar, they used 3/4″ supply lines followed by 1/2″.
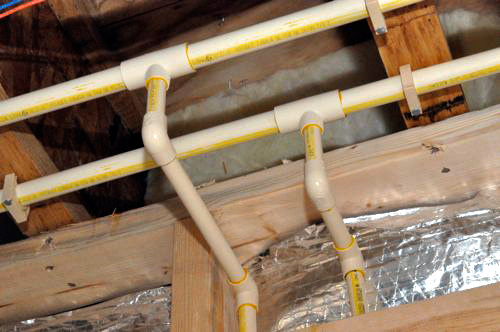
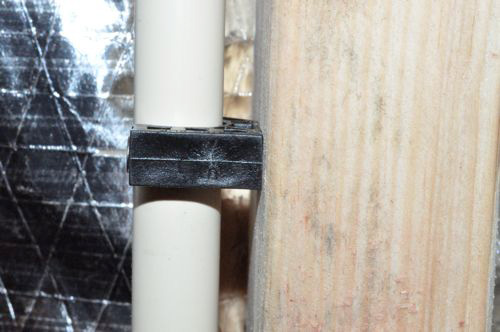
To secure the supply lines, the plumber used tube-talons; however, he reversed the clips to keep the pipe from resting directly against the wall stud. This prevents the pipe from knocking against the 2×4 (aka water hammer).
Pro-Tip: Toilet supply lines are typically set at 6″ off the ground.
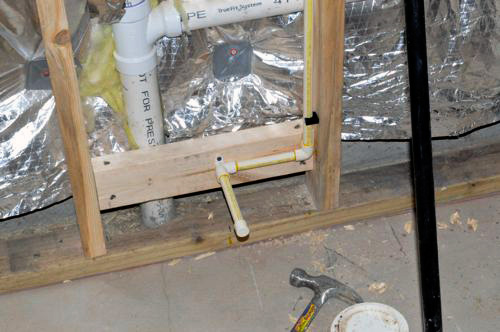
At times they would need to add a cross-member between studs to provide a surface for securing pipes. You can see they did that for the bathroom sink lines.
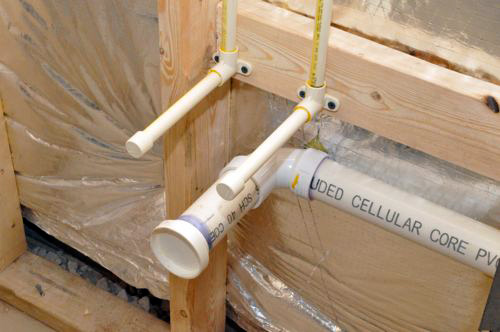
Joe’s plumber said that the plumbing industry is moving away from brass fittings. Instead, we’ll be seeing more stainless fittings. This is because stainless is cheaper than the new(er) lead-free brass.
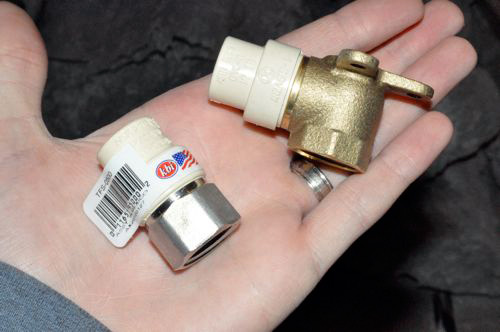
You can see they used the stainless fitting for the shower rough-in. These shower controls are from Delta, and even within this one brand there are many different rough-in valves.
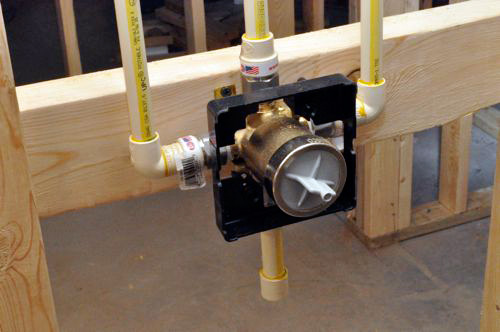
Pro-Tip: Be sure to pick a trusted brand for the shower valve. Making changes after the bathroom is finished can be very costly.
Plumbers aim to space shower supply lines 6″ apart and centered on the controls / shower head. To provide adequate clearance, they often need to move studs like they did for this installation.
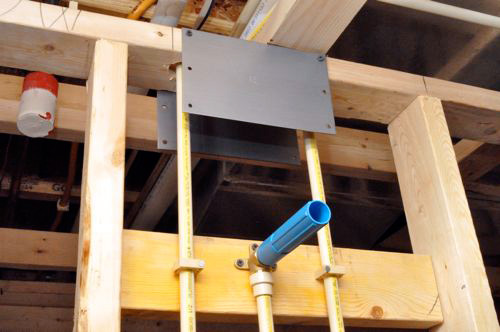
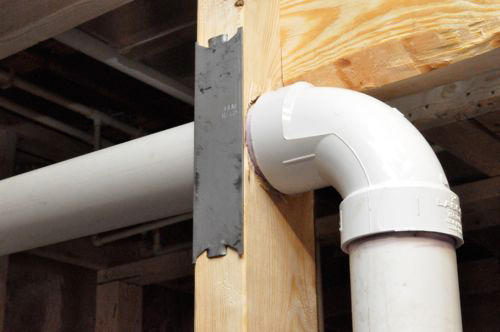
You’ve probably noticed the metal nail plates in a few of the pictures above. If not, here’s a close up of one the plumber added to protect the PVC. These plates are required anytime pipes are within 1.5″ of the nailing face of a stud or beam.
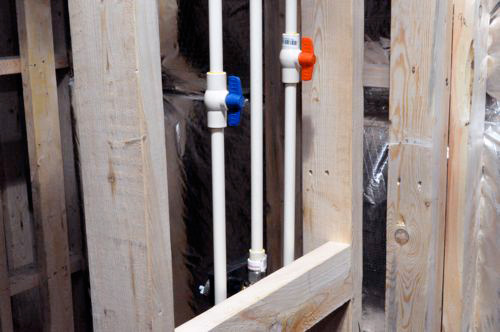
Pro-Talk: The term “stubbed-out” is similar to roughed-out. It’s used to describe capped off pipes that will later connect to fixtures.
Even though the rough-in looks finished, the inspector only gave it a partial pass. This won’t hold up progress, but to earn a complete pass, he wanted to see the shower exhaust vent ductwork in place.
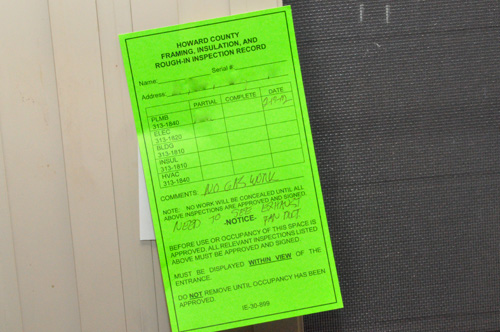
Stay tuned for our next installment in this basement finish coming within then next week!


The pro-tips on this article are especially great. That’s probably my favorite new feature on OPC’s follows.
One thing to note about the delta shower valve. It’s universal from a cartridge standpoint. The difference comes on the rear connections. Any of their valve cartridges can be swapped in at any time offering future changes with little effort.
Great clarification Jeff. From talking with the plumber, he said there were about 30 different Delta rough-in packages. It’s good to know that at least the cartridges are interchangeable.
I used Delta hardware in my recent master bath remodel and I was pleased with how the installation went. It’s also important to note that when roughing in the mixing valve it needs to be a certain distant from the finished wall so you need to plan ahead and know how thick your finished wall will be. Don’t guess, know as accurately as you can because some mixing valves don’t offer a lot of wiggle room.
How many different subcontractors will probably be involved in this entire basement job? Are there any parts that the homeowner is planning to do himself?
I’m not sure how many. It’ll definitely include framing, plumbing, electric and drywall. I expect they’ll sub the flooring too. The homeowners are both older, and not really in a position to do much of the work themselves so I doubt they’re planning on tackling any part of the remodel.
Was the rest of the supply plumbing in the house PVC? I have seen a lot of switchover to PEX recently, did the plumber give a reason for using PVC on the supply lines?
Are any attempts going to be made to repair that vapor barrier under the slab?
I really like the Pro follow stories, it provides a lot of insight into more complicated jobs.
The rest of the house is PVC. I spoke with the plumber briefly about PEX, but I didn’t ask if this basement was a good application. I just found out they poured the concrete. I’ll try to follow up about the vapor barrier.
I’m also surprised to see the plumber use CPVC. I thought the industry was moving away from it. My understanding is that it has the rigidity of copper, but without the strength, and the ease of installation of PEX, but without the flexibility. All the cons, none of the pros.
Also, I was surprised to see part of the slab being removed after the walls went in. I probably would have tried to do that the other way around….
Hey Reuben,
Good comments. I can’t address the CPVC question yet. The framing happened first because otherwise they wouldn’t have had an exact location for the drain (just an expected location). Moving the drain second ensures that they end up centered in the shower.
Good article. Hopefully we won’t need to dig up any flooring. Also curios about the choice of CPVC over PEX, although I know some contractor just like what they like. Didn’t know that lead free brass was more expensive than stainless… thought stainless was expensive to begin with. Hell, didn’t know that brass has lead in it anyway!! I’ll stick to stainless for any future plumbing efforts!
I didn’t realize some brass had lead either! Apparently, most plumbers are using up the brass they have at hand, and then switching over to stainless.
I’m looking at adding a steel, free- standing shower stall up on some concrete blocks, with the drain pipe running above the floor to a nearby drain in the floor. Bad idea?
Not necessarily, but probably not the best for resale value. Digging through the foundation is a pain, but I think it’s really the only way to go to make the bathroom look integrated. It’s one place I’d pay for professional help, though. We’ve seen some folks do it themselves successfully, but it’s just easier to have the plumber do it (it’s a 2 day job if you can get the inspector out at the right time).
Thanks for the feedback, Fred. This shower wouldn’t actually be in a bathroom- just in the corner of a room in the unfinesed part of the basement, and would most likely be used by a guy whose wife didn’t want him coming into the “house” until he cleaned up, such as someone who would get quite dirty working, so not worried about it being aesthetically pleasing- just functional.
They make it look so easy! I too am a bit surprised by the CPVC. We still specify it for certain laboratory gases and liquids but other than that it rarely seems to be used anymore. Yes lead was used in small amounts for many brass pieces because it improved the machinability of the brass. Commercially we started using lead free brass years ago. It uses silicone instead of lead.
Never knew about the tube-talons. We get water hammer here like mad. Wish we could run them upstairs.
Are the tube-talons designed for the pipe to be between them and the wall? It seems like this plumber’s use of them is more logical to keep water hammer from happening.