
We’ve had some record setting snow fall here in Maryland that contributed toward a new problem with my sliding glass door. Ice managed to clog the gutter and overflow onto the backside of my house. After several freeze-thaw cycles, the ice was melting into my home. Now that the ice is gone, I’m taking steps to prevent this from happening again.

Winterize your Home with Caulk
Caulking the exterior of my door frame made sense to prevent water from finding its way inside but caulking also helps winterize your home. Sealing areas like window and door frames, around dryer vents and along the trim creates an air-tight barrier that can prevent drafts. These simple projects can make your house more comfortable and lower heating & cooling costs. For information about finding air leaks inside your home, check out my Seal Your Home website review. To learn about how to seal around exhaust pipes, check out my how-to post.
Select the Right Caulk
It’s important to choose the right caulk so that you get a lasting, weatherproof seal. Some time ago, DAP sent me a couple samples, including DAP Side Winder.
DAP Side Winder
DAP Side Winder is an indoor / outdoor silicone sealant. I choose this sealant because it will create a flexible, watertight and weatherproof seal that will not shrink. Plus, it can be applied in low temperatures (important for mid-winter application). Here are a few more details:
- Great for siding, trim, windows, doors, ducts, vents, flashing and gutters
- Can be used with aluminum, wood, glass, tile, metal, masonry, brick, concrete and more
- Paintable, low odor, low VOC’s
Click here for a complete technical bulletin about DAP Side Winder.

How to Caulk Your Exterior Door Frame
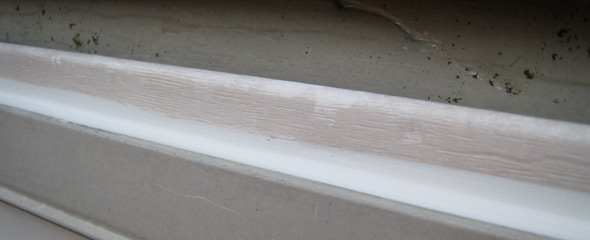
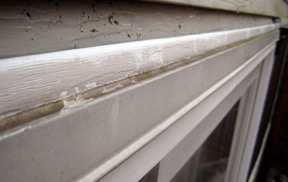
My sliding glass door frame has vinyl J-channel running along the sides and top. I don’t know if that is industry standard but that’s what I have. I could see several gaps were the caulk was missing, providing easy access for water.
Remove old caulk
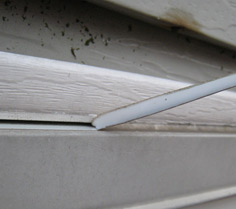
I started by removing the old caulk with my utility knife. I would get a small edge started and then just peel it away. I also checked the gap width. This sealant can handle gaps up to ½” without any backer rod or filler.
Clean
For the sealant to work well, it needs to create a strong bond between the adjacent materials. This is best achieved by applying it to a clean dry surface. I used damp paper-towel to clean the frame and J-channel.
 Load the gun
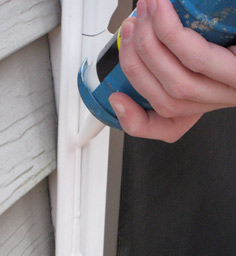
Load the caulk into your caulk-gun and cut the nozzle at a 45° angle. This tube had notches on the nozzle letting you know where to cut to create the appropriate sized bead. Bead size should correspond to the largest gap width you are filling. Puncture the inner seal with a long nail (or something similar).
Apply the caulk
Hold the nozzle at a 45° angle. Squeeze the trigger and move the caulk gun along the gap in a smooth, steady motion. You want to create a nice, uniform bead of caulk. I’ve always found it easier to pull the gun toward myself, rather than pushing it away. If you’re unhappy with how the caulk bead looks, smooth it with your finger. Take care as this will spread the caulk into a wider area.
Curing
For best results, allow the caulk 24 hours to fully cure. Cut away any cured excess.
What do you think? Any tips to add?


Ethan,
I’m really surprised you’re having a problem around that door. Typically there should be a piece of cap flashing that goes on over the top of the door before the bottom siding J-Channel. Hard to tell from the photos if you have that. If the cap flashing is present then there is no way for water to get back into the house…..interesting problem….what is such a pain!
Small tip for smoothing with your finger; if your finger is wet (keep a wet rag/paper towel handy) the caulk won’t stick to it, and it’s much easier to clean off.
Another tip, whenever you are done applying (even if its for a few seconds), press the release button on your caulk gun to relieve the pressure, and that will stop caulk from continuing to flow out and build up a mess on the tip.
Great tips, thanks.
also for smoothing, if you want it nice and concave try using a plastic spoon. probably not needed on exterior, but if your caulk is going to show and you’re a perfectionist like I can be, there ya go.
Also, doesn’t pushing (rather than pulling) help work the caulk into the gap and help it fill better?
@Todd, I think as the water froze and thawed, froze and thawed, it worked past the flashing. This hasn’t ever happened before and we’ve had some snow / rain since and it didn’t happen again. I’m hoping the caulk will help prevent it in the future. Either way, the caulk needed some help.
@Greg, Great tips. I actually do both without really thinking about it and forgot to include them.
@sf, Another good tip. I’ve found that pushing the caulk results in a messy bead. Just my experience.
on my recently purchased 2-story house..there is an ice “path” running from the gutter to the top of my front door…(we have had exceptional snow accum. and the “deathsicles” are certianly evidence of ice dams. now the door frame (between the front door and the storm door is covered with ice….and it continues to build…i can hear it drip as I type thisand the build-up on the storm door is preventing me from even closing the storm door. “winterizing” now doesn’t seem like an option. it doesn’t seem like there is water going into the wall..but it’s only mid February and the forcast calls for more snow…at least until the weekend. i don’t know what to do and i am worried about the damage to the door frame…..let alone anything elese that might be going on. any suggestions?
Hadn’t heard the ” wet your finger” tip before. The DAP Side Winder caulk sounds like a very useful product, with many positive features.