
Twice in five years I’ve cleaned my outdoor AC condenser, and both times I’ve been amazed by the amount of dirt and leaves I’ve found. Fortunately, cleaning your outdoor coil is a task that any homeowner can accomplish, and it doesn’t take very long. A good cleaning will help your AC unit to function more efficiently, and potentially make it last longer too. Read on to learn how I removed the fan, outside panels and scrubbed away a lot of dirt and debris from my outdoor AC condenser.
Editors note: This post originally ran in August 2009. In a related post about AC maintenance, one reader asked about cleaning an outdoor condenser unit, which prompted us to update this post with more pictures and information. If you find it helpful, give it a +1. Else, leave a comment and we’ll try to make it better.
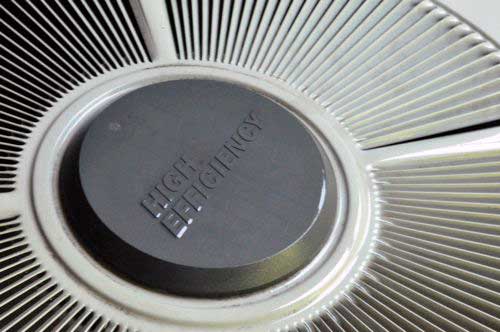
Outdoor Condenser Coil
The coil transfers heat from your home to the outside, and this process works best when air can move freely. That’s why outdoor units have those big ‘ol fans. When dirt and leaves block up air passages, it’s that much harder to cycle enough air. Plus, dirt and even dust can settle on the AC fins making them much less efficient. This in turn raises operational costs and shortens the lifespan of your compressor.
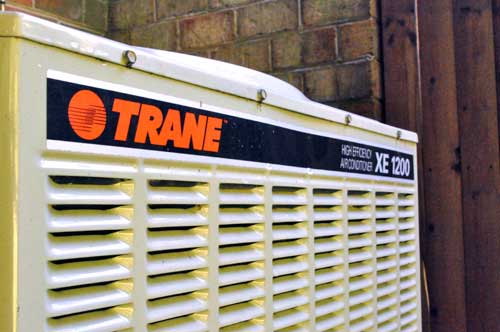
How to Clean your AC Unit (Trane XE1200 as example)
This project doesn’t require much in the way of tools. You’ll need a nut driver to remove some metal screws, a hose, and a scrubber. I’ve got a handy brush that allows me to attach the hose and pump water through the bristles. Cleaning my condenser is pretty much the perfect application for it.
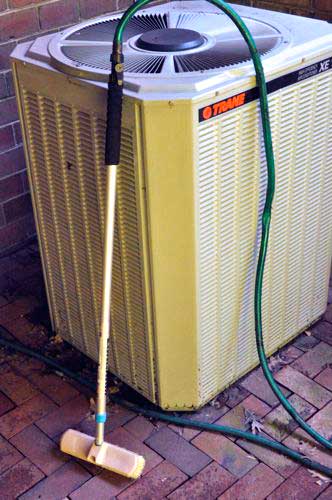
Cleaning the Unit
It’s best to start by turning off the breaker supplying power to the unit, and hopefully your panel is labeled better than mine. Next, remove any nearby obstructions. Most installation manuals will let you know the minimum clearance around and above the unit. If you don’t have access to the manual, try for at least two feet.
My unit has louvered sides held together with a lot of metal screws, and I’d estimate I removed about 30 screws all together. Fortunately, they’re all the same. Just keep track of where they all go. If your unit has a grill instead of louvers, don’t even bother taking the sides off. You can effectively clean everything as is.
You’ll see screws around the perimeter, at the corner where the top and sides meet (not the screws circling the fan). After you remove all those screws, the top (and fan) can be lifted off. Be careful because the fan is tethered with electrical wires. If the installers had any sense, they left a generous length of wire and you can lean the top nearby.

This picture shows the electrical compartment.
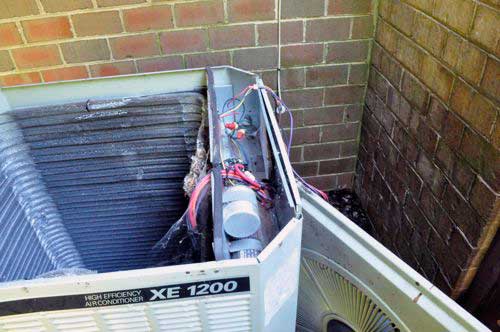
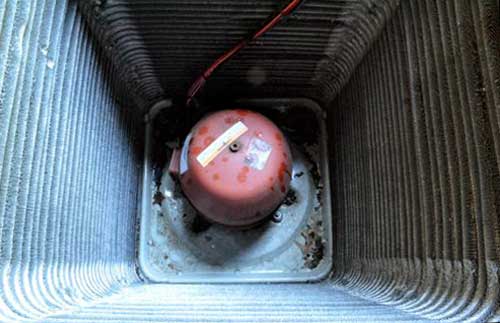
And here you see the compressor.
The side grills have more screws at all the corners and along the bottom edge. After you remove these screws you’ll see how the sides overlap and can be lifted up and off. It’s a good idea to remember where each panel was located. They should be identical, but this’ll help ensure that screw hole line up when you put it back together.
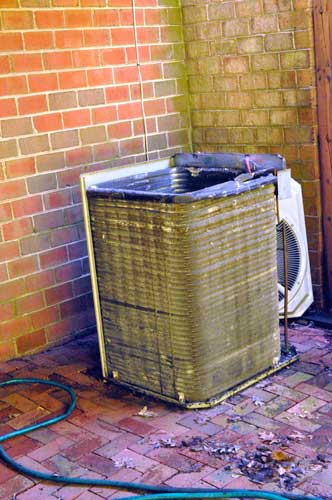
Use your hose and brush to clean the grills, and hose down the fins (do not scrub the fins!). The fins maximize surface area for the heat exchange so if you accidentally mash them together, they won’t work nearly as well. Even an invisible layer of dust decreases efficiency so run your hose over everything (except the electric).
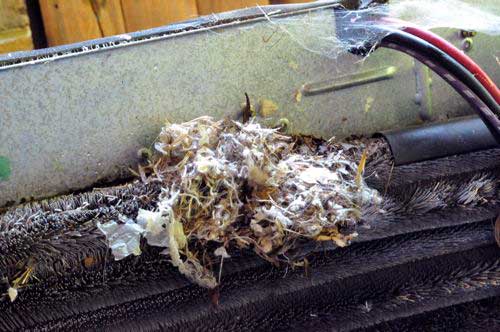
I think this was the beginnings of a nest.
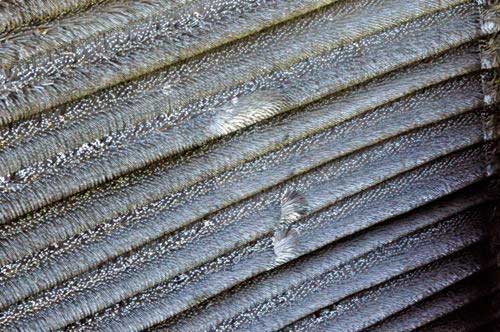
You can see the fins and a few places where the fins are bent- probably from when the previous owner had the compressor replaced.
This shows some of the gunk I found on the fins.
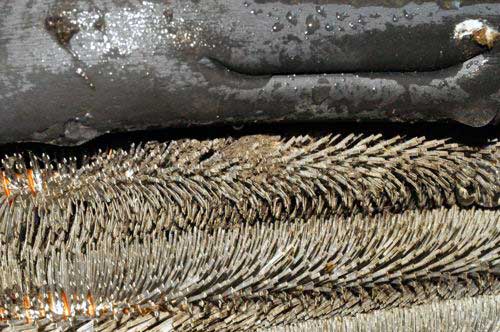
And here’s everything bright and clean.

Tips for Cleaning Your AC Unit
- Some of the parts are heavy or awkward. A second pair of hands is a good idea.
- Compressed air can be useful to clean around electrical parts. It’s also a good alternative if you can’t use a water hose.
- You can also spray your coil with a cleaning solution such as AC cleaner or soapy water.
What do you think? When was the last time you cleaned your outdoor unit?


Yeah, it does help air conditioner efficiency by rinse your condenser or clean it.
Don’t forget the indoor coils.
The inside coil is a bit more tricky because you need to have access to the coil to clean it. If you’re lucky, there’s a panel on your furnace plenum that you can remove so you can vacuum the a-coil. However, if your furnace is like most the plenum doesn’t have an access panel and you would need to make one.
I’ve only got one question. How do the corner covers come off in order to remove the screws from the top on Trane Condensers?
@William, On my outdoor unit, the top has screws all around the perimeter. They aren’t obstructed by anything. You don’t even have to remove the sides / corners to remove the top.
Can I do anything to make a trane a/c unit blow more volume of air out vents into all rooms?
@Tom, Use mastic to seal your ductwork to prevent any air from escaping. You can also install (have installed) dampers to restrict air flow to certain parts of the house. For instance, areas in closer proximity to your HVAC will have higher air-flow. A damper restricts that flow so that it will reach places that are farther away. Hope this helps.
I have an evaporator coil in attic Trane 2TXFH054AS3HHAB. IS this a 2 ton or a 5 ton? Is water suppose to be in the bottom of the coil, draining out the bottom . I have cleaned the PVC not draining and not clogged. This is attached to the box, not connected to anything, but the box that houses the coil. Water is draining out to the outside. Should the coil have water in the bottom of the metal box? The last thing is should the freon copper tubing to the outside unit should it be cool. It is not sweating or cool and yet the AC man says that it is charged. This unit is upstair and does not turn off at all.
Hey Mary, I’m no expert so you’ll probably want to make a service call. I have experienced my indoor coil drain pan clogging /rusting / leaking. Check it out here: https://www.oneprojectcloser.com/indoor-hvac-leaking-water/
We have a heat pump. I wonder if it should be cleaned as well?
On units with actual fins (instead of spines) you can actually use a special tool (comb?) to straighten out the fins if they have been bent.
“It’s best to start by turning off the breaker supplying power to the unit, and hopefully your panel is labeled better than mine.” Many condenser units have a disconnect mounted to an exterior wall in close proximity. That might be easier for most homeowners to find.
Great additional pictures.
This is a DIY project I hadn’t thought of. I know most of my neighbors have contracts for someone to come clean and inspect their HVAC systems once a year and they can cost upwards of $200-$300. That’s quite a cost savings to do it yourself.
We used to have to clean out ours at least once a year depending on how prolific the neighbors cotton wood trees were any given year. Not a fun job. Rather tedious in fact.
Presuming a heat pump unit would run more efficiently if cleaned as well?
Good article. My unit is not a Trane but the steps are the same. Disconnect power, lot of screws, then clean. The only real difference with mine is there is a electrical disconnect at the unit.
Seeing as summer is almost here it’s probably time to do this again.
how to remove cooling coil cement coating in ac
Thanks very helpful!
I have used purple power on outside coils it works great just spray one side at a time then use water hose to spray off quick don’t let it stay on long or it can eat the coil up I have had mine for 12 years with no problem do this once a year.
NO ONE in the web show how to take to panels off from scratch
There are so many cheap plastic piecec imbrittled by the sun that break becUs eNO ONE Shows the process to take the panals off
Why is that
Trane used cheal plastic that cant withstand the sum and become imbrittled
As much as you charge you would think they would use metal instaed of cheesy plastic.dont buy a trane. You will regret it
Best way to clean your condensing coil is to use fresh water with a garden hose (after you disconnect electric power).
It is easy and cheap, plus you don’t have to use chemicals.
Wow that compressor looks lik you reprinted it! Good money saving DIY project
I nee help putting my outside ac unit back together.
I took off metal part surrounding unit, and top grill to paint.
what goes back first.
Hey, that’s a lot of work to clear your compressor. Good work reporting the results though! 🙂
vx80trane airconditioner purple wire from fan where does it belong
We have had a lot of rain recently and I noticed that water is accumulation in the bottom of the unit. is there a drain which may be clogged or have I just not noticed this before?
I just cleaned my trane 3 ton condenser unit put back together and not it seems like its cycling so i cut it off incase i got water somewhere i shouldn’t is that sound normal?
I have a Trane XL19i condenser. 5 ton. was installed 9 years ago. i just replaced the air handler and since this was done the condenser is tripping the breaker on start up. found out that it is on a 30amp breaker when the unit calls for a 60 amp. i will be running a new circuit to the unit with #6 wire and put it on a 60amp breaker like it should be.
My question is this..when these units are shipped out from Trane new do they come with the wires that start at the condenser and end at the outside disconnect or does the install people provide this? The wires from the disconnect sure don’t look like #6 so I am wondering if they are undersized as well and need to be replaced. I don’t want to burn up the unit.
thanks
Had my unit serviced today. Tech went to turn on and blew circuit. Claims wires going into bottom of heat pump shorted out due to wear. I am wondering if too much direct water was sprayed into these parts. Unit is running now because he cut those wires out, so no internal overload protection now and the high pressure switch is also disconnected – only way he could get it started. Says cannot rewire because the wire goes directly into the red heat pumps bottom. Should this have happened?
I appreciate you documenting your experience cleaning the coil and how it turned out for you. I never knew that there were so many screws and small parts to keep track of. I’ll keep this in mind as I try to keep my unit running for as long as possible and probably have a technician come to check it out to make sure everything is running properly.
Great article! Cleaning an outdoor air conditioning coil is such an important task for maintaining efficiency. The step-by-step guide and helpful tips make it easy to understand. Definitely a good idea to keep your system running smoothly, especially during hot months. Thanks for the useful information!
Thank you for this detailed guide! Cleaning the outdoor coil can seem daunting, but your step-by-step instructions made it so much easier to understand. I really appreciate the Trane-specific tips!