
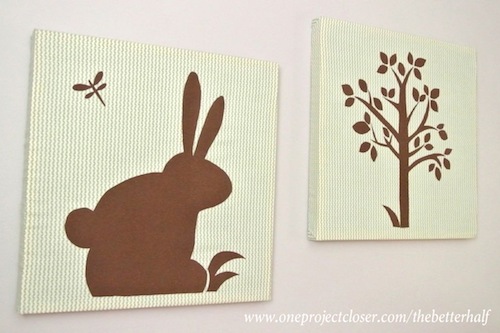
As you may have read in earlier posts, I am working to finish the nursery before Izzie arrives, due February 4th. I registered for canvas wall art to match the bed set, costing $29.99 for two, 12 x 12″ canvas wall hangings. Since I did not receive them at my shower, and felt that they were a luxury more than a necessity, I decided to make my own wall art to save a few dollars.
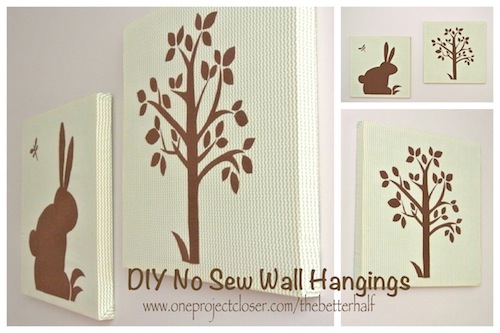
Cost of Making 2, 19 x 19″ Fabric Wall Hangings
- 19 x 19″ wood frames from Ikea = $4.99 each x 2 = $9.98
- Two yards of fabric to cover the frame = $9.98
- One yard of fabric for the design = $2.49
- HeatNBond Lite Iron-on Adhesive = $3.99
TOTAL: $26.44
Supplies Needed for DIY Wall Hanging
- Wood Frames
- Fabric to cover frame and decorate
- Heat N Bond Adhesive, enough to cover “design” fabric
- Fabric scissors
- Iron
- Staples and staple gun
- Level, tape measure
- Nails, hammer
How to Make a Fabric Wall Hanging
1. Buy the supplies. By far, finding the right fabric was the most time-consuming step for me. The fabric was also the most costly aspect of the project, but you can find clearance and sale fabrics to reduce the cost.
2. Assembling the wood frames is very easy. There are four pieces of wood that fit together to form a frame. Two screws go in each end. Go slow and be careful not to split the wood or strip the screw. Place frames to the side until step 10.
3. Iron the fabrics on low heat to get rid of any wrinkles. You can pre-wash the fabrics, but since the fabric will not be washed or worn once hung, it is not needed.
4. Cut out the base fabric to cover the frame. Make sure to leave extra on each side to stretch over frame and affix. I suggest actually placing the fabric over the frame to ensure there will be enough. (measure twice, cut once). Put this fabric to the side until step 8.
5. Place HeatNBond (HNB) onto the fabric you will be using for the design, glue side down (paper side up) to cover the fabric. Iron the paper side of HNB using low heat, ironing small sections for 2 – 3 seconds then moving to next section until complete. This will bond the glue to the fabric. Do not remove the paper after ironing!
6. Using a pencil (and stencil, if desired), draw your design onto the paper backing of HNB. I drew my design free-hand using the bed set design as inspiration. Also, make sure and refer back to the frame to ensure the design is a good size and proportion.
7. Use fabric scissors (smaller ones for more detailed designs) to cut out your design.
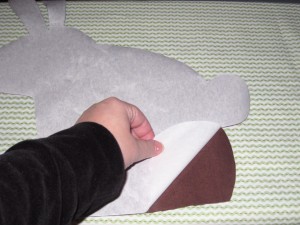
8. Remove HNB paper backing and place cut-outs (glue side down) on top of the base fabric that will be stretched over the frame. Be sure the design is centered within the visible space (not the borders that will be stapled behind the frame).
9. Once the design is in place, iron small sections on low heat for 8 – 10 seconds. Pick up the iron before moving on to next section. Sliding the iron can disrupt the design. Double check to make sure the fabrics have bonded together. If not, iron again for an additional 4 – 5 seconds until bonded.
10. Place base fabric face down on a sturdy, flat surface. Then place frame on top, centering the design (which is face down) as desired.
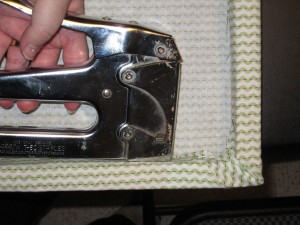 11. Starting on the bottom edge, stretch the fabric around the frame. Use a staple gun to secure the fabric to the frame. Place your first staple midway along the frame. Continue toward the corners, alternating left and right. This ensures equal pulling of the fabric, which is very important as you complete the other three sides.
12. Repeat step 11, continuing with top side, then left and right sides. It is important to stretch opposing sides of the fabric in order so that the fabric does not ripple in the frame.
13. Lightly hammer any staples that do not completely enter flush.
14. Trim excess fabric if desired.
15. Use level and tape measure to plan where you will hang your beautiful new wall decor.
16. Use hammer and nails to hang decor. Depending on the weight of the wood frame, you may want to use drywall screws or anchors. The Ikea frames are very light and therefore I used nails.
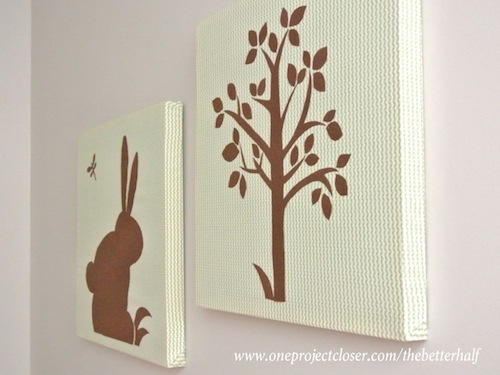
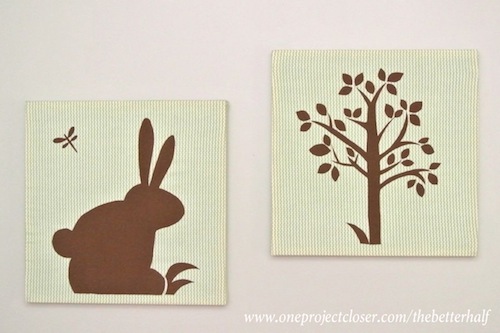
Overall, this was an enjoyable process for me. I spent several hours shopping for the fabric, but the actual making of the wall hangings only took about a hour and a half. I saved a little money, only spending $26.44 instead of $29.95, but got much larger wall hangings, 19 x 19″ rather than 12 x 12″. More importantly, it gave the nursery a more personal, creative touch that was well worth the time and money.
Additional Reading
Fred and Kim picked up some amazing Central American Art that really introduces some bold colors. Check it out!
What do you think? Have you ever made your own wall hanging? Any tips or suggestions?



Wow they look great! So cute!! Another idea would be to hang them with a ribbon bow. I like things a little frillier I guess.
Those came out great, Jocie! Nice work!
Thanks for the encouragement, John and Erin. They came out much better than I had anticipated when I started the project, since it was more of an “evolution” rather than concrete plan. I have to give my mom a lot of credit though – the idea originated with bibs that she makes (and made for me when I was little), and then the idea evolved from there.
@Erin – I also like the idea of hanging decor from ribbon, however, I used ribbon to hang painted letters spelling “Izzie” right next to the fabric wall hanging, so I thought it would be too much.
They look really great! For me, though, I’d way rather spend the extra $3.55 than hours (upon painful hours) to create them. Crafts hate me, lol. 🙂
Like ET, crafts hate me too. But your project turned out really cute. Very fanciful and original.
It’s look really great and so cool………..
John….sigh.