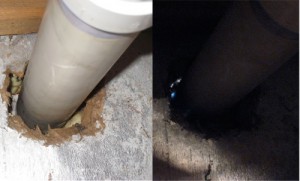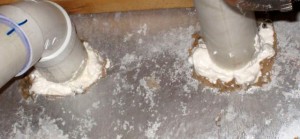
 I recently began checking my home for air leaks and boy did I find them. I started with a couple exhaust vents and was surprised to find little bits of sunlight coming through (see picture). This is a common place for air leaks but fortunately there is an easy solution. Click here for help finding air leaks in your home.
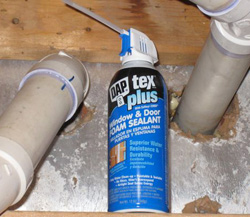
DAPtex Plus
DAP (official site) is the maker of DAPtex Plus foam sealant. It’s designed to seal up cracks, gaps, and voids like the one I described around my exhaust pipes. It features CoVinyl-X9000 “for superior weather resistance plus added toughness and durability”. What that means to me is that cold air, rain and even pests won’t have easy access to my home anymore.
DAP was kind enough to send me a few samples including DAPtex Plus. I used it over the weekend with great results. Read on for a step-by-step guide to sealing air leaks in your home.

DAPtex Plus Uses & Information
The label on DAPtex Plus is a little misleading. The full name is DAPtex Plus Window & Door Foam Sealant but it can be used in many areas, both inside and outside. Here are some suggested uses:
- Windows
- Doors
- Ducts
- Vents
- Pipes
The foam comes in a small pressurized can- it looks similar to a can of spray paint. DAP includes a straw to fit into the nozzle enabling you to better direct the foam. The foam comes out white and takes about 24 hours to fully cure. Before it cures, the foam is workable (toolable) and cleans up with soap and water. After it cures, the foam is sponge-like and can be painted with latex paint.
Where to Find DAPtex Plus
DAP products are available from several retailers. Some of the most common distributors include Home Depot, Lowes, Sears, Target, and Walmart. Click here to locate a retailer near you. You shouldn’t have any problem finding this product. Expect to pay around $6-7 for a 12oz. can.
How to Seal Air Leaks
Sealing up air leaks is a simple project and it will improve the energy efficiency of your home.
Note: these guidelines are not meant to replace manufacturers directions
Access: I needed a little more access, so I cut a rough opening in the insulation board with a utility knife. For pipes, make sure you can reach the entire circumference before proceeding.
Prep: Clean up the application area by removing any dust, debris, grease and dirt. I used my shop vac. Shake the can really well for about 1 minute. You’ll actually be able to hear the foam moving around. Push the straw into the nozzle and remove the safety tab above the trigger.
Install: Hold the can in an upright position and pull the trigger. A small putty knife is really useful to work the foam into place. Have a wet rag nearby to wipe up any excess.

Additional Information
- For outside applications, you have to paint the foam with a latex paint after it’s fully cured.
- Clean up the straw and nozzle with warm water for future uses.
- You can scrap off cured sealant but for best results, work it in place while it’s still wet.
- If you’re concerned about a large space, consider how spray foam insulation may help.
What do you think? What air leaks are you going to seal?


That’s similar to Great Stuff, right?
Timely article. This is on my schedule for this evening. I just bought a Southern Victorian cottage. I was sitting in the den and looked at the fireplace and realized I could see daylight almost the whole height. Since it goes 10 foot floor to ceiling, that’s a lot of air infiltration.
@Katharine, it is similar to Great Stuff with a few minor differences
@George, be careful what you use around a fireplace. This product can withstand heat up to 150 degrees. After that, it will begin to melt.
Here’s a PDF with more technical information
I think it should probably be okay. There is over 12 inches of masonary between the firebox and the wall. There is no heat damage to the paneling that abuts the fireplace. Currently it’s not being used as it was converted to LP gas by the previous owner and appears not to have been used in many years. I need to have it checked before filling the tank and using it.