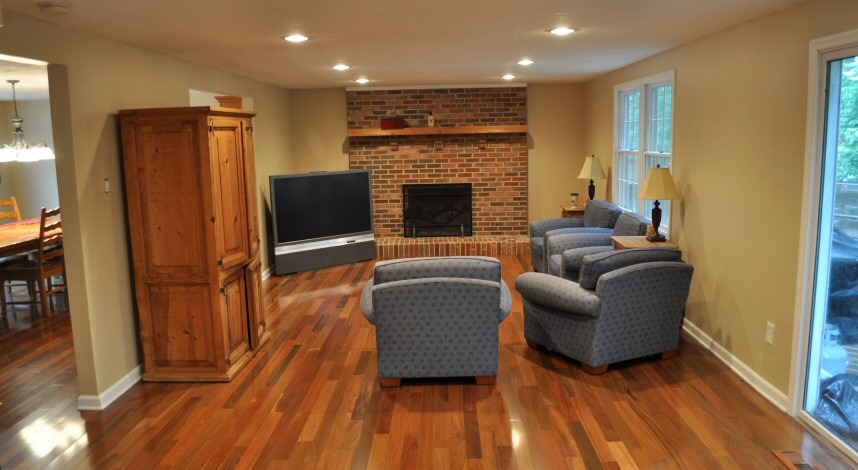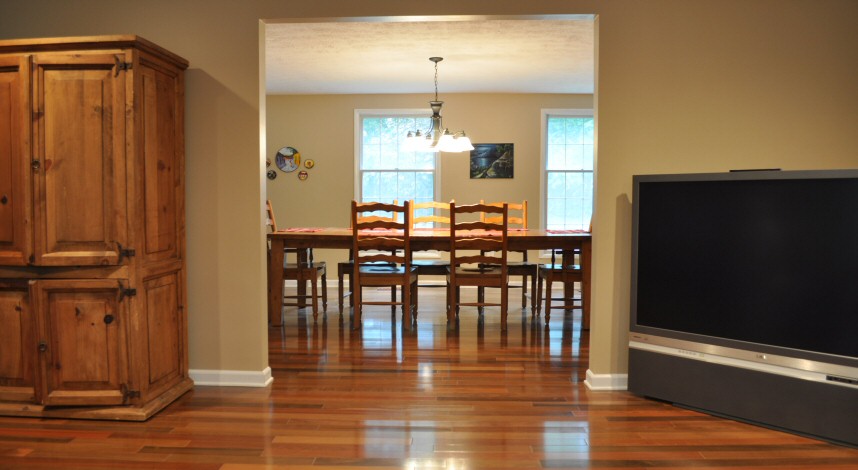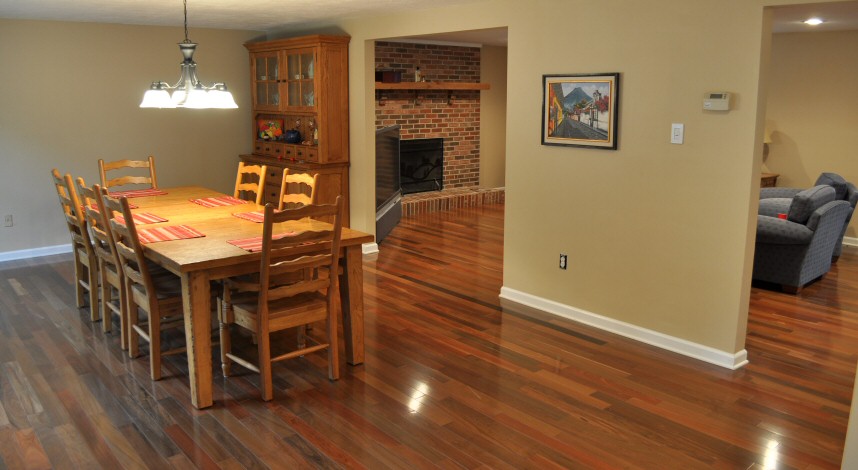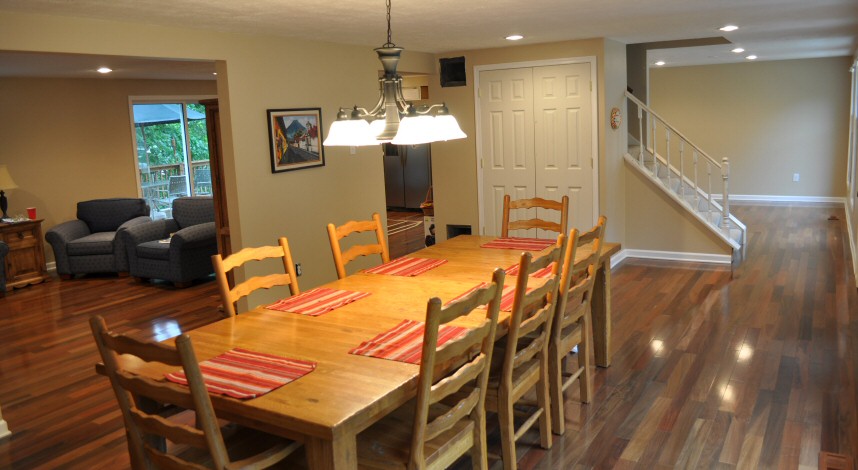
We’ve reached then end of our hardwood flooring installation! We’re thrilled with the results and we hope you found our two weeks of tutorials helpful if you decide to tackle this job in your own home. We wanted to share some “after” pictures of the remodel with you as inspiration for your own hardwood job!
This is the final post in our series on how to install hardwood floors. Thanks for reading, and visit that link for all the information you need to install hardwood flooring in your own home!
Before we start, recall that back in December we started this remodel taking down walls in the first floor of our home. The result was a much more open space. We then hired a contractor to remove a section of a load bearing wall, remove an oddly-placed pantry, re-route plumbing, and install recessed lighting.
After the contractor finished, we started our Brazilian Walnut wood flooring project, installing 1100 square feet of beautiful flooring throughout the first floor. This completes about 1/2 of everything we want to do with this floor. The other half is the installation of a new kitchen, bathroom, and laundry room. Those are coming in late Summer and early Fall, with plenty of pictures to share.
Brazilian Walnut Hardwood Flooring Pictures
(pictures can be enlarged by clicking)
Stay tuned for more “how-to” articles, stories, and pictures of the kitchen, bathroom, and laundry room as they get reworked later in the year. Also, keep an eye out on Tuesday for the complete “How-To” round up on hardwood flooring where we tie together the last 2 weeks into a single article that you can bookmark for the future!


Wow! Your floors are stunning! Thanks for all of the how-tos… we hope to be able to undertake a similar project in the next year or two!
wow- looks amazing guys!
Beautiful result! I’ll be installing some hardwood flooring before long, too, so you’re great collection of detailed and helpful flooring installation posts couldn’t have been better timed for me. Thanks!
Make that: “your great collection of detailed….”
“You are” so much more than just these excellent blog posts. 😉
I love this site. I am not very handy but I love to watch/learn from the pro’s.
My wife loves the color of your walls. What color is it and from what manufacturer?
Keep up the great work I enjoy learning.
Hey Bud, thanks for the compliments… We don’t consider ourselves “pros” but we have been at it for a good while. That color is Ralph Lauren’s Parchment – and it is our absolute favorite neutral tan color – goes with just about everything. Unfortunately, Home Depot stopped carrying RL paints, so you have to find an RL distributor to get that paint now. We LOVE RL paint – think its the best performance for the price out there. It’s still around, you just have to hunt for it.
Well done Fred.
I think I can see a space for bookcases on each side of the fireplace.
Very Nice!
What type (brand) of Brazilian Walnut are in these pic’s and is it 3/4 or 7/16 thickness. BR-111 pic’s on their website show the same installed pic for each of these widths but the actual picyure & description of the product is much darker in the 3/4. Can anyone explain if there are significant differences in appearance in the 7/16 vs 3/4? Thx
Hi Mike, the BW shown in these pictures is 3-1/4″ wide, 3/4″ thick solid, Select Brazilian Walnut from Lumber Liquidators. Their 2-1/4″ wide product looks exactly the same except the boards are thinner (we have installed it in another home). You do have to be careful because not all BW products are created the same. We really like Brazilian Walnut.
Hi there,
I’ve been shopping around for hw for a few months now and my hubby and I were considering Brazilian Walnut. Our problem is that everyone is telling us that it will darken (which is fine, we want a darker wood) but one of the installers at LL told us it will lighten. I’m so confused!! Please tell me what your experience has been. The room that the hw will be in has a lot of sun coming through it.
Thanks, Lidia
Wow, wow, wow, wow Wow! I’m blown away at your gorgeous floors Fred. They are absolutely beautiful. Breath taking in fact.
Curious, why did you use 2 1/2 screws to secure the ply to the OSB 5/8? Wouldn’t a 1 1/4 have worked fine without extending too far below the subfloor?
Keith, I think this question is in reference to our subfloor leveling article, which is a part of our hardwood flooring installation tutorials (this post is the last one in that series). Anyhow, the answer is for two reasons: 1) in some places there was quite a depth of asphalt shingles, such that 2-1/2 inches may have been required. The second was that we wanted to get a few of the screws into the joists as we went along, and there was no harm in driving 2-1/2 inch screws through the subfloor to achieve this purpose. Thanks for visiting. I hope we’ll make you an OPC subscriber!
You did great work, beautiful floors. I’m in the midst of similar project and can appreciate all the work and decisions that went into it. It is amazing how the Brazilian walnut pulls out such variety of rich colors.
If you wouldn’t mind, I have the same subfloor situation…5/8 Aspenite, which I hear is not recommended subfloor although some say it will work. so I’m looking to lay down an additional layer. Why did you choose Plywood over OSB? Most seem to favor Plywood, but some say the OSB 3/4 thick is sufficient, and I’d assume if I just added 1/4 more OSB it would meet spec.
I’ve wondered about the felt vs rosin paper. Everyone recommends felt, however it does have an odor to it when you are close to it, and I’d assume when the sun heats it up, it would off gas more. Do you notice the odor to the shingles or felt?
Thank you.
Keith, it is a complex project, so I’m glad we could provide you some resources.
The main arguments for plywood is:
1) potentially better screw hold (although, OSB is so similar at this point, not really noticeable)
2) deals with water damage a little better. OSB swells at the edges if you ever have a water problem. We were worried about that.
There is no off-gassing whatsoever from the shingles. Couldn’t even really smell them when we laid them down.
We went with rosin paper. I’ve seen the arguments for felt. I believe that if the floor below is climate controlled, you really can use either. the main benefit is to reduce squeaks between the surface floor and the subfloor.
Let me know if I can be of any additional help.
Very sleek looking floors. We’re preparing to sell our home, which has original oak flooring. You gave me great advice to have it done professionally, and this gives me more of a push to strongly consider that, if not overly expensive, just for the ” WOW!” factor. This would make a home memorable in the eyes of a prospective buyer.
Great ‘how to’. Super details and ideas. My mother in law is stuck in poorly constructed house and the subfloors have many peaks and valleys. I wanted to bring the house up to date with new flooring but my skills are limited ( as is my budget ) and I was intimated by subfloor. I search internet for hours for solutions. Joist shimming and shaving seemed beyond me. I’m going to attempt your plan. Also considering just sanding and polyurethane coating new plywood layer. I’ve seen beautiful floors done this way.
Thanks Again.
Beautiful. I have used shingles before. I’m waffling about my current project and will probably use floor leveler since the space is only 6 x 9 (laundry room). You need a new couch to go with that beautiful floor.
This is going to be extremely helpful. I have a home built in 1920 and at some point the previous owners landscaping was dumping water under the foundation. Make matters worse, the concrete floor in the basement was epoxy coated . The steel pillars in the basement at some point sank a little.Some repairs were made to lift it but they didnt get it 100%. Meanwhile they never corrected the water problem.
Flash forward to today its a completely dry basement. I have actually finished it off. I built a 2×6 wall under the center beam and directly center in the basement a 6×6 boiler room for additional support.
While nothing has moved and I dont suspect will again the first 12 inches around the exterior walls has a a considerable drop and then it feathers out to a rate thats hardly noticeable. I think I’m going to rent a sander and rip down the high spots along the perimeter in the existing hardwood floor as trying to level the rest of the floor to the high spot would be absurd. Once that is done use this method for the smaller corrections and call it a day. I’ve got taller ceilings so thats not an issue and I’ll just replace all the doors. Theres room in the framing to raise the floor a little and still fit 80in doors where the current 78’s are.