
I’m really excited to launch into another Pro-Follow. There’s no better way to learn how to complete a home improvement project than seeing professional contractors in action. Stay current with all of our Pro-Follows by subscribing to our feed, liking us on Facebook and following us on Twitter.
As Fred mentioned yesterday, we were planning a different article about installing recessed lighting. However, after documenting the lighting job, we decided it wasn’t good enough to publish.
Today we’re back with general contractor and carpenter Steve Wartman as he builds a new deck. If you’ve read our How to Build a Shed series, then you’ve already met Steve and have seen the experience and expertise he brings to every job.
How to Build a Composite Deck
The same homeowners that had Steve build the shed have contracted him to construct a new, composite deck on the back of their home. They went with composite materials because they’re virtually maintenance free, meaning the homeowners won’t ever need to be seal, brighten or strip the decking boards.
This is going to be a great series as many DIYers do not understand the challenges and requirements associated with this project. Furthermore, there are many dishonest decking companies that will cut corners in an installation, resulting in problems down the road. Stick with us as we guide you through the right way to build a deck.
The Plan
Here’s Steve to give you a short introduction to this project.
So the plan is to build a new, 12 x 24′ deck and a 4′ set of stairs. It’ll have two rows of buried-post piers, Trex composite deck boards and a white vinyl rail system.
Step 1: Plan, Dig and Pour the Footers
Determining the location of the deck is easy. It’s more difficult to determine how many footers are required and where they are going to be located. Here’s Steve with another video sharing some details about footer and ledger board requirements.
So if you missed it in the video, how the deck attaches to the house is one of the factors that determines the required number of deck piers and footers. Other considerations include the size and shape of your deck, how much weight it will hold, and the size of the beams. This deck will be rectangular in shape, and the homeowners aren’t planning on adding a hot tub (or other heavy objects). Since Steve’s crew cannot through-bolt the ledger board, they’re installing two rows of piers, which results in a “free-standing deck.”
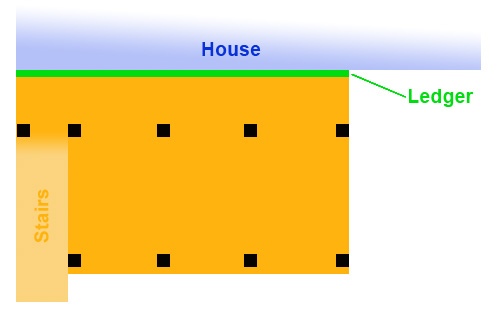
The first row of piers will be placed 3′ off the house, and the second row of piers will be 8′ after that. Piers should be spaced no more than 8′ apart so that means we have 4 piers per row, with the first row having 1 additional pier to account for the stairs. Here’s a sketch of the deck and piers.
After they determined the footer locations, the crew ran a couple of string guides and started digging. This was no small task because they decided to cut through the brick patio and underlying concrete before learning it was 5-1/2″ thick.
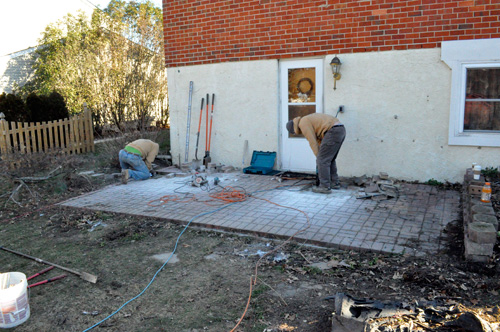
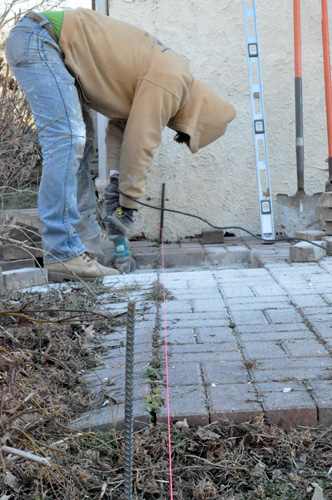
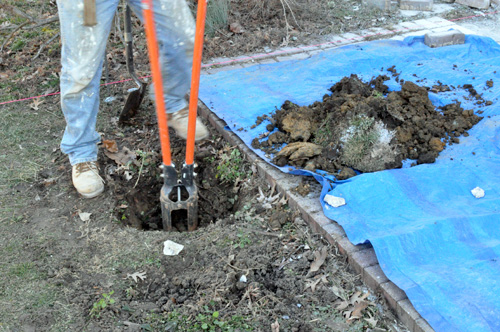
Each footer needs to be deeper than the frost line, and here in Maryland that means footers are at least 30″ deep. Each hole was that deep and about 24″ across. At this point, all the footers need to pass inspection to ensure they will be capable of supporting the deck.

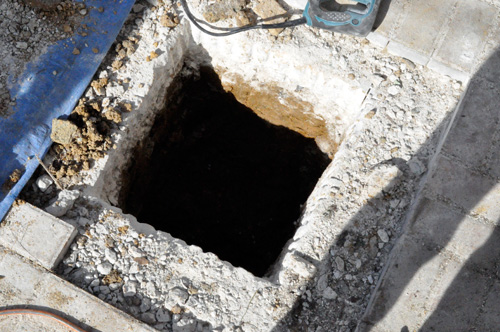
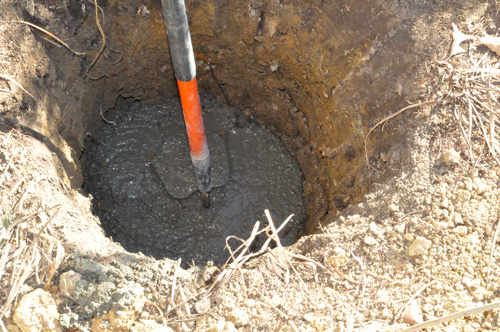
After inspection, Steve and his crew poured the footers. Using 80lb. bags, they mixed enough concrete to achieve an 8″ thick pad.


They used a garden hoe to make sure the concrete would set with a nice, flat surface.
Step 2: The Ledger Board
While the concrete cured, they got started on the ledger board. They installed a 2 x 10′ ledger along the entire length of the deck, taking care to ensure it was completely level. Steve and his crew temporarily secured it in place using a powder charge nailer. Here’s a quick demonstration:
Next, they marked the locations of their joists. Often you’ll see joists spaced at 24″ on center (oc), however with composite decking, you’re joists need to be closer together. Steve’s crew marked their joists at 12″ oc. Determining the joist locations ensures that none of the concrete anchors will create an obstruction, and it allows them to place an anchor in every bay (between each joist).
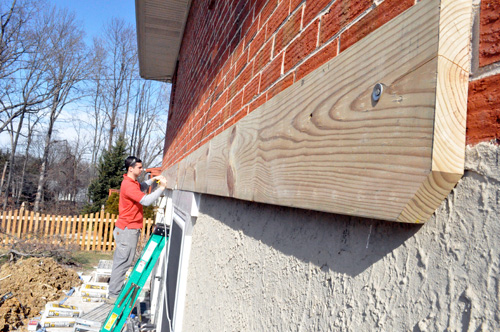
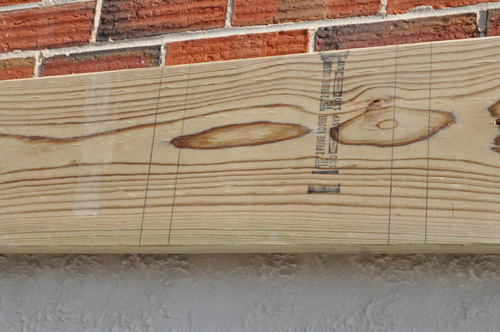
They can use concrete anchors called Red Heads to secure the ledger board.
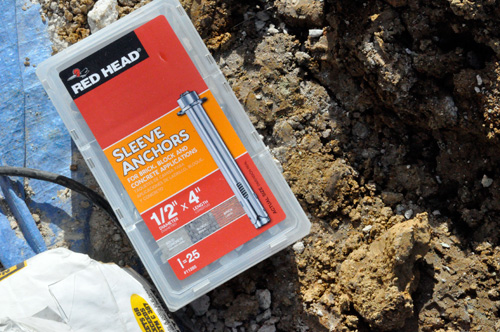
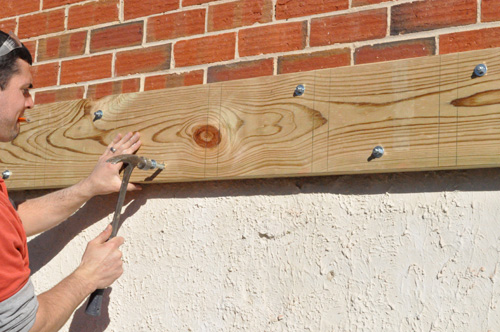
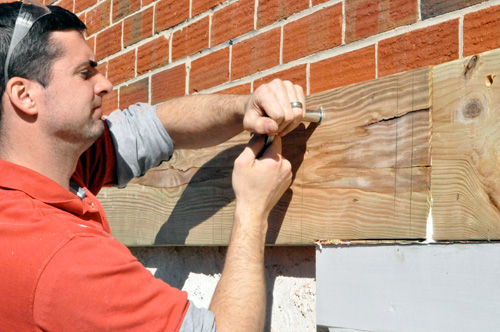
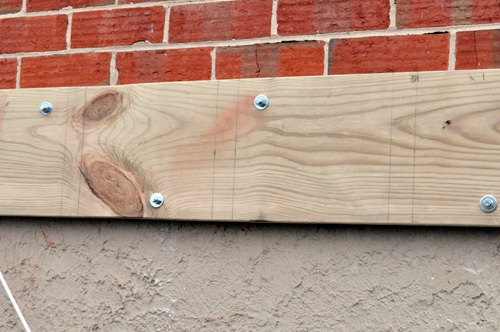
The concrete anchors need to be positioned so that they are driven into the mortar between bricks and staggered. For each Red Head, they predrilled a hole, used a hammer to drive them in place, and a socket wrench to tighten them down.
That’s it for today. I hope you’ll join us next time as we discuss setting the piers in place, running the support beams and installing the joists.


How in the world did they find the exact locations of the mortar joints behind the ledge board?
Based on the pictures, I think they are using the horizontal mortar joints, which if they are level, they probably easily find by snapping a chalk line across the board (or measuring down from the top of the board. My guess is that it’s a relatively “close” science, but if they end up just a hair into the brick, they aren’t going to sweat it.
Fred’s right. They were able to measure where they expected the joint to be, and I don’t think they missed any of the pre-drill holes.
What’s considered a through-bolt in the code? I would contest that a lag that’s driven into both the rim and joist ends (or blocking) would be just as strong as a bolt through just the rim… a rim that’s held to the joist ends with 16D nails. Perhaps the code also specifies how the floor joists must be secured to the rim. Is there an online searchable version of the IBC?
I’ll take a look on the IBC online, but I’ve not seen it. As for through-bolting, I tend to agree with you that if you get enough metal into enough wood, it’s more than adequate for holding. I think the reality is that the simplest requirement was to go with through-bolts. They’re easy to inspect and provide a super-strong hold.
To my knowledge the code does describe how joists must be attached to the rim joist (including the size and number of nails required, based on the size of the lumber). But, it’s worth noting that when the house is cinched up after the build, there’s a whole lot more than the face nails holding that rim joist to the joists themselves. You have plywood fastened to the top, nails through sill plates, etc. — not to mention the friction holding force created by the house actually sitting on top of the rim.
Improperly fastening a ledger board is a huge reason for deck failure… I’m glad Steve was able to cover this angle in the post, and i’m sure the final complete “How To” will cover this component extensively.
so what if the owners change their mind and want to add a hot tub later? Is the design prohibative to this or is there some retrofitting that can be done?
Ethan and Steve will be able to answer this one better than me, but I know that on our deck we were told we could install additional joists under the hot tub span. The 6×6 supports and the 2×12 support boards between them are more than adequate to hold the weight.
Now this is a pro follow I will probably be using this summer. We need to build a deck at my fathers home that currently has builders patio slabs.
I suspect this will be a really good one when its finished up. This is a great project.
What are the advantages/disadvantages of hand digging the footer holes vs. using an auger? The people that installed our deck did the same hand digging, which definitely seems to take longer, but I don’t completely understand the benefits.
A few things come to mind:
1) If you’re anywhere close to utilities, you must hand dig by law.
2) Given the size of the hole, perhaps there is significantly less advantage in the auger?
3) This type of manual labor is cheap.
But, I will say that I love using an auger. Used one when I was a teenager to help my dad build a fence. I seem to remember thinking “this is way easier than digging by hand.”
For whatever reason, the folks who installed our deck (which has 16 6×6 posts) also dug by hand.
Even better than a two man auger… one mounted to the PTO of a Tractor, no breaking yourself when you hit a rock (the tractor is NOT going to move), and its a bit more powerful.
We dug holes for maybe 50 trees with my father when I was a kid, and we had to stand on the frame of the auger because his Tractor has no hydraulics to provide down-pressure.
Oh man.. sounds like good fun. I can see my boys (and me) lovin’ that.
Another tool I don’t get to use too often is a hydraulic wood splitter. They’re by no means as dramatic as an auger, but I still enjoy the slow and steady drive that just pries the wood apart… More memories from when I was a kid.
Yeah, my father is happy to have his Tractor (40’s Massey Ferguson) he uses it to plow the driveway (blade), cut brush/tall grass (brusk hog aka rotary cutter), and mow the lawn (finish mower), the three point attachment and PTO are pretty awesome, it takes a quarter of the time to mow with his tractor as it would with a small rider (like he used to make me and my brothers do, starting at age 8) and it has far outlasted every single small lawn tractor he has bought, except his IH branded cub cadet, which is REALLY a little tractor, so I dont think it counts, the cub cadet actually has a cab and snowblower for the winter.
I like splitting by hand 🙂 nothing feels more manly than taking a hunk of metal and using it to make a log into kindling.
I actually had to wait until it was 10° out to split one piece, it was the main crotch of an oak (maybe 14″-16″ in diameter at the bottom) and about 3 feet long. Waiting until it was frozen (it stayed well below freezing for a few days) made it easier to split.
Since they’re doing so much work at this house, all the underground lines had been previously located (something I’ll be sure to mention in the final writeup). So they weren’t concerned with buried utilities. In the end, it’s just more cost effective to dig than rent an auger.