
Months ago I shared a tour of the OPC workshop, and I distinctly remember William calling BS because the shop looked so clean. What can I say? I like a clean shop. I also remember Tim R. encouraging me to get dust collection sorted out for health and safety reasons. With that in mind, I’ve been working on a dust management system in our shop for the past couple of weeks, and it’s finally complete (at least for now).
Dust management (DM) isn’t the sort of thing you want to jump into blindly. It’s important to plan out the materials, port locations, find compatible products and more. Plus, it’s especially difficult to interface flexible hose with solid pipe (a must for any dust management system). Read on to learn how I tackled these challenges so you can create a DM system of your own.
Materials
- 6″ PVC and fittings (see below)
- 4″ PVC
- 6″ Flexible hose (see below)
- 4″ Flexible hose (see below)
- 6″ Hose clamps
- 4″ Hose clamps
- 6″ Sheet metal fittings (see below)
- PVC cement
- 4″ Blast gates (see below)
- Floor sweep (see below)
- 4″ – 2-1/2″ reducer (see below)
- Hanging strap
- Silicone sealant
- Aluminum tape
- Metal screws
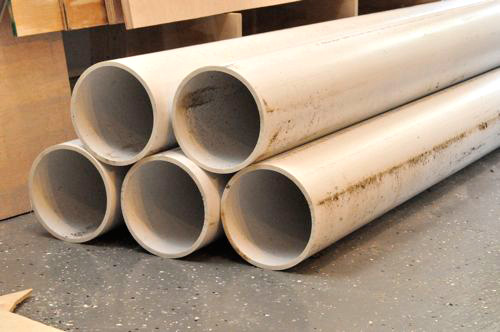
6″ PVC
There are several different types of PVC out there like sewer & drain (S&D), drain, waste and vent (DWV), SDR35 and more, and each has different characteristics. I’m convinced that just about any of these will be able to handle the demands of a dust management system so the factors that you want to consider are size, weight, availability and price. I selected 6″ DWV, foam core PVC because that is the biggest size my dust collector can handle, and the foam core means it’s much lighter than alternatives. Unfortunately, it’s also pricier, but that’s what was readily available at my local plumbing supplier.
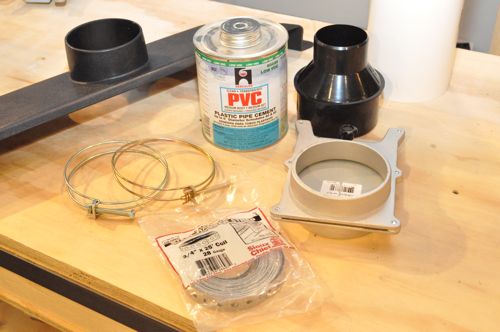
Blast gates, Floor sweep, Reducer and Flexible hose
These are all products (mostly) specific for dust management systems, and Amazon is the best resource for finding them. Here are the links to what I used:
Sheet metal fittings
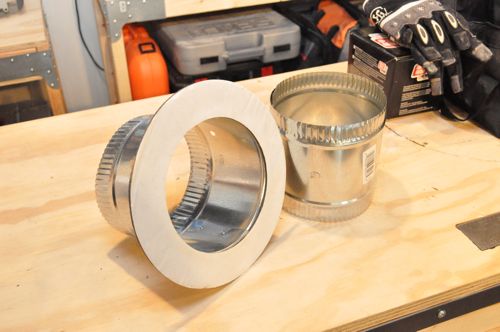
One of the difficulties in setting up a dust management system is making all the connections, and I ended up using a few 6″ sheet metal fittings to overcome some “challenging” connections. I picked up a starting collar and a crimped coupler from my local HD.
Tools
This project doesn’t require too much in the way of tools. Here’s what I used:
- Drill / driver
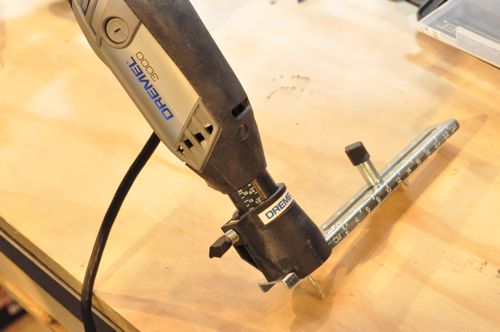
- Dremel with circle cutter
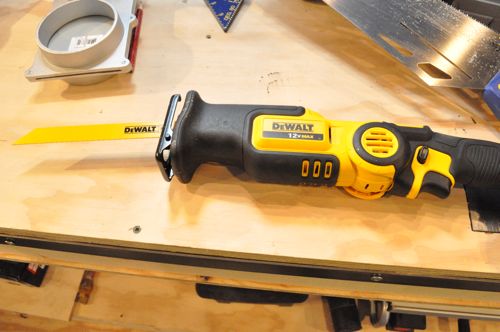
- DeWalt 12v pivoting reciprocating saw
- Rubber mallet
Dust Collector
The heart of any dust management system is the dust collector, and Delta was kind enough to send me the Delta 50-786. This unit features a 1-1/2 HP induction motor, 1 micron filtration, and 1,200 cubic ft. / min (CFM). It can accommodate two 4″ ports or one 6″ port. The snap in bag ring is really convenient for quickly swapping in a new bag too. I’ve had this unit setup with my table saw for the past couple of months, and I’m so impressed with how much sawdust it captures. If you own a workshop, you know how tiring it can be to sweep up sawdust all the time, and that’s why I’m excited to integrate the 786 with all my workshop tools. Look for a full review to come.
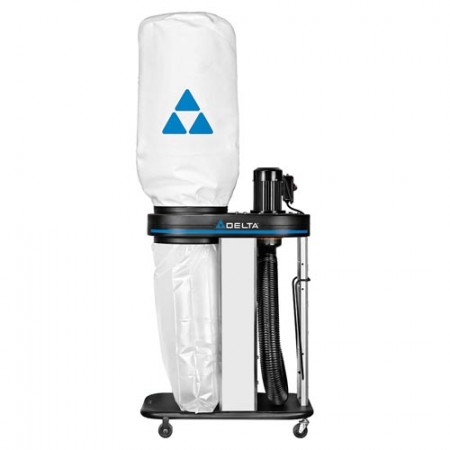
This is a single-stage dust collector which means that everything goes through the impeller and into the collection bag, and the top filter collects small particles. A two-stage collector is even better because it separates the heavier bits and pieces first which improves efficiency, and it has the added benefit of protecting the impeller from damaging debris. As you might expect, two-stage dust collectors also carry a higher price tag and have a larger footprint.
1-1/2 HP is powerful, and I’ve actually sucked up things I thought were out of reach! Even so, this is at the lower end for a dust management system, and a 2+ HP unit would be preferable.
Dust collectors are loud so ideally I’d place this unit in an adjoining room. That’s not possible for me so I have to be content with storing the dust collector in an out-of-the-way location.
Even though the owner’s manual shows a convenient “flange” for connecting 6″ flexible hose (in lieu of the two 4″ ports), my unit had no such thing. That’s one of the reasons I had to get creative and purchased the sheet metal starting collar.
Should I Ground my Dust Management System?
If you look around online, there’s some debate over using PVC or metal ductwork for a dust management system. If you ignore differences in price and availability, the argument boils down to safety. Combustible dust (like sawdust) creates the potential for flash fire and explosion, and the National Fire Protection Association (NFPA) states that anything less than 420 microns is cause for concern (see source here and additional reading here).
In short, a dust cloud is quite flammable and only needs an ignition source to cause trouble, and that source could be anything from a static shock to a hot motor. Furthermore, air and particles moving through the PVC or ductwork build static electricity. One solution is to ground the entire system which is easily done with metal ductwork. However, PVC is an insulator and so grounding the pipe is out of the question.
After everything I’ve read, here’s my two cents. PVC is a fine choice for a dust management system, and since it’s an insulator, the chances of a spark occurring inside the pipe are minimal. The OPC shop is a small-scale operation, and I doubt I’ll ever have a highly concentrated dust cloud that could actually explode. So the real threat is an ignition source starting a fire in the dust collection bin. For that reason, I’ll empty the bin on a regular basis. Lastly, I plan on running a ground wire on the exterior of the pipe because I want to avoid shocking myself should enough static charge build up.
Planning Pipe Layout
The goal of any dust management system is to preserve suction at the tool, and properly routing the pipe can make a big difference. Here are some tips:
- The closer the dust collector to the endpoint, the better. That means plotting as direct a route as possible.
- Bends and turns negatively impact performance so keep those to a minimum.
- Use long sweep elbows or even two separate 45° fittings to create a large radius turn rather than short, quick turns.
- Opt for wye fittings rather than T’s to improve airflow.
- Maintain as large of a pipe for as long as possible.
- Flexible hosing creates about double the resistance of rigid pipe so try to minimize flexible hosing.
For my setup, I’ve created a 6″ run from my dust collector up into the attic and down right next to my table saw. I integrated several sized ports on this one line so that I can connect my table saw, a floor sweep and a 2-1/2″ port (miter saw, router, shop vac, etc.) I’ve also capped a wye fitting in the attic for future expansion.
Step 1: Cutout Drywall
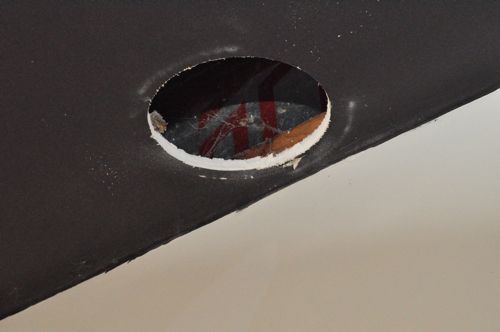
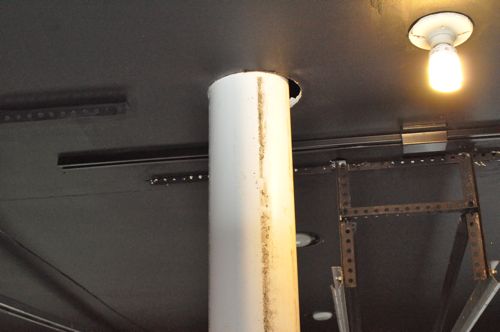
To do all this, I began by cutting circles in the ceiling for my PVC using the Dremel circle cutter.
Step 2: Run the PVC
Somehow I managed to finagle the PVC in place, supporting all the pipe with metal hanging straps attached to the roof trusses. I chose to glue everything because I wanted to ensure an airtight fit and because it’ll help support the pipe. On the other hand, 6″ PVC fits very snuggly, and it’s much easier to reroute the PVC, if the fittings aren’t glued together.
6″ PVC is tough to work with just for its sheer size. I quickly learned that the fittings won’t turn after they are fully seated, so it was important to put them on in the correct orientation. Also, you go through PVC cement very quickly.
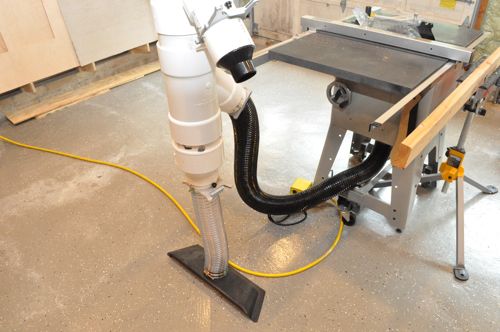
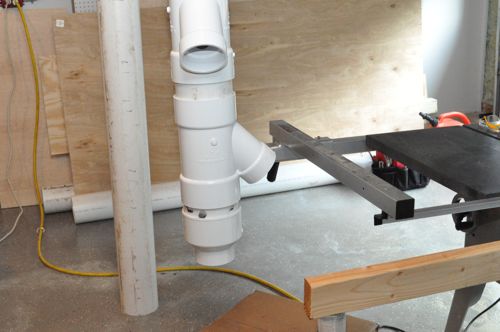
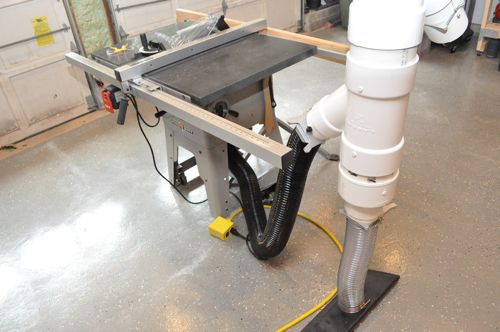
Here’s a look at the run next to my table saw. It has two 6 x 4 wyes and a reducer at the bottom. I fit a short section of 4″ PVC onto each fitting before installing my blast gates. Some of my cuts weren’t very pretty so I hid them inside the fittings and used factory edges when they were visible.
Step 3: Install Blast Gates
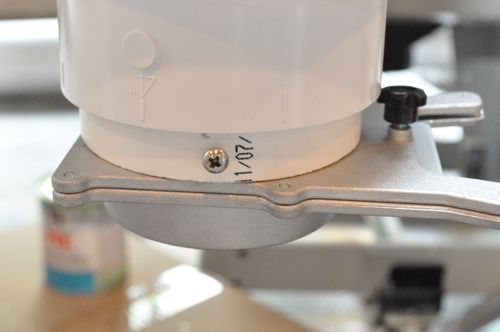
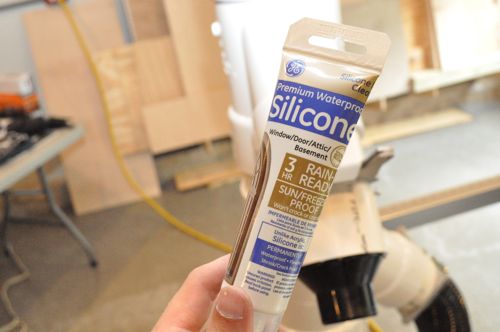
Blast gates direct the air flow to the appropriate tool, and they have the added benefit that they fit the inside diameter of 4″ PVC or flexible hose so in effect they act as a coupler. I secured my blast gates with two screws and sealed the edges with silicone.
Step 4: Make Final Connections
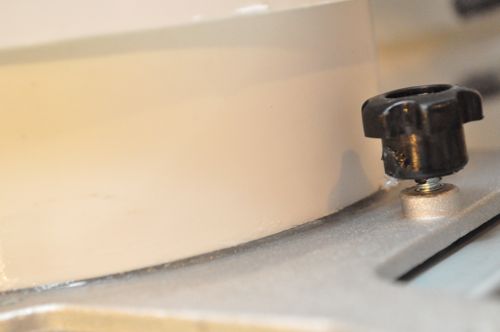
Here’s a look at the blast gate and my 2-1/2″ port. This’ll serve as a connection for a router, shop vac and more.
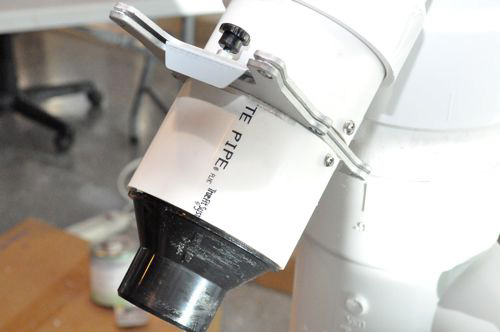
Here’s the floor sweep, and it’s very convenient to sweep dirt and debris into it. I’ve secured the short section of 4″ flexible hose with hose clamps on either end. Originally I had planned on using double-sided tape to secure the floor sweep. It actually works just fine without so I may nix that idea.
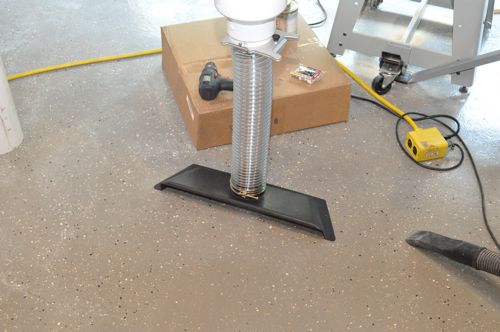
For the table saw, I connected a 4″ flexible hose with hose clamps to a blast gate on one of the wyes.
I don’t have a great solution for my miter saw. To really capture the sawdust I would need to set up a hood, and I haven’t figured out the best way to integrate that with my mobile miter saw workstation.
Step 5: Connect Dust Collector
Like I mentioned, Delta does not provide an easy way to connect 6″ flexible hose so I purchased a starting collar. It had adhesive and predrilled holes for screws. Just make sure the screws are short enough not to damage the impeller fins. In the picture you can also see that I’ve clamped the 6″ flexible hose to the crimped end.
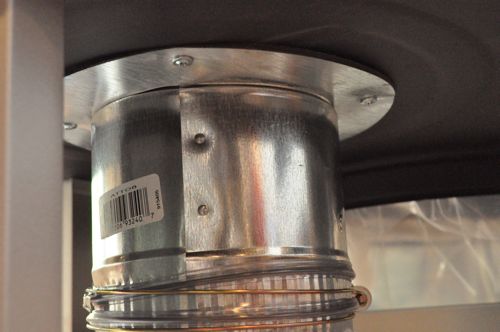
Next, I covered the entire thing in Aluminum foil tape to eliminate air leaks.
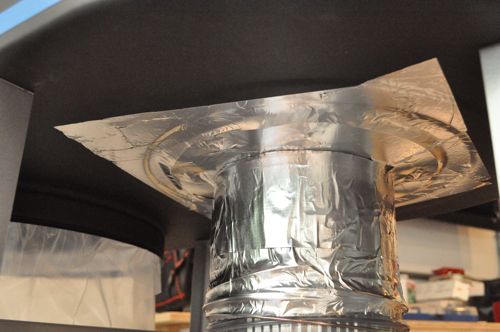
On the other end of the 6″ flexible hose was a 6″ metal coupler. Ideally, I would have used a 6″ PVC splice. Unfortunately, I’m not sure anyone makes splices that big.
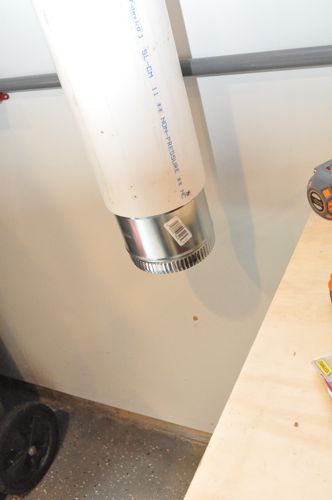
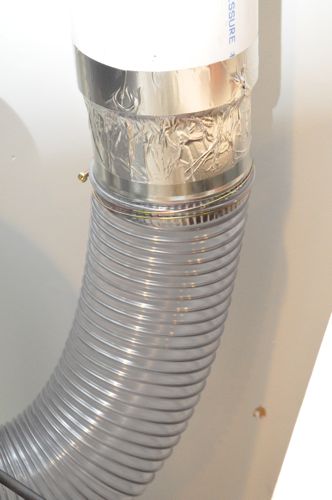
With a couple of screws a hose clamp and bunch of foil tape, I connected the flexible hose to the PVC.
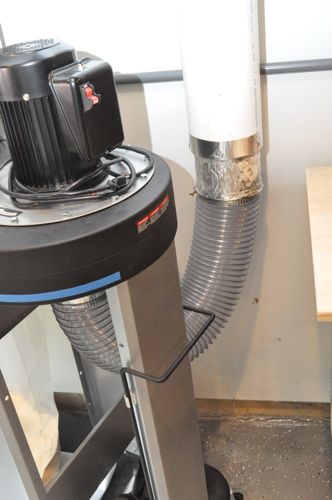
Finished
I fired up the dust collector and listened at all the joints for air loss and found a couple of spots that needed some silicone. Otherwise, it was very tight. Using the table saw was the real test as I’d grown accustomed to minimal sawdust. I grabbed a scrap piece of plywood and made about 15 cuts, and I’m pleased to report that just about all of the sawdust was vacuumed away. I feel really good about how this turned out, and I’m glad that it’ll be easy to expand as I add new tools (like a bandsaw someday).

This DM won’t take the place of an air filtration system. However, it’s a big step forward in keeping my shop clean and safe.


Let us know if you find a good solution to the mitre saw problem – I have the same issue. Right now I just use the 2 1/2″ hose as a shop vac to clean it up on occasion.
I’m debating setting up a permanent miter station. Half the problem will be just finding enough space since I won’t want to limit the size stock I can cut. We’ll see….
I found a free plan for a miter saw station from Jay’s, it might be Jay’s Creations. It is awesome, loaded with storage. I built it set up for the 32’ length of my shop, which gives me 8’ left of saw and currently about 14’ right of saw. The great thing about the plan is it modular and can be built to adjust to any configuration of shop size. The design lends to great accessibility for dust collection as well. It was my very first attempt at any type of cabinet construction and while I would not say it is of resale quality, I think it turned out very well and gave me loads of storage for tools, supplies, etc. I would recommend anyone to check it out for their shop.
Woodsmith just had an e-tip this afternoon on this very thing. It’s a sliding hood that sits in a frame that’s temporarily mounted to a bench.
http://www.woodsmithtips.com/2012/07/19/miter-saw-dust-catcher/
Very jealous of your system. Sweeping gets tiring indeed. Do you have a price estimate for how much you spent on this? Interested to see if it’s affordable for me. Thanks and great post. Keep us updated on how it works in the long run!
This was a pricey endeavor because 6″ PVC (no matter what kind) will run $30 – $45 per 10′ section, and each fittings can cost about as much. Plus there’s all the adapters, not to mention the cost of the dust collector itself. Altogether, something like this can easily run about $2000.
How did you seal around the pipe penetrations in the ceiling? Also where did you get your 4″-2 1/4″ reducer? I was only able to source locally from Rockler. Menards, HD, and Lowes didn’t have it. I have dust collection on my TS too but I still get some above the table even though I always cut with the guard on. Maybe a ZCI would help.
I haven’t sealed around the pipe yet because that’s something I haven’t figured out yet. There is some slight movement so whatever I do will need to be flexible. Any suggestions? I got all my odds-n-ends (including the reducer) off Amazon. I get a very small amount of dust above the saw too. Perhaps a ZCI is a good move.
Maybe a roof pipe flashing boot would work. A non-angled one.
Great DC system Ethan! I recently sold a unit I had for a while before we moved. This wainscoting project we’re working on has convinced me that we’re going to be needing another one soon!! Good use of PVC and the grounding wire to protect you from shock. Clever solutions!
Wow, this is a serious system. seems overkill for a casual DIY’er, but probably a must-have for people with professional shops.
Dust collection is quite important, in my opinion, regardless of how much you use your shop. Protecting your lungs is priority one. I’ve seen more casual set-ups just using a shop-vac, that’s better than nothing.
It’s definitely an investment. However, if you have even a few different shop tools, it’s much more convenient to put the dust collector out of the way and open a couple blast gates every time. Otherwise you’re carting the DC around, and not taking full advantage of it with things like a floor sweep or shop vac hose.
Really nice setup. It feels like have a dust collection system takes you to the next level and commits you to a shop floor plan layout. I have never seen the floor sweep but that sounds like a really handy idea. I’m interested in doing a similar layout option for pneumatic tools and routing cross shop hookups for one large compressor. Should we be expecting any plans or knowledge sharing of shop pneumatics? Thanks again.
Running something similar for pneumatic tools is on my “wish list”. Right now we don’t have the compressor for the job, and I expect we’ll stick with our pancake for a while yet.
Running pneumatic is best to run a 1 inch line or larger for the main trunk then reduce coming off of that if necessary. If you can run 1 inch to all your connection great psi is good but without volume of air you lose power just as fast.
Cool reminds me of shop class except that dust collector was huge. Will keep that workspace looking nice for you.
wonder how easy this would be to build in a garage that hasn’t been drywalled & insulated yet.
That system is pretty awesome. I would love to have one in my shop but my shop is also my garage. This means that the same place I park my Jeep and motorcycle is where I work on them. And it’s the same place I cut wood or any other project. It gets old always having to move a vehicle to work on stuff, but until I can afford a bigger place it will do. I will just have to stick with a shop vac and dust masks
I used to have that very dust collector and loved it. Worth every penny. What happened to it? Oh, I loaned to someone who’s garage burned down with my dust collector in it!
Ken, I know it’s not funny, but I couldn’t help but chuckle at your comment. You never expect to lose a DC to a garage fire. Do you know how it started?
Jeremy says “It’s nice!”.
He’s a man of many words 🙂
Another great job on the walkthrough! I’ve finally moved into the new house and dust management is first on the list for my multipurpose garage/shop! Since I want to do woodwork in the shop and also do furniture refinishing, I don’t want to be fighting dust in the finish all the time (not to mention breathing it in, of course!) Keep up the great work @ OPC!
Great site Ethan. I know this post is dated but hopefully you can help me understand one piece of this as I’m installing metal blast gates in my dc system. When you screwed through the pvc pipe into the blast gate flange, did you predrill holes in the aluminum or is the force from the screw simply holding the gate in place without actually going into the gate? Trying to figure out how I’ll solve this issue in my own system.
Thanks!
Jeff
I have big issues using 4″ pipe. I wanted to keep it simple and use 2″pvc. My main interest is picking up/catching
sawdust. I can see problems connecting any system with adapting fittings to any pvc. all my equipment, 10″ Sears (older),Delta 14″bandsaw, Delta belt/disc sander,and eventually a router table set up. All of them have different sized ports none of which are standard vac hose mates. I want to use a 16 gal 6.5hp shopvac with a 2 1/4″ hose fitting Male end is 2 1/4 o.d.and female is 2 1/8″ I would only use one port at a time w/ a 2″pvc. Anyone have input to this approach?