
This post comes to us courtesy of Lindsay at Southern Lovely! We found a great DIY framed mirror on Lindsay’s site and asked if we could share the “how-to” here on One Project Closer.
We think this mirror looks fabulous, and the project is a really simple tackle that you can do in just one day at a fairly low cost. If you have a large flat mirror in your bathroom and want to dress it up, this project will do it.
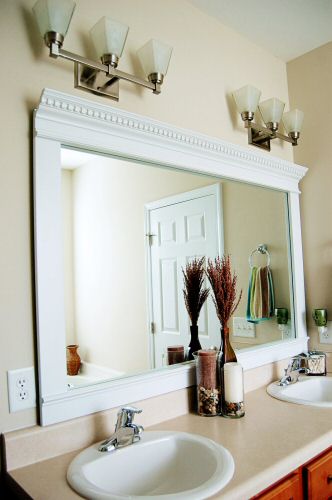
If you’re not already a reader of Southern Lovely, Lindsay’s a mom of three, and enjoys “taking a break from reality and creating anything and everything.” Well, she’s certainly succeeding at creating. We think this mirror looks great! (And so do many of Lindsay’s other creations, like this refinished yellow dresser and much more at her site!)
Tools & Supplies Needed
Total cost: $25-$50.
- MDF trim board (measure your own mirror to determine how much you need based on the instructions below)
- Trim (chose whatever you’d like to add to the MDF board)
- Liquid nails
- Double-sided tape
- Primer
- Paint
- Miter saw (or another saw to cut your board & trim. A Mitre saw will deliver a nice finish)
- Caulk
Step 1: Measure the Mirror and Purchase Materials
In this tutorial, the molding is going to be fastened directly to the outer rim of the mirror (effectively making the mirror space smaller). The top and bottom moldings run the full length of the mirror, and the side trim connects the top and bottom pieces.
Step 2: Cut the MDF & Trim to Length and Assemble
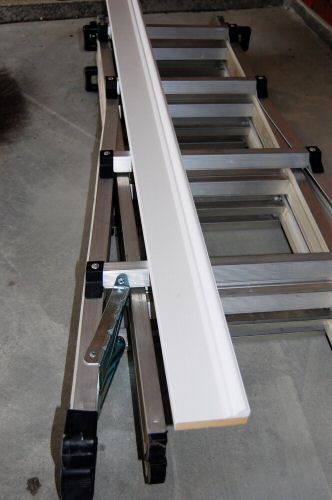
The picture below shows the top length of MDF with the first piece of trim attached. You can fasten the trim using liquid nails and it will be plenty strong enough. You can also use a pin nailer or high gauge finish nailer to add additional strength.
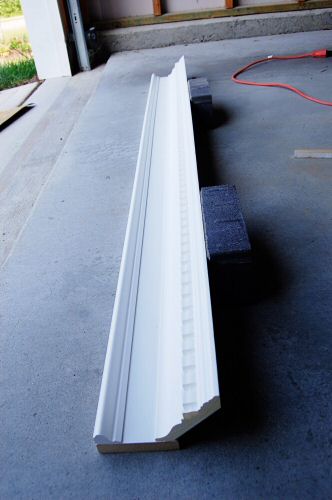
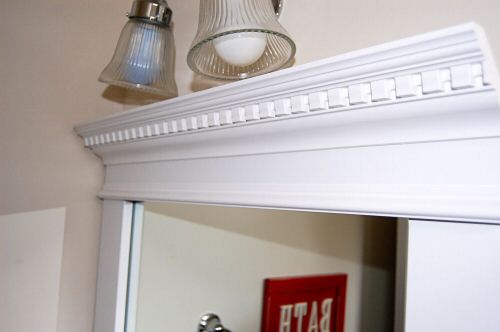
Next, add trim to the top. This can be a decorative crown trim, or really any trim you like best. This should be glued with Liquid Nails and can also be pin nailed or finish nailed.
The bottom and sides are completed in a similar fashion. Note that the sides will be butted up against the top and bottom trim, and so very precise cuts are important. With the visual division the trim provides, any slight seem will be basically invisible.
Step 3: Paint the Trim and Molding
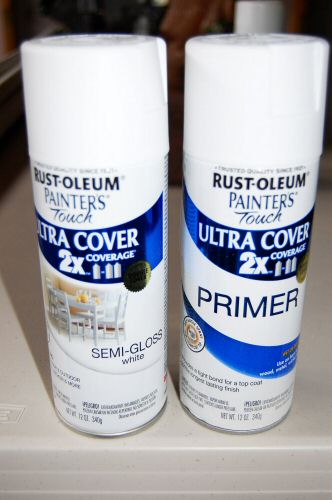
After assembling the trim components, we used Rustoleum spray paint (Primer and Ultra Cover 2X).
Step 4: Fasten the Trim to the Mirror
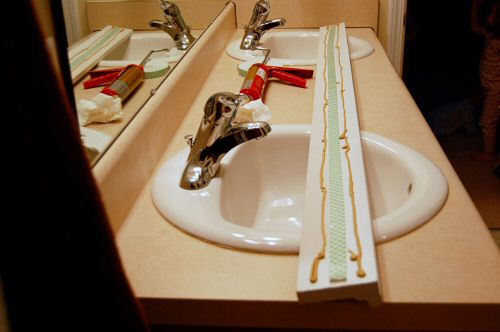
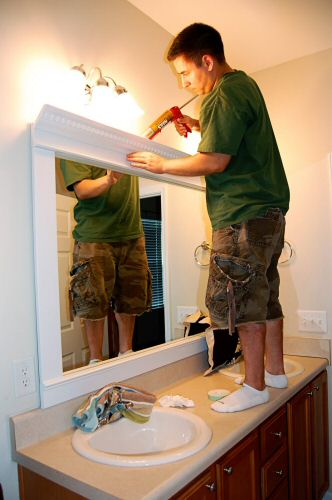
Lindsay found that the best way to fasten the trim to the mirror is with double-stick tape and liquid nails. Make sure to quickly wipe away and clean any glue that leaks out onto the mirror (and use a small bead of glue to minimize this.)
Step 5: Caulk any Seams
You can use simple white, waterproof caulk to hide any small seams, if necessary.
Final Pictures!
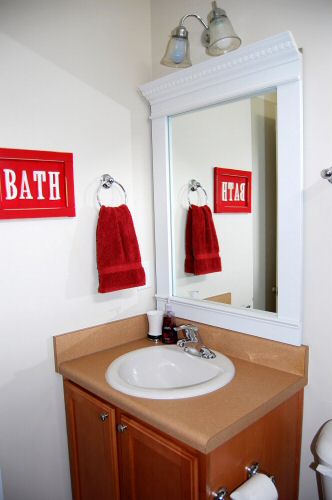
With some additional decor and new up-facing lights, the room is transformed!

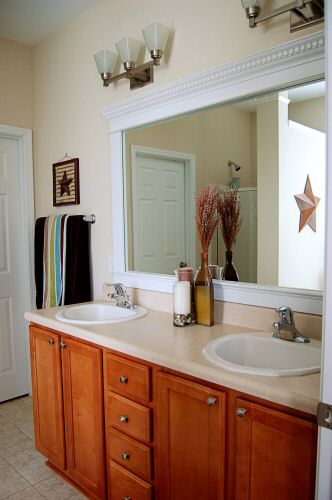
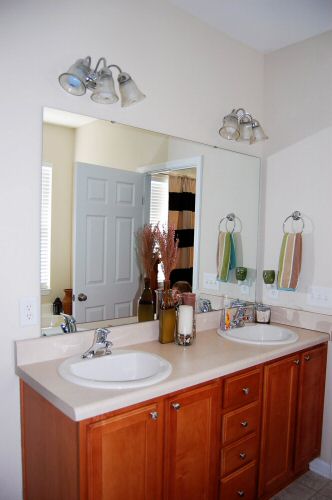
You can follow a similar strategy for smaller baths too. Lindsay did!


Great update! I love the molding Lindsay chose. I have a funny shaped mirror in our bathroom I want to try to update with molding. Thanks for sharing the details!
Funny-shaped could make for a difficult task! If you choose the molding route, they do make rubber molding that will conform to a window’s curve (it’s used on thing like arched windows!)
We have the same large, boring mirror in our bathrooms and I like this concept for dressing them up a bit. However, I think I would have to incorporate returns for the crown molding – I personally don’t like the look of the crown when viewed from any angle other than straight-on (which obviously is most of the time, but hopefully you get my point).
Yeah, I was going to suggest returns too… on all three trim pieces and it won’t cost any more. It’s a great skill to learn. A little wood glue and use your fingers as clamps.
One caveat on MDF, if one is using it for trim boards in a bathroom, be sure to back prime it.
Using trim to dress up a mirror is a great idea and one that almost any diy-er can tackle.
Yep – definitely yet your point. I don’t hate this at all the way it is, but returns would look good too!
Jeff – good tip on the back-priming… Easy step for an extra measure of surety. I’ll update the post.
They look great, though I really think the crown on top could use a return, it looks a little silly floating out in space like that (yeah, I know, I am super critical… be glad I dont do code reviews for you 🙂 )
The only mirror dressing up I have done was when I was a teenager and decided to put vinyl fish decals on my mirrors, I just left holes in strategic places for you to see your face. I had two mirrors facing eachother, so when you stand between them it looks like you are in the ocean with fish going on forever… Yeah, its geeky, but the fish are still on those mirrors (and I still like them for some reason) 🙂
We should feature your vinyl fish decals for an upcoming how to! “How to simulate an aquarium in your bathroom without using water!”
Well Fred, I have pictures of a bathroom from our last home that I painted the walls using a double roller technique going over it twice with a total of five colors including the base that made the walls look like water. Wanna see that too? ;^)
Wow – we could put your water and Joe’s decals together and really get lost in the new oceanic-themed design 🙂
LOL We sure could. I had plans to add fish, but never got beyond printing them from a scan of my shower curtain.
Looks great! I think this looks easier than trying to mitre the corners together like I’ve seen before.
Hey there Beth! Long time no see 🙂 Welcome back (I know – we’ve been posting all remodeling stuff and you dig the decorating, right?!)
I do think this is easier than mitering the corners, and it allows you to put the nice crown on top. If you just did the typical frame, you wouldn’t get nearly as dramatic of a look.
This works if the mirror isnt butted right to the wall on both sides our mirrors wouldnt work with this. But if you can do it its a nice option. I’m fine with the boring way less dusting lol
Oh yeah, this adds so much more interest than the plain old boring mirror. Definitely keeping this in mind for the future!
I do like the idea of covering the returns, however. I think the floating trim would bug me too.
Three votes for covered returns! We’ll have to get Lindsay to weigh in on future plans 🙂
Make that four. Though it’s an awesome idea and so much better than any other full bathroom mirror I’ve seen framed, I too feel it’s just a bit short of being perfect.
Very nice project. And just a radical thought: no law says you can only use white paint!
Lindsay, thanks for sharing this! This update looks great!
Thanks for all the great feedback. We are so new at the whole DIY projects, that to be honest, I didn’t even think to do the suggestions that were made. We will definitely keep them in mind. I am just happy with the way it looks now, to what is was before. One project at a time, right. 🙂 Thanks so much for having me today!
Lindsay, I think it looks great! Thanks for letting us share!
I love the look of a framed mirror and this project looks like a nice and easy one with great looking results! I’m wondering about the use of the double stick tape and guessing it is to keep the wood from sliding while the liquid nails cures.
When I installed thin brick on a wall at our cabin, I came across a product called Loctite Quick Grab. It was like liquid nails except for that it bonded instantly! I loved it – you had a few seconds of moveability and then it was locked in. This product saved me lots of time!
Hi Renee! Thanks so much for stopping by our site. This is the first time I’ve seen you here! The double stick tape is for exactly what you said – holding the molding in place until the liquid nails dries.
Loctite makes a bunch of great fast-drying epoxy products … Quick Grab sounds like it might be an even better product for something like this… Great suggestion!
Hi Renee! This is the first time I’ve seen you around here before. Just wanted to say a quick Welcome to you!
Thanks Kim! I love the site and have now subscribed!
That’s a really neat idea. Great step-by-step photos and instructions. The overall effect is very nice. Thanks
Updating your mirror is all over the DIY blogosphere, but it seems like every post I come across has a mirror that is already glued to the wall with no little support bracket things (really technical, I know) and both of our mirrors have them. I tried gluing the mirrors to the wall with Liquid Nails Mirror Adhesive. I applied the adhesive as directed and then secured the mirror back to the wall with the original brackets.
I didn’t get around to putting the trim on the mirror for over a week. I removed the brackets, glued the trim, secured that with painter’s tape (b/c I hadn’t heard the awesome double-sided tape tip), then closed the door to our small guest bath. About 10 minutes later I hear a loud crash! The mirror had fallen off the wall!
Luckily it was a small mirror, but now it’s been months and I’m still afraid to remove the brackets from the large mirror in our master bath. Sadly, the beautiful trim I have is just sitting in our spare room and not looking awesome in our bathroom. I’ve thought about trying to cut little notches out for the brackets, but I’m not really sure how to do that or how the final product would look.
Any suggestions? Sorry for such a long post!
I also have the problem of having brackets on my mirror. Do you have any suggestions for framing over the brackets? I’m afraid to remove them and glue the mirror – it’s HUGE, and would be a pain to replace.
Replace the mirror clips with washers. The washers are flat and will hold the mirror in place.
Ditto about the returns on the trim. Other than that, it’s a great update. I have heard of others using small nails to keep the frame in place beneath the frame as well.
Tiffany & DoubleMint2x & Paul & Andrea – I was thinking that a mirror adhesive was probably the answer, but it sounds like Paul&Andrea didn’t have such a great experience with that…. I would say that it was probably due more to some particular circumstance in their installation, since gluing mirrors isn’t completely unheard of.
You could always notch the back of the molding for the clips, but the part of the clip below the mirror is still going to stand out. The notching could easily be done with a Dremel-type tool, a router, or even a hand tool (with enough precision and labor).
There are also other options, like carving out the back of the molding so that it lips over the edge of the mirror by, say 1/2″, then notching the molding for the clips. Something like that would be some effort, but would allow you to keep the clips. You’d need the space around the mirror to achieve this, of course.
This weekend we finished framing our mirror. We feel like the mirror in our master is fully adhered to the wall even without the brackets now, but we just didn’t want to risk it. We think that even though we waited over a week, the first mirror wasn’t done drying. It is really humid in this part of East Texas, so we use that as an excuse for a lot of things down here! LOL Used the Dremel to notch the molding to fit around the brackets. Since we hadn’t planned on leaving them up when we started this project we couldn’t completely cover them because we already cut and painted the molding. We did find some thinner ones at Lowe’s so that helped make the notching a little easier.
On another blog post about framing out mirrors they said you could use hot glue to put the molding onto the mirror. We tried that because I wanted it up and didn’t want to go to the store for the necessary adhesive. It is actually holding up…don’t know how long it will last though. We’re skeptical and feel like we will eventually be having to glue it with something stronger.
A tip to those of you who are planning this project…Just like you want to paint the back of your molding b/c you see part of its reflection in the mirror, you want to make sure you don’t put your glue to close to the inner edge because you can see it in the reflection as well. We’ll fix that when we re-hang it.
Thanks for sharing this – esp. the extra details on the hot glue alternative. Would you be willing to send us a picture so I can add it to this post?
Wow, what a difference! It turned out beautifully! Thanks for stopping by my blog yesterday – I am so glad to have found yours!!
This is a great project! I wish I would’ve read it sooner!!!
Nice work, everyone, but for those who are in a hurry, there is a MOEN product that provides framing for a large bathroom mirror, altho without the larger molding on top. Other options include molding from a frame store — which can be more expensive, but would provide unlimited design options and no need to mitre or finish the frame except on the back. *Great tip, by the way.* A frame store, and perhaps even a craft store may do the mitre cuts or painting on request. Alternatively, take down the mirror and donate it to Habitat for Humanity; substitute a second hand mirror with or without frame from HH, a thrift store, a bathroom showroom, or your neighbor’s trash. Another inspiration was gluing tiles to the sides; my next project will use sea glass tiles in 4×4 and 1×1 to complement a backsplash with 1×1 sea glass tiles in a tile mix that includes stainless steel — precious gems metal and glass mix. ….. I love mirrors — and usually buy them second hand for under $100 and give them new life. I also recommend a heavy duty hanging kit at the Container Store for under $10. Another favorite is Home Store where the mirrors are $100-200, but still less than comparable versions elsewhere. A little customizing using the tips above adds dimension, size, value. Has anyone tried to add one mirror on top of the other? I’d appreciate some tips. It is possible to add molding to create the same look, but two mirrors creates more dimension on a flat wall.
Margaret, thanks for adding this! (And welcome to OPC – first time I’ve seen you write a comment here!) Lots of good ideas in this comment that I’m sure others will benefit from.
Great ideas to spruce up a ho-hum bathroom mirror!
my wife will love this idea…!
Great Idea!!. I would also put returns on the crown to give it a more finished professional look. Also you can buy vinyl versions of the crown and the other trim if you are worried about high levels of moisture damaging the wood or MDF. I would be concerned near the ceiling where alot of moisture will linger during and after a shower.
Love this look of the mirror. We have one just like it to frame ourselves. I love the light fixtures you chose, are they chrome finish? what finish is your vanity hardware?
Love this I actually did this to an old mirror I even had them cut the trim and because I had one side close to the wall I glued directly on the mirror equally around looked great everyone came to my house loved it . . I am going to do this again when we redo our down stairs bathroom beautiful great job