
We’re back with another Pro-Follow update for the bathroom remodel with Steve Wartman and his crew. If you’re just joining us, you can read up on the progress so far at these links:
- Day 1: Demolition
- Day 2: Plumbing, Electric and Concrete Board
In the introduction to this project, I mentioned that moving the bathroom fan was part of the plan. The original fan was situated on the opposite side of the shower and vented into the attic space. Steve wanted to relocate the fan so that it more effectively pulls moisture from the room, and he wanted to vent it out through a nearby soffit.
Electric
When the electrician came through on Day 2, he was able to reroute the electric from the original fan to the new location without pulling any new wires. This was really fortunate because that meant the wall switch was all ready to go.
If that had not been the case, the electrician would have needed to fish a new cable (14/2 NM-B) from the switch to the new fan and either run a new circuit or (more likely) extend an existing circuit.

Materials
- Bathroom fan kit (fan, ductwork connections, soffit cover, fan cover)
- 4″ flexible ductwork (see below)
- Aluminum tape
- Wire connector and wire nuts
Flexible Ductwork
Flex duct is an acceptable choice for this project. However, rigid duct is an even better choice because it improves air flow. Opt for rigid duct when possible.


Tools
- Drywall saw
- Drill / driver
- Hole saw
- Utility knife
- Wire strippers
- Pliers
- Ladder
Step 1: Cut the Hole
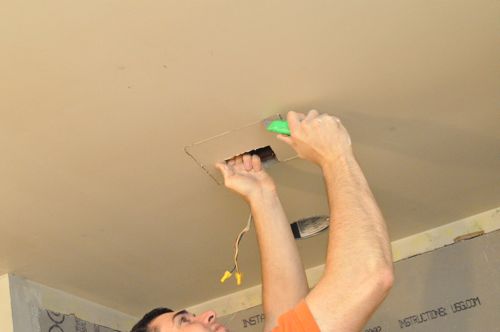
The guys provided the general location for the electrician to pull the wires. To install the fan, they needed to enlarge the hole, and they wanted the final location adjacent to a stud for mounting the fan.

After measuring the fan, they marked lines and cut out the drywall.
Step 2: Trim Duct to Length
The guys ran 4″ flexible duct between the fan and the soffit, cutting it to length.
Pro-Tip: Cut the ductwork only as long as needed. While leaving extra length may help during the installation, your bathroom fan will have to work harder to move air through.

The bathroom fan kit includes a coupler between the fan and the ductwork, and they secured the ductwork with aluminum tape.

Step 3: Run the Ductwork
Fortunately, the soffit is a short distant away, and after shifting a little insulation, they can push the ductwork through. Had that not been the case, they would have needed to go into the attic to run the ductwork.
Pro-Tip: Run the ductwork as straight as possible to avoid restricting air flow.
Pro-Tip: It’s best to run bathroom vent ductwork through conditioned space to prevent the moisture-rich air from condensing inside the ductwork.

Step 4: Make the Soffit Connection and Install the Cover
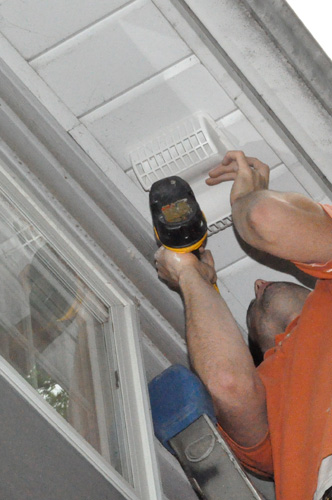
This bathroom vent kit includes a soffit cover with slats that open as the air is forced out.

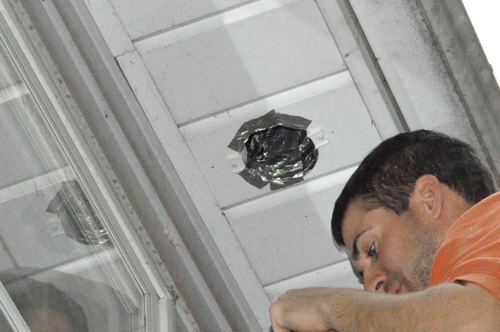
Using a hole saw, they cut a 4″ hole through the soffit.
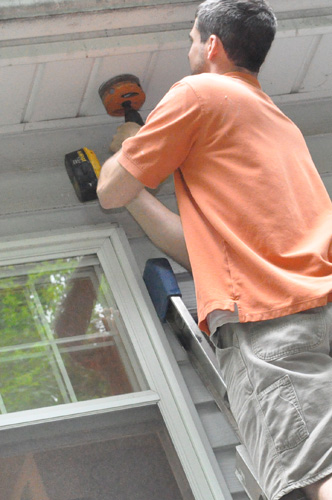
Pulling the ductwork to the opening, they secured it in place with a combination of plastic clips (included in the kit) and aluminum tape.
Next, they screwed the soffit cover in place.

Step 5: Wire Bathroom Fan
One corner of the fan features a removable plate with a knock-out, and behind that plate are the hot and neutral wires.


After removing the knock-out, Steve’s crew pushed a plastic wire connector in place and fed the wires through.
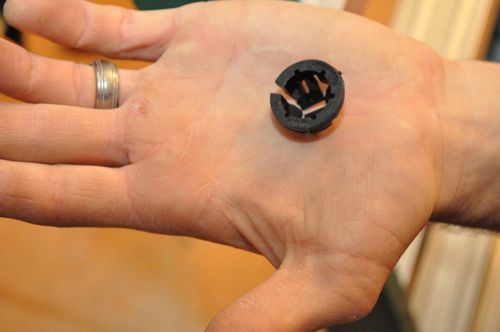

They connected the bare copper wire to the ground screw, and they paired the black wires together and the white wires together.


With all the connections made, they screwed the metal plate back in place.

Step 6: Mount the Fan
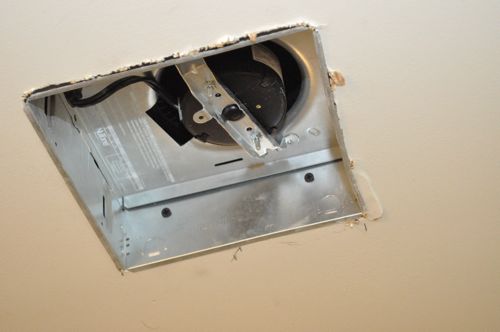
After making the hole a little bit larger, Steve’s crew pushed the fan into place alongside the stud. This fan included a few metal fins to help hold it in place, and the guys drove screws into the adjacent stud.

Step 7: Install Fan Cover
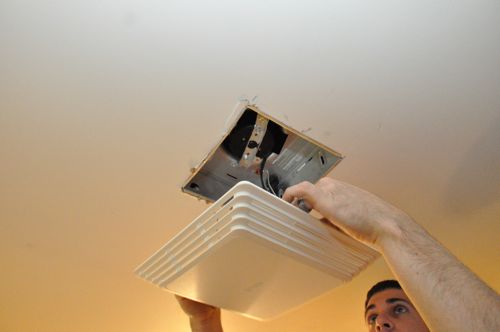
The last step for this install was to hang the fan cover which is secured with a pair of metal hooks.
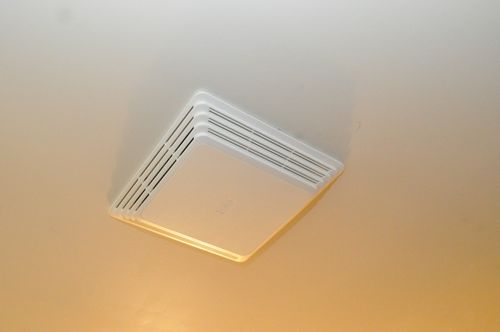
Finished


Definitely something remodeling enthusiasts should check out when they want to get the job done with flying colors! Thanks for the step-by-step guide. Keep up the good work!
Danger, Will Robinson!
Sorry, Lost in Space flashback!
On a more serious note, I completed an almost-identical project several years ago and was very happy with a job (I thought) well done. A few years later I re-shingled my roof and found that the sheeting above the soffit where the exhaust vent was located had rotted, and I had to replace the sheet in that area.
As you know, warm air rises and the soffit did its job and redirected that warm air back into my attic space. The moist warm air that infiltrated the attic caused the rot. Had I not replaced the shingles, I would not have discovered the problem, which could have led to serious structural damage that could have compromised the whole roof. Here in Canada, snow loads can be quite substantial and I shudder to think what could have happened had the rot destroyed my roof trusses as well.
As I said, Danger!
I enjoy your articles and the pictures do a really good job to illustrate each project.
Thanks for a very useful and very informative site.
Matthew
That’s a great point to consider, and I appreciate the comment. I’m willing to bet the different climates play a part in the equation. However, I don’t have a definitive answer. Did you re-route the vent to go through the roof?
I had the same issue, so I routed mine to an existing roof vent.
We didn’t have any bathroom fan when we moved in so Jeremy added one, but currently it only vents into the attic. Its on our very long to do list to eventually vent it outside. I am a little worried about mold and moisture in the attic in the mean time, but we check it periodically and it hasn’t been a problem yet.
You need to vent it outside!!! for mold issues, as wall as possibility for rotting and damaging the roof. I say put that high on your list, along with an attic fan, if you’re going to be cutting holes in the roof.
What about using solid ducting? Wouldn’t that promote better airflow?
When using flex pipe, make sure there are no sags in the line, or water could condense and pool there, and if its bad enough, eventually block the line completely. I believe it should be insulated as well if it is running through unconditioned space (to reduce condensation inside and out, depending on the season).
I usually run rigid duct from the outside vent back as close to the fan as possible and then 8-12″ of flex. Oh and tape the seams at every joint. Get almost the full benefit of rigid with hardly any time invested.
Should’ve left the original fart fan in place and just added the new one on the same switch. Now there’s nothing over the toilet to expel offending odors.
hehe Fart Fan 🙂 I agree
Hehehe…. A while back I had a conversation with Broan, and they said that some people prefer the silent fans while other people want the noise to mask other ah… certain noises. The funny thing is, Fred pointed out that the white noise is only good inside the bathroom which means that everybody can hear you regardless.
When we did a similar project, we opted for the roof vent rather than the soffit vent for the reasons Matthew mentions.
Did you run the duct yourself? How difficult was it to seal around the hole in the roof?
I sometimes forget to turn the fan on when i take a shower…I’d install one that runs whenever the light is on, but then when you goto the bathroom at 2am, it might be too noisy.
Any ideas?
Humidity sensing fan. It will turn on when the preset level is reached.
Ah that is such a bad placement of that exhaust!! It is against code here but I don’t care where you live it’s not an ideal spot. You should be teaching DIYers (1) to leave the line straight through the roof our out a side wall with no soffit above and (2) to use rigid duct where possible with insulated flex connectors. If those locations are not available out the side wall a few feet below the soffit is the next best option. Out the soffit is about the worst spot you can put it. Just because it’s a convenient location doesn’t make it right. Any HVAC engineer can tell you that.
Robin, can you elaborate why? It appears that the soffit isnt vented. This placement is allowed by code in our area. I too like ridged runs with flex connectors.
Hi Robin,
I double-checked, and, like Fred mentioned, the soffit isn’t vented. I can’t see any problem running the duct this way as the moisture doesn’t go back into the attic. Sure rigid duct is preferable. However, flex duct is an acceptable alternative. Is there another concern? I know you design HVAC systems (and probably have special knowledge) so hopefully you can be more helpful.
Well my biggest concern was that it was vented just not in the small section you see in the picture. It’s pretty rare to not have a vented soffit around here unless it’s a decorative one. The side wall a few feet down from the soffit would have been a better location because that gives the hot humid air a chance to escape into the atmosphere better. Supplying hot air under the soffit means it will be collecting up next to the house because of the coanda effect before it gets out into the atmosphere. Luckily this soffit isn’t very wide. This is a short cut I see taken all the time and there is usually a better place to put to put it.