
Recessed lighting is a common part of many home improvement projects, and I’ve seen it installed in basements, bathrooms, kitchens, bedrooms and more. It’s a topic I’ve touched on before with my recessed lighting tabletop demonstration. However, today’s Pro-Follow will showcase how Russel, a master electrician and owner of ETC Electric installs recessed lighting with some important tips along the way.
Usually it’s a requirement to obtain an electrical permit for work that includes a new or extended circuit, and sometimes only licensed master electricians can obtain these permits. You can usually find more information and where to file for permits via links on your local authority’s licensing and permits web page.
Pro-Tip: Most jurisdictions follow some variation of the National Electric Code. You can get limited free access to the NEC via NFPA’s web site at that link.
Pro-Tip: In some areas, homeowners can take a general electrical examination, and if they pass, pull their own permits and do the work themselves.
Materials
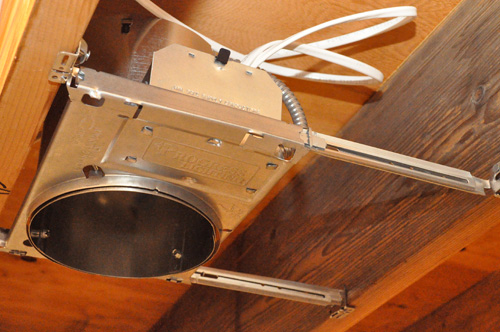
Russel buys most of his recessed can lights through a local electrical distributor called Capital Tristate because DIY centers don’t carry brands like Juno and Progress Lighting that he prefers. For unfinished spaces like this basement, Russel purchases new work cans. If this had been a finished basement, Russel would have purchased old work (a.k.a. remodel) cans.
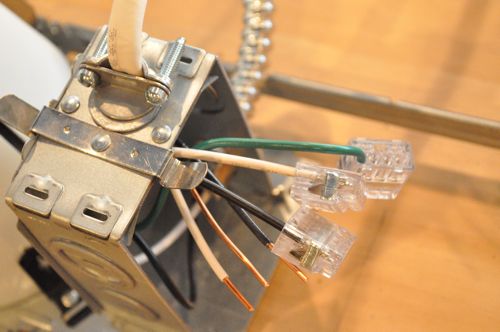
There is some debate regarding the reliability of push-in or stab-in wire connections, and none of the professional electricians I’ve worked with use that style connection. However, they are UL listed and significantly faster to wire. In my opinion, it’s a toss-up, and pros usually stick with what they’ve been using.
IC vs. Non-IC
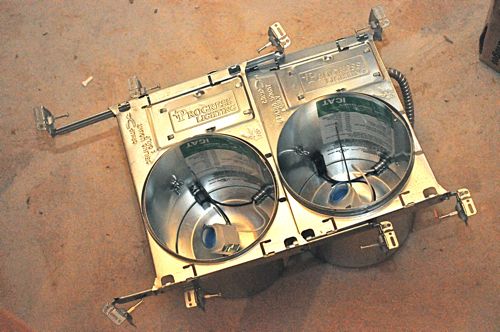
All recessed can lights are rated for insulation contact (IC) or no insulation contact (non-IC), and some are convertible between the two depending on what trim kit and what wattage bulb is used. IC cans are appropriate for attic installations and other installations where insulation will directly contact the can. Non-IC cans are appropriate for most first floors and basements, or anywhere insulation will not touch the can. The manufacturer will include information about the required air gap around non-IC cans and it’s usually 3 – 6″.
Some of the other materials necessary for this project include cable connectors, wire nuts and staples.
Pro-Tip: Check local code to learn if you need to use insulated staples to secure cables.

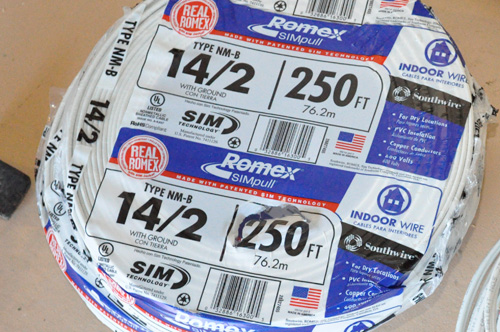
For this job and most other lighting applications, a 15 amp circuit and 14 gauge, 2-wire (14/2) is appropriate.
Pro-Talk: The term “2-wire” refers to a cable with a hot, neutral and ground wire within the wire sheathing. “3-wire” includes these wires and an additional red wire called a traveler or signal wire. 3-wire is used for three-way switch configurations (where two switches control the same light), as well as interconnected smoke detectors.
Step 1: Plan Layout
The first thing Russel does is plan the layout of the lights with the homeowner. He asks questions about how the space will be divided up and used and if there specific task lighting needs. He also plans the switches in such a way so that you won’t need to backtrack to turn off a bank of lights.
Circuit Requirements
As Russel plans the layout, he’s keeping several requirements in mind:
- Some jurisdictions may also impose a limit on the number of individual fixtures on a circuit.
- Circuits may be loaded up to 80% of their nominal capacity, meaning that a 15 amp circuit can have 13 amps of loading.
- Most fixtures are rated by wattage, rather than amperage. A 15 amp, 110 volt circuit may be loaded up to 1430 watts (80% of 15 amps = 13 amps; 13 amps*110 volts = 1430 watts). This means you could theoretically have fourteen 100 watt recessed lights on a single circuit.

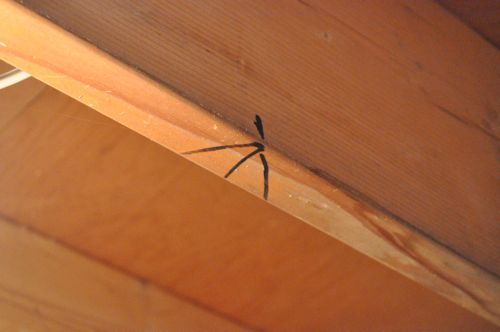
After determining the general location for the lights, Russel goes back to measure and mark the joists in the exact location. He typically divides the space evenly with the cans close enough to “overlap” the light to better eliminate shadows.
Step 2: Run Wire
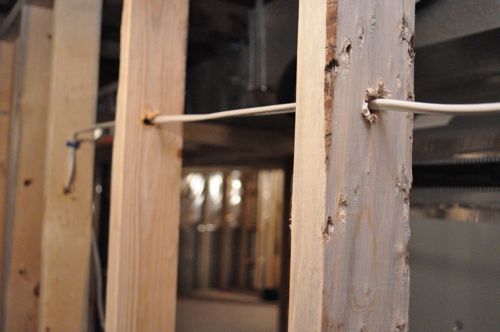
Next, Russel runs 14/2 cable leaving a generous amount of excess for wiring the lights. Whenever possible, Russel runs the cables parallel to the joists and often uses concealed space within a bulkhead to traverse perpendicular to the joists. He secures the cable with an insulated staple every 4′ and within 8″ of the switch box and fixture. He also runs a wire from the circuit breaker panel to the switch.
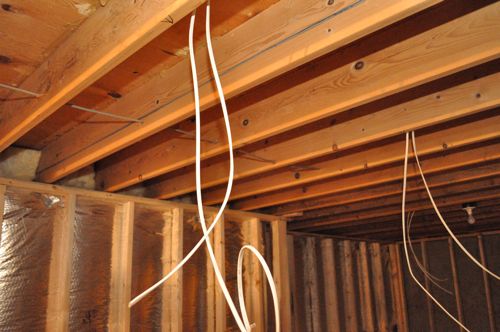
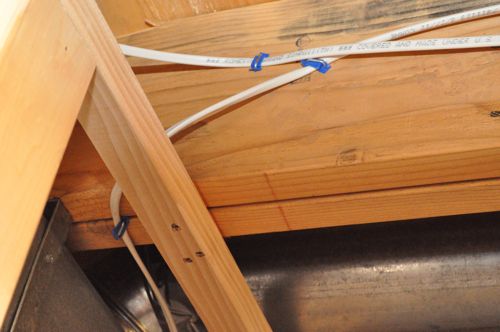
Sometimes the best solution is to drill through the joists, and there are important guidelines to remember when drilling structural members. For drilling through joists, the hole must be no larger than 1/3 of the actual joist depth, and must be inset 2″ from the top or bottom of the joist. There’s no restriction on where along the length of the joist the hole must be positioned.
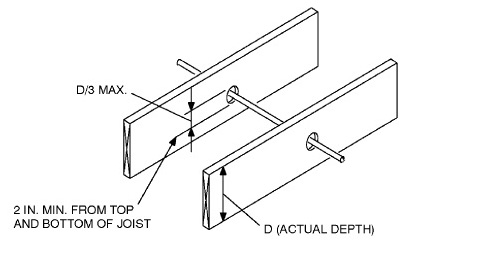
Pro-Tip: Find all the details about cutting, drilling and notching structural members in section R502.8 of the International Residential Code (IRC).
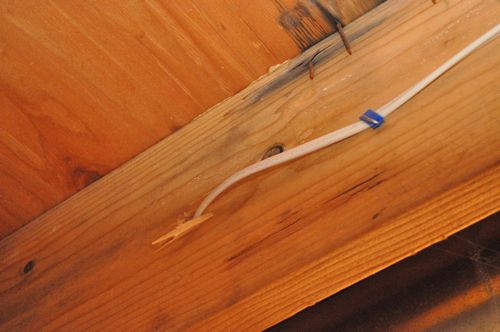
Pro-Tip: TJI joists often feature knock-outs for running utilities.
Pro-Tip: NEC 300-4 states that where cables are installed through holes in joists, rafters, or wood framing members, the holes need to be not less than 1-1/4″ from the nearest edge. If that’s not the case, the cable need to be protected from screws and nails by a steel shield plate at least 1/16″ thick.
Step 3: Wire Light
Next, Russel wires the light, and the first step is to run the cables into the fixture. There are several ways to do this. In my opinion, the easiest approach is to use plastic hit-lock cable connectors that snap into a knock-out and grab the wires.
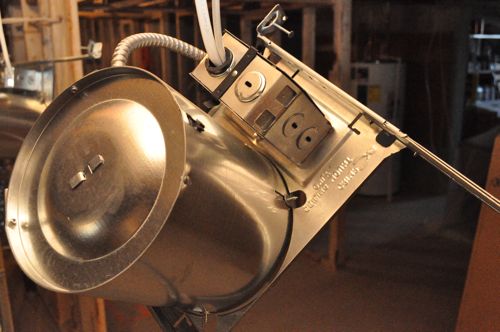
After stripping back the insulation, Russel pairs all the hot wires, common wires and ground wires together. Next, he securely twists them together and cuts away any excess exposed copper. Lastly, Russel adds a wire nut.
Pro-Tip: Several electricians I’ve spoken with all agree, the most common DIYer mistake is failing to properly twist wires before adding the wire-nut.
Pro-Tip: NEC 370-17 states that the outer jacket of NM cable shall extend into the box a minimum of 1/4″.

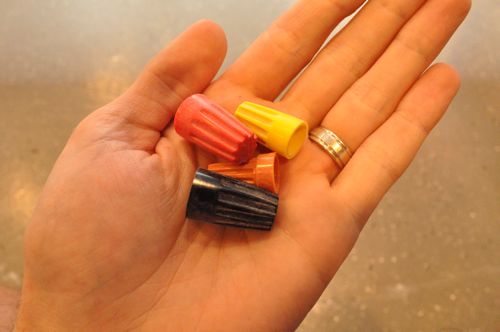
Pro-Tip: Wire nuts are available in several different sizes, and they are commonly color-coded to indicate capacity. Here’s a simplified guide for sizing wire nuts from The Home Depot.
Here’s a look at another way to run the cables into the fixture that doesn’t use knock-outs or a cable connector.
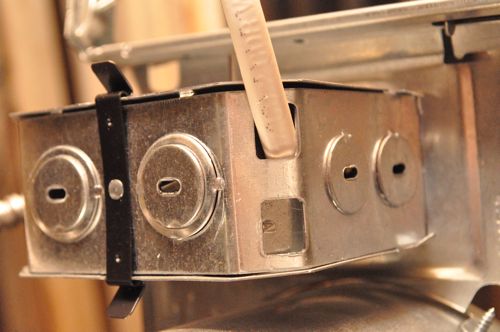
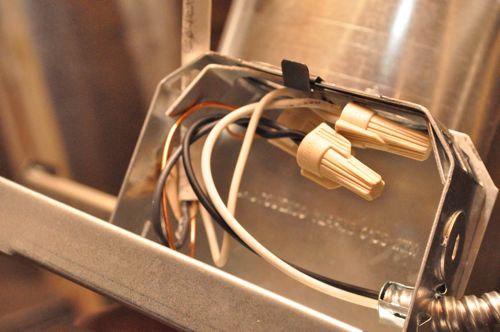
Using twin screw cable clamp connectors is another common way to run the cables. This example also shows the push-in style wiring (not yet wired).
Step 4: Secure Fixture
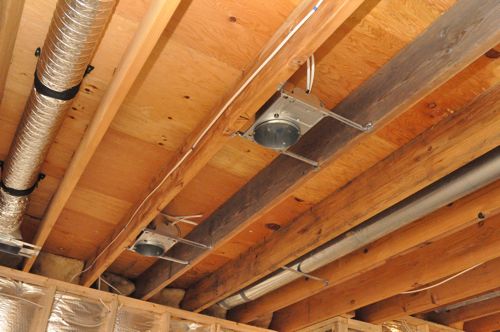
After Russel has all the fixtures wired, he nails them in place.

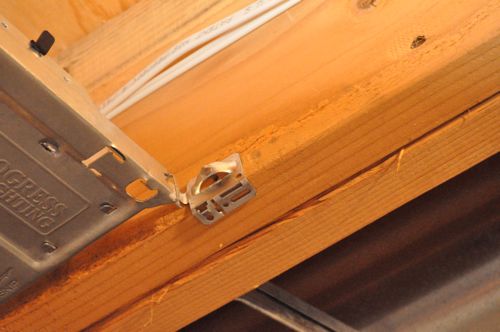
Most cans will slide side-to-side along the mounting bracket so you can position it as needed.
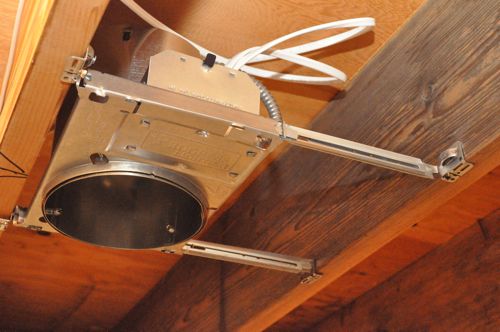
It’s common for the brackets to be bent as needed.

Step 5: Wire Switch
At a minimum the switch box will have a cable coming from the circuit breaker panel and a cable going to the first recessed can light in the group. In that scenario, Russel will splice the common wires together and splice the ground wires together with a pigtail for connecting to the switch ground screw. The two hot wires will be connected to the hot (golden screw) terminals on the switch.
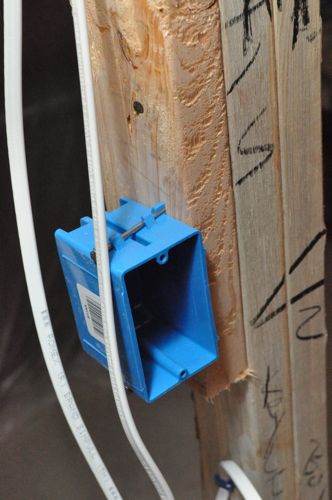
Pro-Tip: Although not required by code, receptacles are typically placed 48″ off the ground.
Pro-Tip: NEC 370-16 states that the volume of electrical boxes shall be sufficient for the number of conductors, devices, and cable clamps contained within the box. Nonmetallic boxes are marked with their cubic inch capacity. Use the following table to properly calculate box size:
| Conductor Size | 14 gauge | 12 gauge |
|---|---|---|
| For each separate insulated wire | 2 cu in | 2.25 cu in |
| All ground wires (combined) | 2 cu in | 2.25 cu in |
| For each device (switch/receptacle) | 4 cu in | 4.5 cu in |
| All internal cable clamps (combined) | 2 cu in | 2.25 cu in |
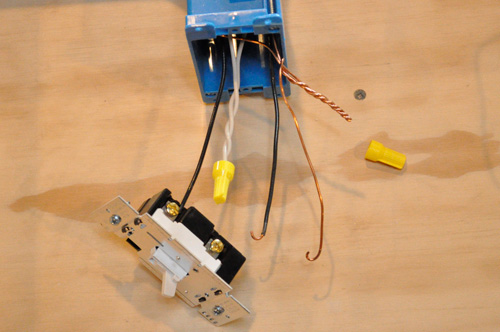
Pro-Tip: New code requires a neutral wire be located at every switch, because neutral is required for some newer dimmer switches to function. In the past, an electrician could run a 2-wire “switch cable” from an overhead lamp down to the switch. This cable would bring power down to the switch on the white wire, and take “switched power” back to the lamp on the black wire. When Russel runs cable for the lights in this basement, the circuit will originate at the sub-panel and travel to the switch boxes first, before heading on to the lights, resulting in a neutral wire at both the switch and the lights.
Switches, especially dimmer switches, may have a lower wattage limit than the overall breaker. 400-600 watt limits are normal for dimmer switches. Russel ensures that each switch is rated for the appropriate wattage.
Step 6: Wire Breaker
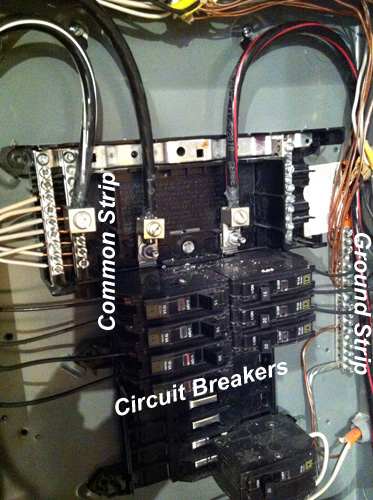
At the panel, Russel uses the same hit-lock connectors to run the cable.

With the panel break off and the individual circuit breaker off, Russel connects the hot wire to the circuit break, the white wire to the neutral bus bar and the ground wire to ground bus bar. Note that in sub-panels (pictured), the ground bus and neutral bus are separate. In the main panel for a house, ground and neutral are tied together on the same bus.
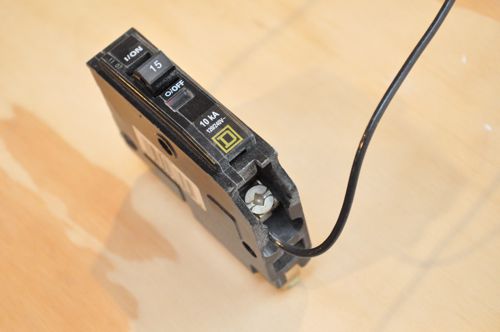
After Russel makes the necessary connections, he turns the panel and the circuit breaker on.
Pro-Tip: In virtually every jurisdiction, permits and an electrical rough-in inspection are required prior to installing drywall. Failure to get a proper inspection may lead to the inspector later requiring that all drywall be removed. This can be extremely costly, so this step should never be skipped.


I love doing electrical work. Not sure why, I just think it’s fun.
Did you do a subpanel in that fancy garage of yours? Do the wiring yourself? I pulled a new line and subpanel in mine last winter and it was the best decision. 40A @ 220V has done wonders for my small shop.
So the previous owners of my house rarely used their bulkhead (which I use nearly every day being a cyclist whose workspace is in the basement), and as such there is no switch there for the basement bank. Were I to correct this situation (or an electricial were to), would I need to swap out the 2-wire (that I assume was previously used) for 3-wire since I really want 2 switches to control the lights?
One thing I don’t like about recessed lighting is when people punch holes in their building envelop to install them on the top floor. A normally cold attic is now kind of warm from the lights and air leaks and then ice dams develop on the roofing. If a person wants cans lights on the top floor I’d rather see them air seal and insulate with a cap or spray foam the underside of the roof sheeting and make it a hot roof.
I am so glad to read a comment from somebody who also cares about leaky buildings and the importance of a proper building envelope (not just a weather envelope but air as well)!
I always wondered about the colors on wire caps, thanks for the link.
Also, seems strange that the runners are just bent for some situations. Seems like cutting them to size would work nicer
Why are they calle New York recessessed lights?
Looks like a fun project. I’ve always wanted to get into doing electrical work. Thanks for the post.