
Today we’re featuring a guest article by Ken from The Joy of Moldings
Jennifer’s kitchen is getting a top to bottom molding makeover. I just installed the crown molding and door trim (a Greek Revival eared architrave style), but still have the baseboard and wainscoting to go. Since I get so many questions at The Joy of Moldings.com about how to paint crown moldings, I thought I’d share my painting techniques with One Project Closer readers.
Project Price & Materials
- Crown Molding Materials From Lowes: $211.75
- Primer: $30.74 Sherwin Williams Wall & Wood Primer (this primer will last for most of the house)
- Trim Paint: $65.99 Benjamin Moore, White Dove OC-17, Satin Finish (This will last us for most of the house as well)
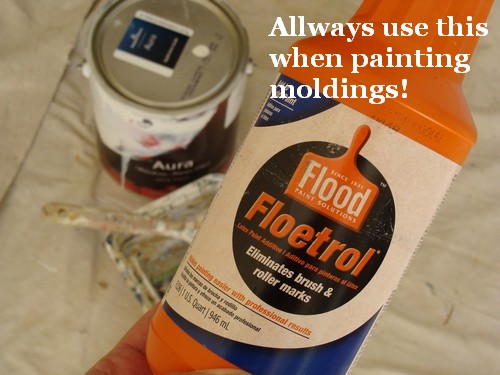
- Flotrol: $7.00 Paint Additive
Grand total: $315.48 + tax
High-Resolution Painting
My goal when painting moldings is to make them look like they are an integrated part of the home’s architecture, and not just sticks of painted moldings nailed to the walls. To achieve that solid look on both moldings and walls, I’ve developed a series of preparation and painting steps that consistently give me what I call a high-resolution paint job
How to Prepare the Crown Molding for Paint
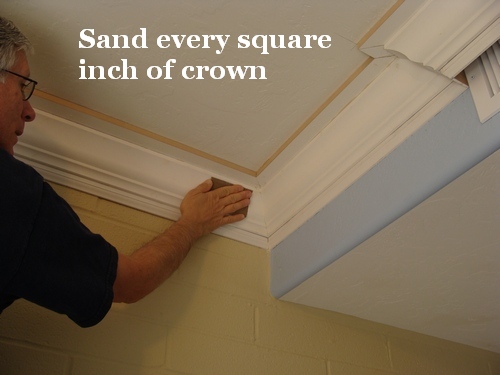
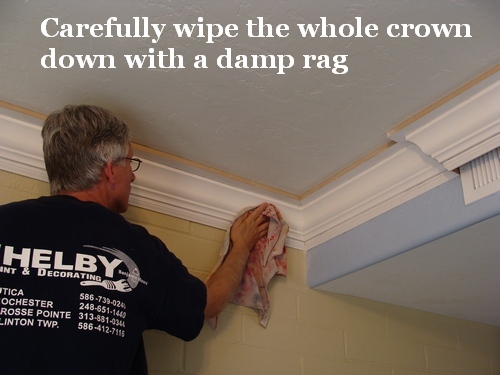
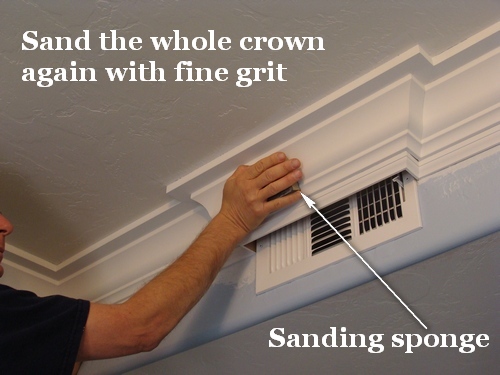
I’ve already spackled all the nail holes, so the spackling is dry and ready to sand. I work in small sections from top to bottom to make sure I don’t miss anything. When I’ve finished a section I run my hand over it to feel for imperfections that I can’t see. If I can feel an imperfection, then it will probably show through the finish coats of paint, so it gets sanded.
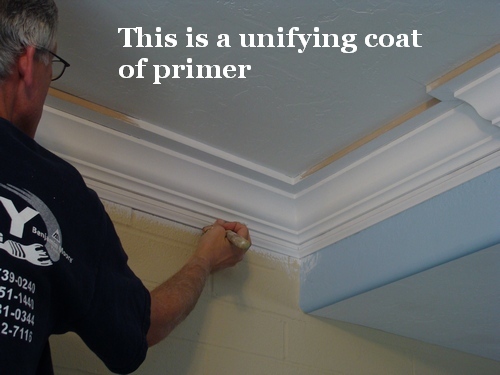
Prime the Whole Crown Molding
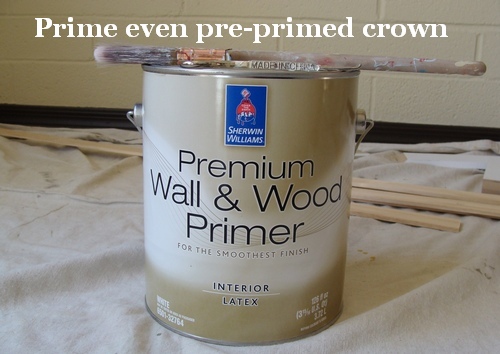
All of those nail holes and other places I’ve spackled have to be covered over with primer or else they will show up as little rough spots through the final coat of paint. So I just prime the whole crown molding.
Caulk The Crown Molding
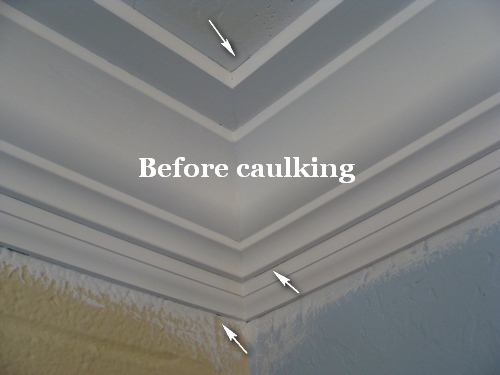
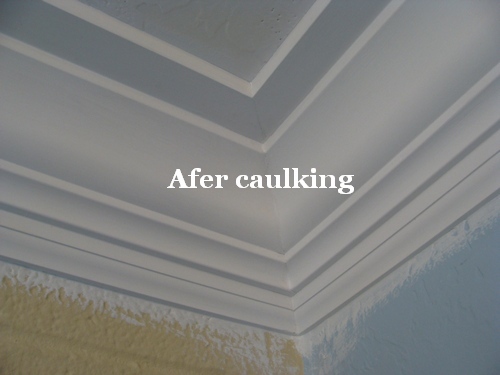
A common complaint about painting crown molding is when someone runs a fat bead of caulk across the top and bottom of their crown molding, and then wonders why they can’t cut-in a straight line of wall paint against the crown.
The not-so-secret secret to painting straight lines against your crown is to do a really great job caulking it.
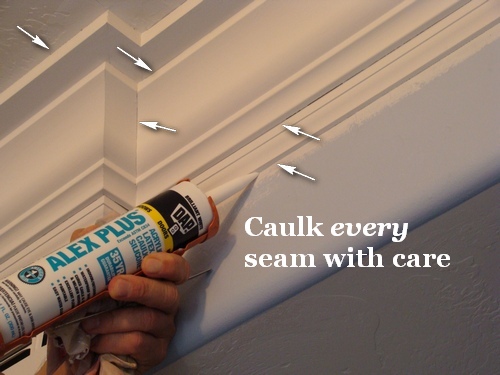
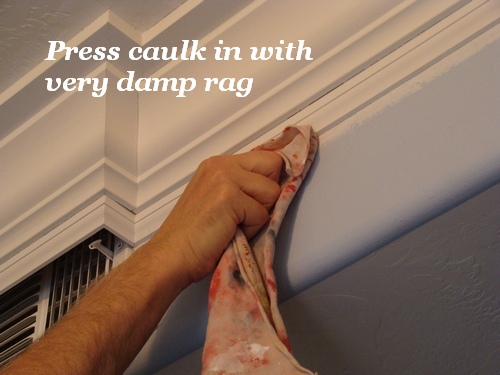

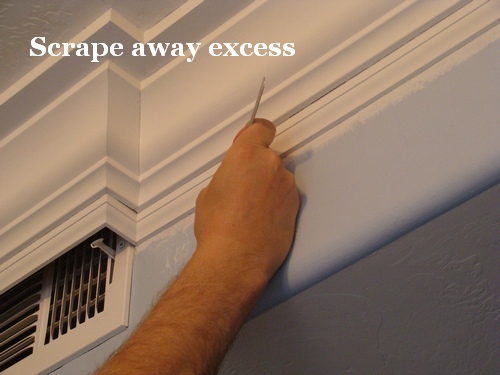
Caulking is one of the most important steps in bringing my crown to an ever-increasing state of perfection. This is a monotonous task, so I just put on some music, make sure I’ve got lots of Jennifer’s, yummy home-made snacks at hand, and try to make it as enjoyable as possible.
How to Paint the Crown Molding
Some folks love to paint while others would rather have a root canal without Novocaine. If you’re of the later group, these tips might help ease the pain.
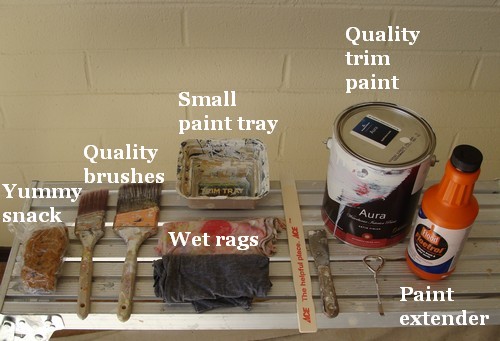
I always use a paint leveler/extender when painting moldings. Always. It extends the time you can work with the paint before it starts to tack up, and that leaves me with fewer brush strokes in the finish coat.
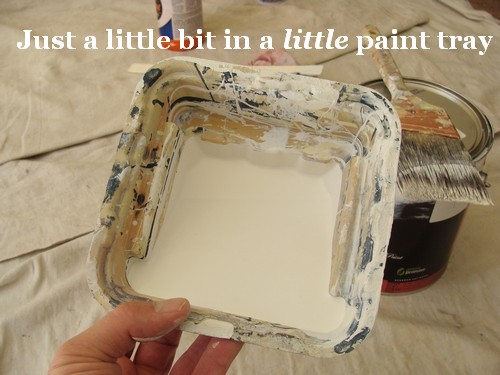
When doing brush work, I never, ever work out of the paint can or out of a large paint tray. Better to run back and add more paint to a small tray than to let the paint get sticky in a large one.
Painting Sequence
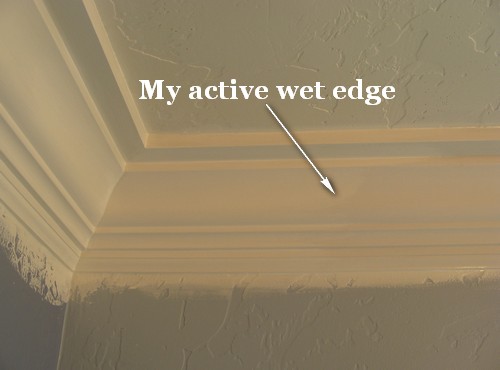
My arm just sort of goes on auto-pilot when painting crown. That’s because I have a sequence I follow that ensures I paint quickly enough to maintain a wet edge to the paint, and get that give me the best finish possible.

I can not maintain a good wet edge if I’m concerned about getting paint on the walls or ceiling, because it makes me paint too slowly.


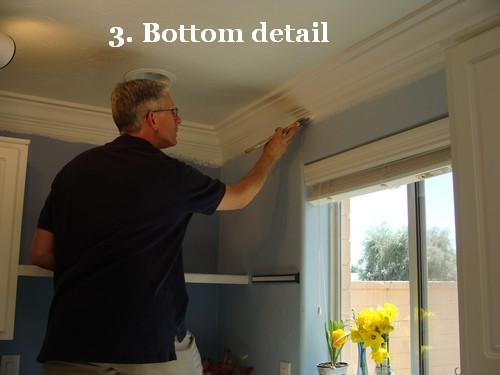
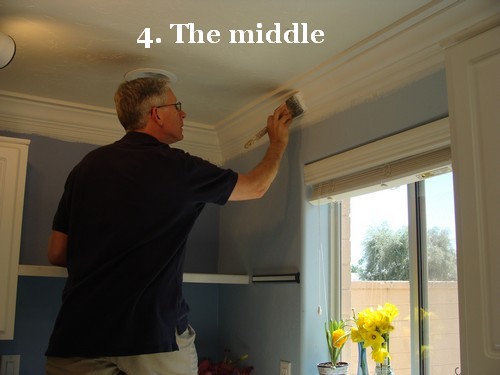
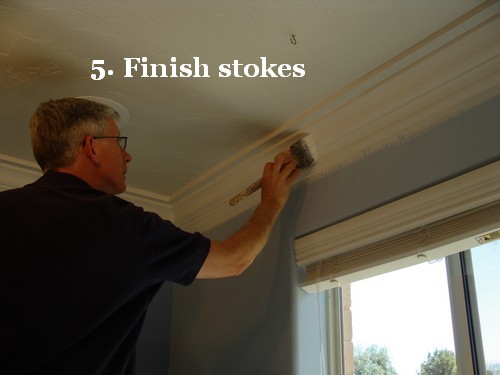
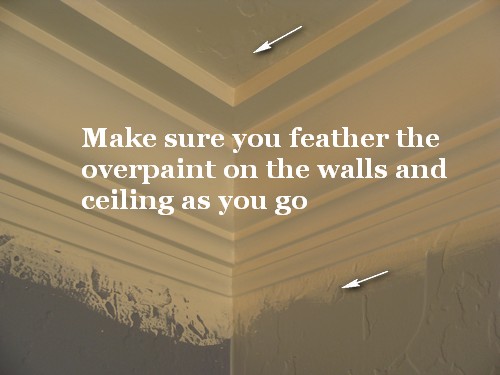
I’ll put a bit of primer over the overpaint before I paint the walls.

It’s a race between painting quickly yet in control to maintain a very wet edge — so the crown has a perfectly blended finish coat — and painting so slowly that I leave brush strokes and start and stop marks in the finish coat.

Two coats are better than one. I always paint two coats on my trim, ceilings and walls (even if the manufacturer says it covers in one) — it’s the only way to get the true color of the paint.
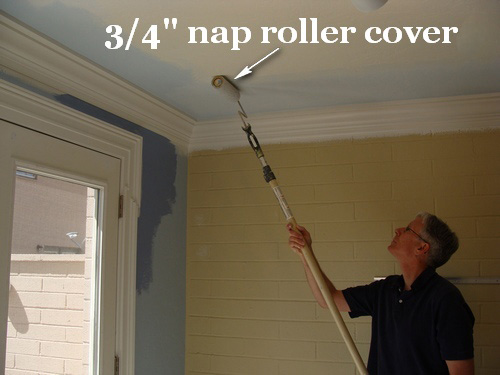
Paint The Ceiling
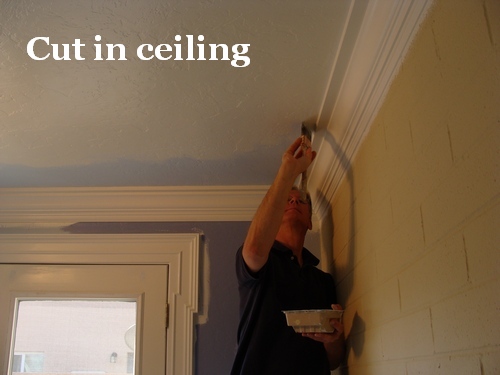
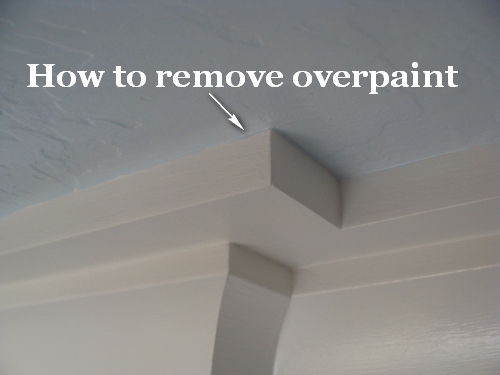
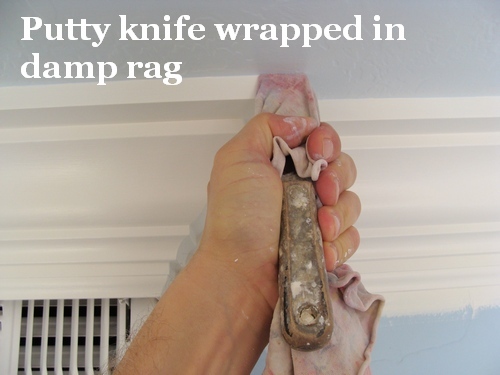
When I get just a little bit of overpaint on the crown, I use a putty knife and damp rag to remove it.
Paint the Walls
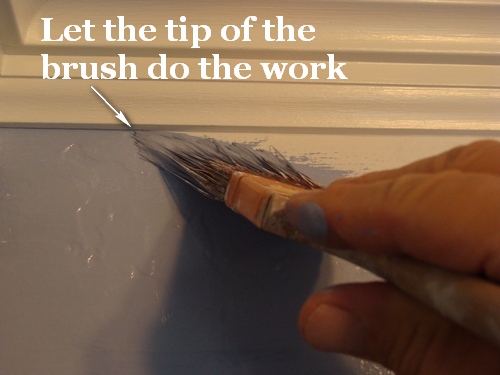
The only way to paint perfect lines up to the moldings is to paint by hand with a good brush. Masking off the moldings with tape will always end in frustration, because the paint seeps under the tape and gets all over the moldings.

The trick is to not get too much paint on your brush. Put a bit on your brush, brush that paint onto the wall near the trim to act as a little paint reservoir, and then work the paint from the wall up against the molding. You’ll develop a feel for it and get faster with practice.
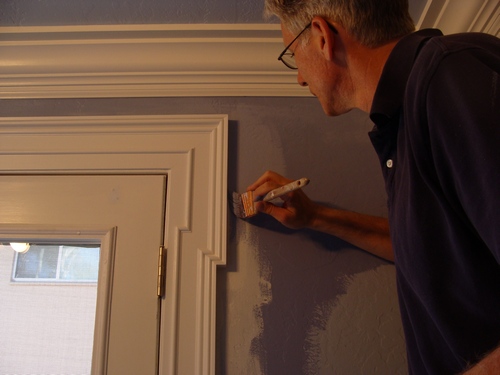
Above: This door trim style is called an eared architrave, and I built it using stock materials from Lowes Home Improvement for a grand total of $74.60.
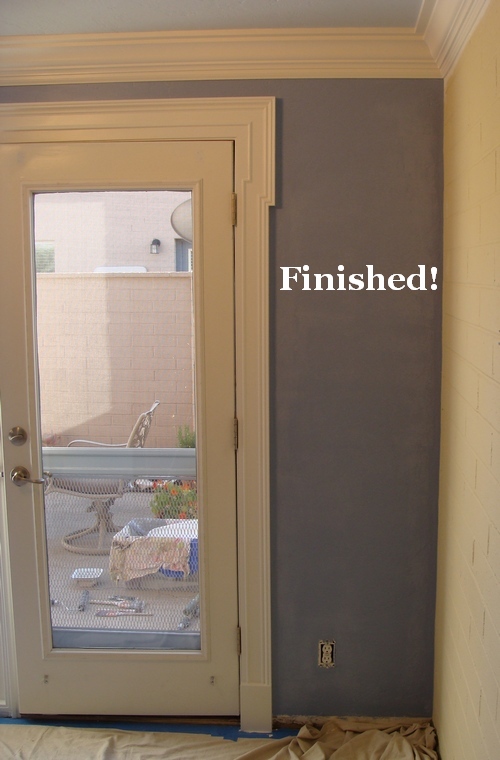
And that’s all there is to it!
To Review: Ken’s Most Important Things About Painting Crown Molding
- Never paint crown molding before installing
- Always paint two coats
- Paint the crown molding first, then ceiling and then walls
- Apply a unifying coat of primer, even to pre-primed crown
- Use good paint like Benjamin Moore Satin Impervo
- Use a paint leveler/extender to increase your working time with the paint and remove brush strokes
- Use good brushes like Purdy or Wooster
- Move everything out of your way — clear the decks
- Use a small cut-in tray and don’t put too much paint in it
- Always keep your wet edge in mind
- Cover your paint tray and brush with a damp rag when not in use
- Turn the heat down in the house
- Feather the overpaint that gets on the walls
- Paint in sections
- Use finish stokes
- Never use blue tape on moldings when painting the walls; free-hand the paint from wall to the molding
You can keep up with our molding makeover progress at The Joy of Moldings. Good luck painting your own crown moldings!
Cheers,
Ken & Jennifer


This is a fantastic and very detailed post! We have installed and painted a fair bit of molding, and we do a pretty good and clean job IMHO, but Ken’s attention to detail puts us to shame and gives us a few ideas for improvement. Ken’s got a great deal of patience and sense for perfection. Thanks for featuring this article.
I’m also a huge fan of cutting in by hand. I’ve used the tape for certain applications, but it’s often very frustrating to say the least.
Have you found the AlexPlus to shrink over time? I was thinking about trying the new 3.0 paintable silicone the next time I do trim work.
We use AlexPlus as well, and it’s held up well for us, but I can’t say that for more than two years worth of molding project in our house yet. Out of curiosity, what got you interested in the 3.0 paintable silicone?
We use frog tape over blue tape, which does better sealing and removing later on (a “kinder” adhesion). That’s coming from someone with a not-as-steady-hand, so tape’s my friend. We do need to occasionally touch up afterwards.
I stopped using AlexPlus and other high-silicone caulks for exactly that reason, shrinkage. When I sculpt wet caulk — either along seams or in a corner — I want it to hold its shape when it cures, and the high-silicone caulks don’t do that. I’ve long since restricted my use to just regular, white painter’s caulk.
Hmmm…I guess my thinking was that the silicone (3.0) caulk would move better with building stresses. I’m in a 4 story condo that’s timber construction so settling is a small concern.
You can always re-caulk if the building moves enough to open it up. Incidentally, because buildings settle so much is the reason why I only install three-piece crown moldings. A single crown molding installed with a nailer behind it will still move with the building, and the joints — scarf, copes and miters — will all eventually open up. However, when I install a three-piece crown, the lower detail is nailed to the studs and glued to the wall. The rest of the pieces are also glued and nailed to the wall, just not to studs. This has the unintended effect of distributing the force of a settling house across all of the moldings. The crown molding joints, in my experience anyway, never open up when installed this way, so using a super flexible caulk isn’t important.
Great detailed post. What if you were using stain instead of paint? obviously the material would be different, how about the technique?
I’ve only ever done one stained molding project, and it was oak wainscoting on a divided staircase. I used caulk between the top rail and wall that sort of matched the wood color. Installing stain-grade moldings is a whole different level of woodworking, and generally caulking is not acceptable. Instead, where moldings are not flush with walls and ceilings, the material is scribed and then carefully shaped by hand. Gary Katz would be the guy to give you the particulars on that sort of woodworking. This is one of the primary reasons I love painted moldings, they are very forgiving.
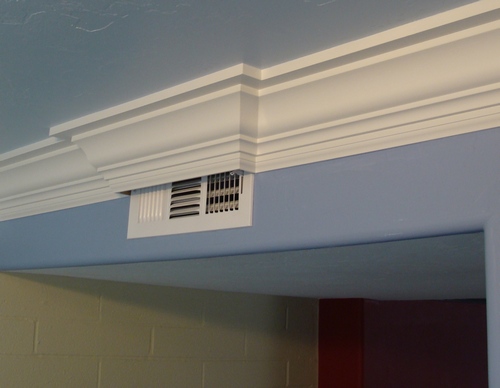
Seriously detail oriented, really nice looking finishing. though I have to say the handling of the vent looks a bit odd to me.
It’s a pretty standard way of dealing with the vents. I had no room to move the vent, so the only alternatives were to start and stop the crown with wall-returns on either side (I call this breaking the crown), install a tiny crown (not an option) or install no crown at all, also not an option, at least for us.
I’ve always wondered why you can’t just stain or paint trim before installation. It’s probably something obvious, but I can’t seem to get it.
You’re right, William, the reason I don’t paint moldings before installing them is so obvious that I forgot to put in my post. It’s simply this: You’re going to cut, file, sand, nail, glue, cope and probably bang the moldings against a door or two before they get installed. All those things leave their mark on the molding. And you can’t really sand latex paint in any meaningful way, so what’s the point of painting it beforehand if it can’t be fixed later? Have you ever tried to sand flush a crown molding scarf joint with latex paint on it? Painting moldings before they are installed is mostly a production technique for large, simple installs. It’s not wrong, of course, but you’ll hardly get the very best finish on your moldings that way.
Awesome tutorial. Thanks for all the info. I was with William, but can also relate to all the “pain” the moulding would go through before being installed. I always cut in by hand as well, but have read several different blogs that describe putting down your tape, painting over it with your base color or clear acrylic paint to seal the edge, then finishing your paint job. I haven’t tried this technique, but the idea is appealling. LOVE the putty knife wrapped in a damp rag. I usually just use my finger under my t-shirt. This will be a much better alternative!
I have to upgrade to good brushes if I’m going to cut by hand. It sounds lame but my mind just has difficulty paying $10 for a good brush. $70 for a table saw blade is no big deal though. Great post.
How about windows? How would you paint those and maintain a wet line?
re: “difficulty paying $10 for a good brush”
Having very little painting experience, in 1974, I painted with my brother on a commercial job for about 4 months when I was out of work. There were several things I learned:
1. Quick coverage with one coat requires painting from a 5 gallon can with a roller filled with paint. Dip the roller, hit it lightly and quickly on the screen, take the roller to the wall and and then smooth it out. (Commercial work where speed and quality continually weigh against each other, and you are painting over concrete, so small drips don’t matter much.)
2. We paid $22-35 for our brushes from the Pittsburgh commercial store. Watching my brother run paint down the edge of a door jamb convinced me that quality tools make a huge difference. BTW – I am still using the brushes I bought in 1974. Painting commercially taught me the importance of actually cleaning ALL of the paint from the brush – especially the heel. Proper clean-up ensures long brush life.
3. I currently live in a home where two finish carpenters spent two months putting up crown molding and general wood trim amenities to match. After 15 years I decided to repaint because the caulk had dried and shrunk to the point it looked very poor. The painters used Sherwin-Williams SherMax caulk on the woodwork. $ years later when I went to have the floors refinished I pulled my own shoe molding. The SherMax caulk had not shrunk and was still fully pliable with its original adhesion. The caulk application method is as Ethan details above in his great post about proper finishing of crown molding. Back in ’74 when I did my painting, the supervisor would walk around yelling, “Keep your finger off that caulk.” Now high silicone caulks must be finger or tool finished to look right.
4. Back in the day, we always got great service by wearing in painter’s whites into the paint store. I notice Sherwin-Williams had a sale on painter’s whites just last week. They were sitting on the end-cap across from the customer service counter. $30 spent on whites could pay big dividends on paint purchases in the future. HOWEVER, we got about a 47% discount on SW Emerald in our street clothes. I have shopped three different SW stores in the last 15 years, and pretty much they are out to get your business. The East Texas store (or any SW store) which will not compete with big-box, needs to be reported to corporate.
5. Since I am on a roll, I will mention that Behr now has a top of the line paint I used on my daughter’s home in Denver. Although I wanted to buy SW, she liked the Behr colors. The knowledgeable Home Depot paint mixer said that she had used the Behr to one-coat a dark color in her home. I tried it over an extremely deep purple (almost black) paint and it actually is one coat – so as another poster indicated, Behr has stepped up their game at least on their premium (this was top of the line) paints.
THANK YOU Ethan for the great information on your site. It is the difference between an average DIY job and a truly professional job !! KUDOS!
Glad you like the post, Jeff. When painting window and door surrounds I have to work a little more slowly, because, as you stated, keeping a wet edge is a problem with a pattern that has so many parts. So I start at the top, the entablature cornice, then the frieze and necking, then each pilaster down to the apron and sill. I try to keep the wet edge at the bottom of each of those parts so that the paint blends when I start the next detail. And who doesn’t love a good saw blade!
Ken, I’ve got to tell you that this is a great how-to article and we’re really glad you’ve shared it here (and therefore added it to our “how to” database). I learned a lot about what I could be doing better when installing and painting moldings.
Hey Fred! Thanks for letting me post, it was a lot of fun. And let me tell you, One Project Closer has a great bunch of readers here!
Great job. I never seen a door molding that did that out and in before at the top. Whats that molding called?
I’m more of a taper than a freehand painter but I will do free hand at lower levels but when it comes to the ceiling even on a ladder I still mess it up. I dont have neat hand writing so Im sure my hand just doesnt have the skill to paint steady. I bet it would take months of practice for me to get it perfected.
You seem to have done this before!
MissFixIt: That door trim style goes by three names, and none of them are in common usage: “lugged,” “eared” or “shouldered” architrave. An architrave is a classical architectural term for what we normally call door or window casing. Now that you know what they are, I’ll be you’ll start to see eared architraves all over the place. They’ve been around for 2,500 years, so if you’re looking for a molding style that won’t go out of style, this just may be the one!
Thanks! Great info
hi my question is did you leave the backside of the crown molding around the vent unpainted ?
Hi Barbie: I left it unpainted behind the vent only because I forgot to paint the back side of the molding before I installed it. When I put the final coat of paint on the walls I’ll be getting in there with a little brush and paint the back — it looks a little nicer that way.
Update: We are not at all happy with the Benjamin Moore Aura paint we’ve been using on our kitchen moldings. The paint dries way too fast, even with paint extender added. We’ll go back to using BM Satin Impervo.
Thanks for the update Ken! Paint preference is always a hot topic and it’s great to get your input!
Great tutorial and a special thanks for introducing me to Ken’s website. I’m using tons of his tips and ideas on the remodel I’m doing to our house.
This is a fantastic tutorial. I’m pinning this to my pinterest page asap. 🙂 Megan
Your tutorial was very clear and detailed. I have never used paint additive before and will have to try it in my attempts to get better results.
KatieQ, you will just love painting with the extra time a paint additive will give you to work out those brush strokes.
Great help, thank you. I guess I should have read it before I pre-painted all my crown molding. Can you tell me why you suggest not pre-painting? I’m about to install it next. Thanks, Jim
Hi Jimmy: painting moldings before they are installed is a production method used to get the moldings installed as fast as possible but with little regard for what the final finish looks like.
I give even greater detail on how to paint moldings on this page http://www.thejoyofmoldings.com/how-to-paint-moldings/
Good luck Jimmy!
With this great article I’ll be able to do a bang up job on our Sunroom ceiling that we are finally working on. It has loads of trim work to deal with. Thanks Ethan for allowing Ken to share his expertise with us.
Hi Ken, I have devoured every word as I prep for my kitchen crown molding. I know you used floronol to delay the dry time, I was wondering if you have experience with Benjamin Moore’s Advance? That’s what I am using and wondered if I still needed to add floronol or would their slow drying properties be adequate?
Thanks for your time and detailed tutorials!
Good Day Ken,
Great details…
Do you find that there is a great benefit in using an extender vs. water? I know some of the hybrid paints like BM Advance say do not add extenders or water.
Thoughts?