
Welcome back to our latest Pro-Follow update. Last time we left off, Steve Wartman and his crew had finished installing the bathroom fan, and the previous day they had hung concrete board in the shower and Fir plywood over the subfloor. At this point, the bathroom is ready for tile, and Steve called in Rick Smith and his crew to tile the shower and bathroom floor. Rick brings over 30 years of experience, and coincidentally Rick is the contractor that tiled my master bathroom several years ago.
If you enjoy our Pro-Follows and learning how professional contractors complete home improvement jobs, subscribe to our email or RSS feeds and never miss an update. Every Pro-Follow comes to you from a real job site, chock full of real pro tips. Check out our Project Guides to see all the completed how-tos.
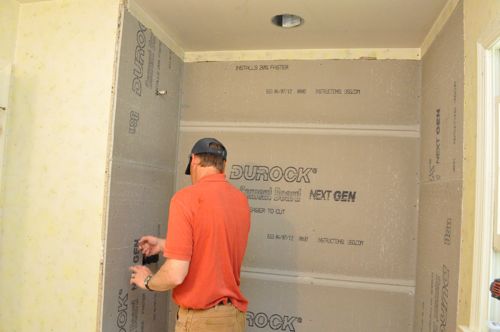

Subfloor
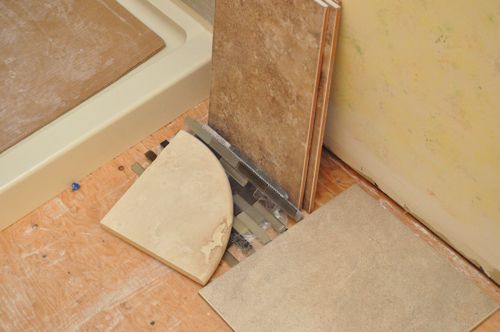
It’s very important to have a properly prepared subfloor because otherwise, the tile will crack and come loose in no time. The goal is to provide a flat surface with minimal deflection (bounciness). You can reduce deflection by adding extra layers of underlayment like plywood or installing additional supports under the floor.
Many professional tilers (like Rick) can judge a floor’s deflection by feel alone. For the rest of us, the Tile Council of America offers a standard formula called L/360.
L/360
Divide the total span of the floor joists (in inches) by 360 for the maximum amount the floor can give in the middle under a live load of 40 lb./sq. ft., plus any long-term deflection due to the weight of the floor.For example, the maximum deflection for a joist span of 15′ is [15 * 12] / 360 = 1/2″.
This formula is useful for most ceramic, porcelain, and hard stone. For soft-stone tile, such as limestone or light marble, the L-720 formula applies (cutting the maximum allowable deflection in half).
When possible, Rick likes to verify the subfloor framing, and for joists spaced more than 16″ oc, he suggests using Schluter Ditra which is a waterproof, uncoupling membrane. He also targets at least a 1-1/8″ thick subfloor. Steve’s crew achieved that by installing the Fir plywood which is an acceptable underlayment even though Rick prefers concrete board.
Plan Layout
Before starting, Steve spoke with the homeowner about various tile layouts. With that input, Steve can approximate the location of features like the shower shelves and glass listello.
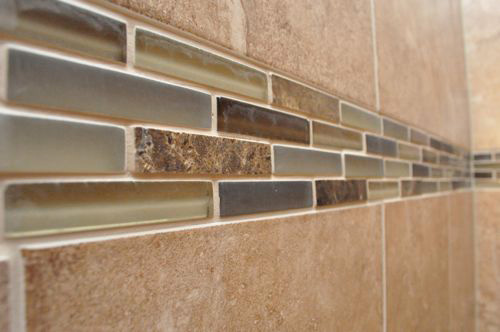
Pro-Talk: A listello is a narrow, decorative tile that add visual interest to a wall.
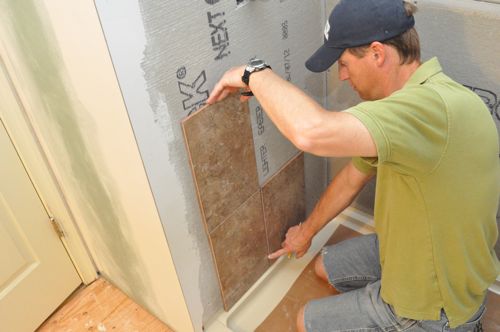
Pro-Tip: Shower heads are roughly 82″ off the shower pan, and most layouts avoid running decorative tile at that height.
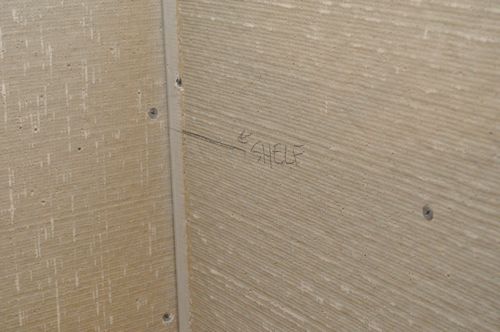
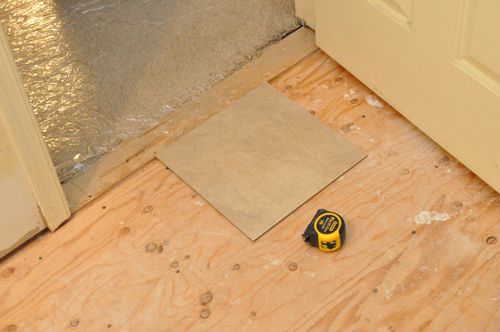
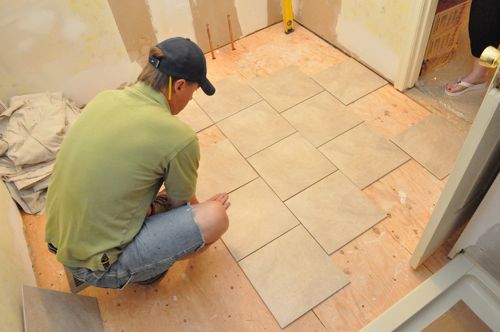
For the floor, installers often center a tile in the doorway. Steve maps out the floor and finds that a staggered layout works well because it avoids thin, small tiles around the perimeter. If that hadn’t been the case, they would have shifted the layout (perhaps centering a grout line in the doorway).
Materials
- Thinset mortar (see below)
- Tile mastic (see below)
- Mesh cement board tape (see below)
- Tile shims
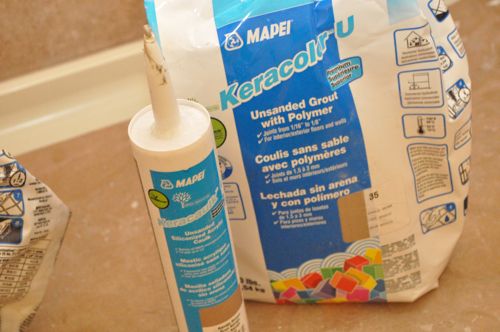
- Un-sanded grout
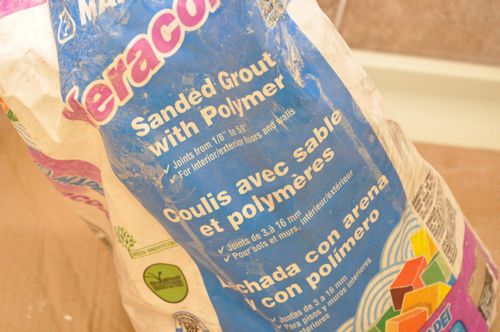
- Sanded grout
- Caulk (see below)
- Tile (see below)
Thinset mortar
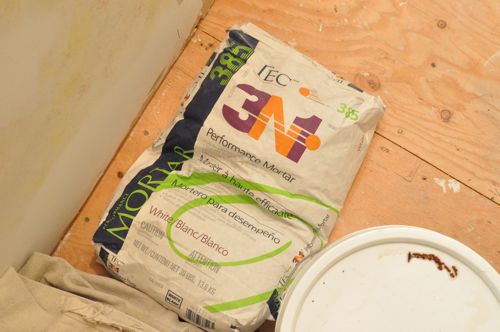
For this install, Rick and his crew are using a modified thinset mortar which has a latex additive that makes it stickier and stronger. Modified thinset is often used for tiling walls, over plywood for better adhesion, high-traffic areas and spaces that will get wet (like a shower). Thinset comes in a powder form and is usually mixed with water.
Mastic
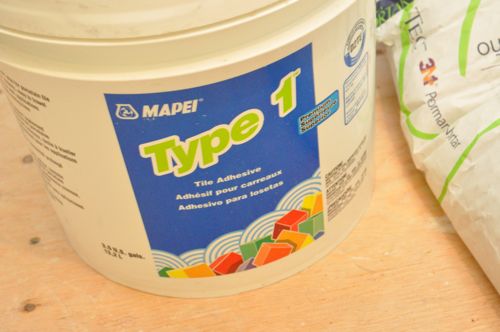
Mastic is an organic adhesive, and it’s not suitable for direct contact with water. For that reason, Rick and his crew only use it on the top-most courses in the shower. Mastic comes premixed in a tub.
Pro-Tip: Rick and his crew say that using mastic for floor tile is one of the most common do-it-yourselfer mistakes.
Mesh cement board tape
The mesh tape used for drywall will deteriorate in contact with concrete board so it’s important to use an alkali-resistant tape. Plus, concrete board tape is stronger and mold resistant.

Caulk
Rick is using an un-sanded siliconized acrylic caulk that matches the color of the grout.
Tile
Porcelain and ceramic are the two most popular options for tile. Porcelain is denser and heavier which makes it tougher to cut and more difficult for wall installations. Regardless of the type, tiles can vary in size up to 1/16″ (even expensive tile from reputable dealers).
Tools
- Tile cutter (see below)
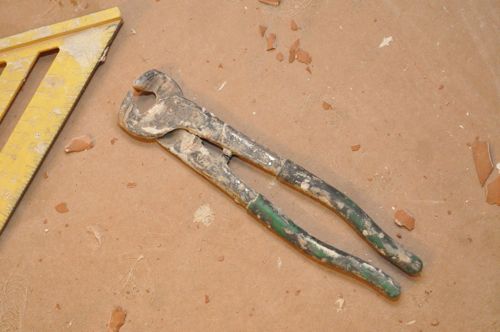
- Nippers (see below)
- Level
- 3/8″ notched trowels
- Grinder
- Utility knife
- Buckets
- Mixing Paddle
- Corded drill
- Sponges
- Diamond hand pad
- Saw or multitool
Tile cutter
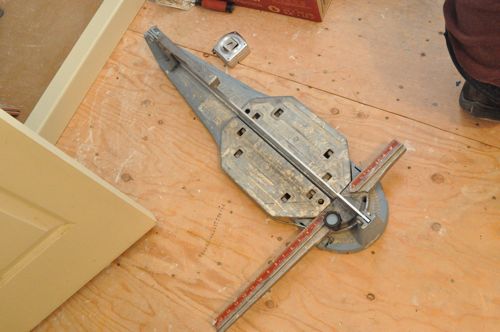
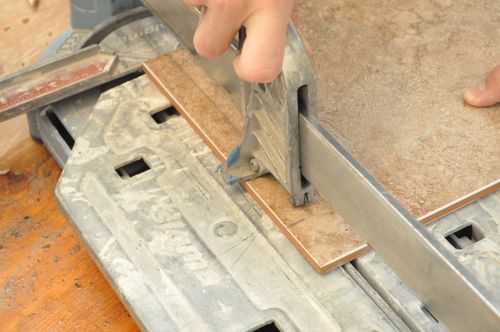
This is a relatively straight-forward tile job, and Rick and his crew used a tile cutter to score and snap all the tiles. They didn’t need to break out a tile saw.
Nippers
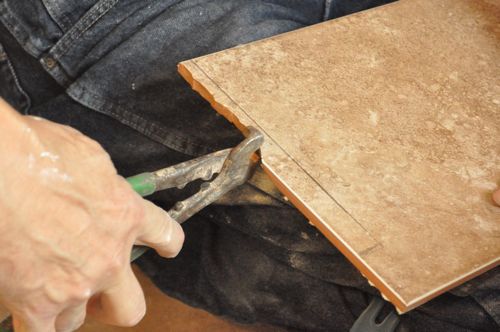
Nippers are used to chew off pieces of tile, and they are especially useful for making curved cuts. A good pair of nippers is indispensable, and some of these guys have been using the same pair of nippers for 20+ years.
Diamond hand pad
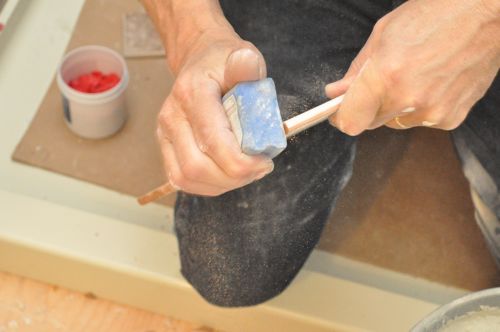
A diamond hand pad is used for cleaning up a cut edge, and they used it after every cut.

Check Walls
Rick started the day by checking all the walls. Rarely are walls and corners square, and Rick wanted to know where the problem areas would be. He found that some of the walls were as much as a 1/4″ off plumb.

Mark Wall Center
Starting on the side wall, he marked a center line, and this is where he will start laying tile.

Tape Joints
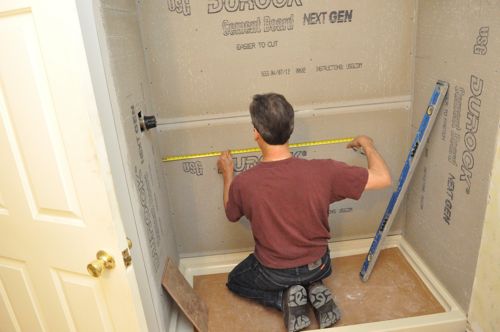
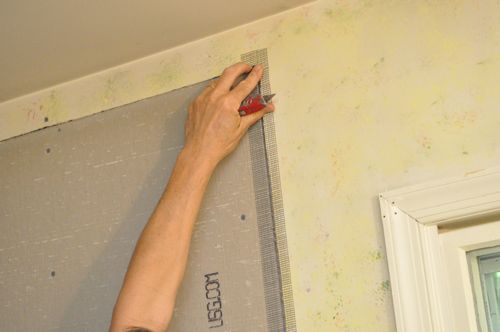
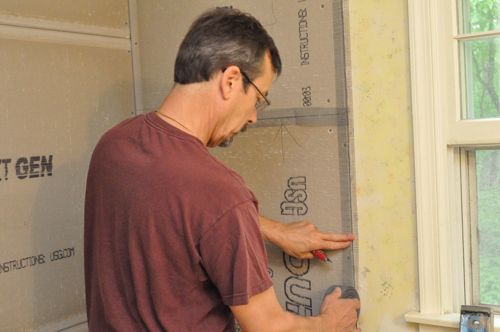
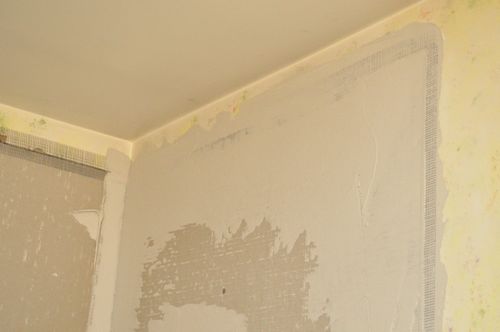
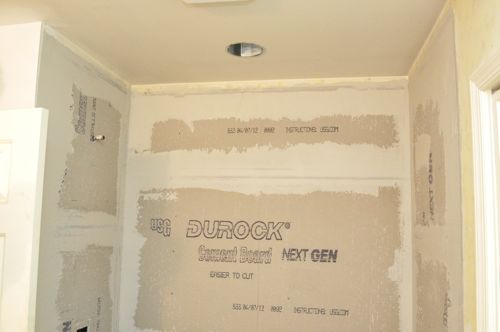
Rick covered all the joints with mesh concrete board tape including the joint between the concrete board and shower pan.
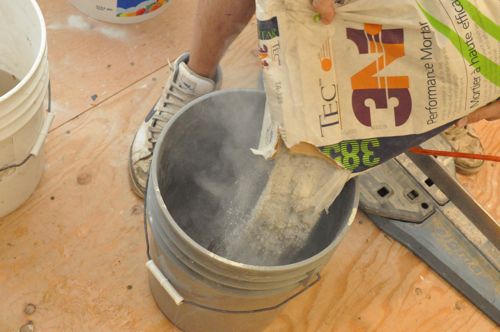
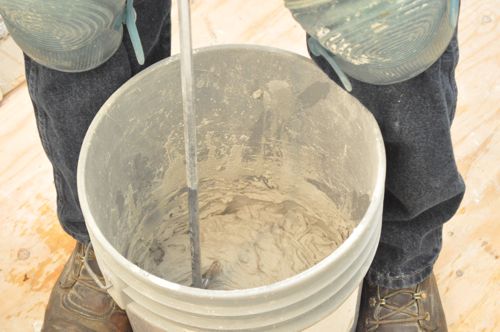
Mix Thinset
Next, he mixed the thinset in a bucket with a mixing paddle, and he mixed it thick enough that it wouldn’t slide down the wall.
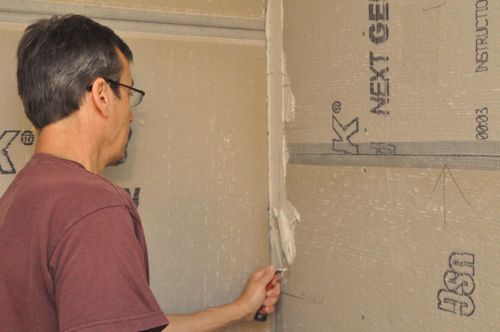
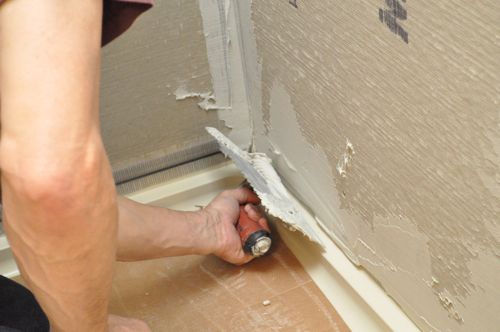
Cover Joints
Rick covered all the joints with a layer of thinset, and he covered the drywall mud to ensure good adhesion.
Mark Spread Line
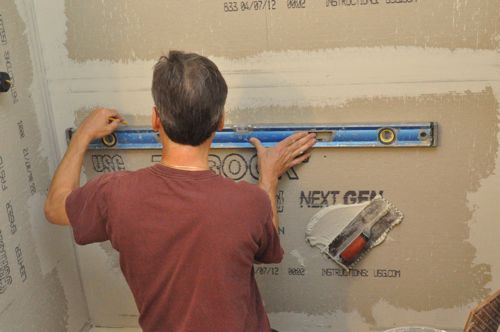
Starting from the shower pan and measuring up the height of two tiles, Rick marked a level, spread line that will serve as a guide for spreading thinset and laying tile.
Spread Thinset
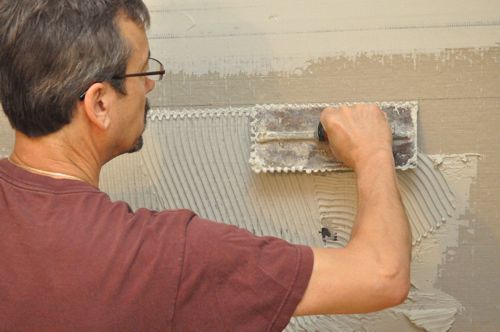
Rick spread the thinset using a 3/8″ notched trowel right up to (but not covering) the spread line.
Lay Tile
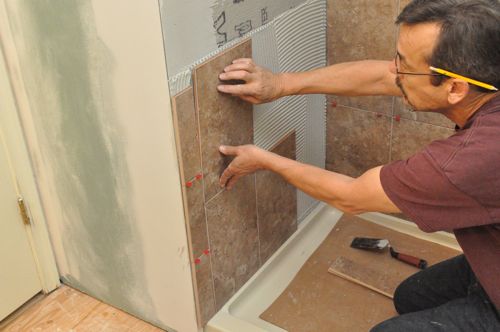
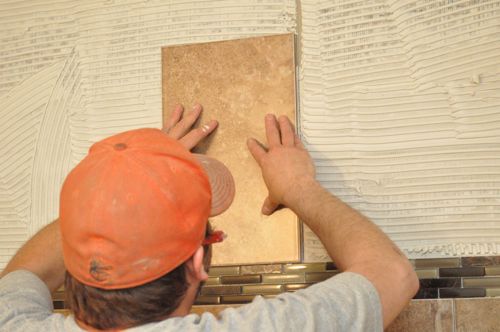
Starting at his center line and working into the corners, Rick laid two rows of tile. Beginning in the center is important because it allows him to better conceal cut edges in the corners and it ensures a symmetrical layout.
Rick pushed each tile firmly into the thinset, ensuring good coverage. He lined up all the corners and was mindful to keep all the tiles at the same depth.
Pro-Tip: Check each tile for chips or defects, and clearly mark the defect before setting the tile aside.
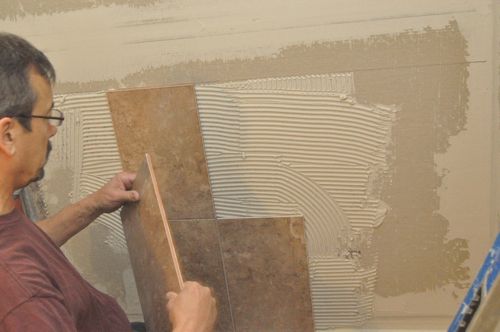
Since Rick knew the areas where the walls were not square, he “cheated” a little by opening up the joints slightly to account for the difference.

Add Shims
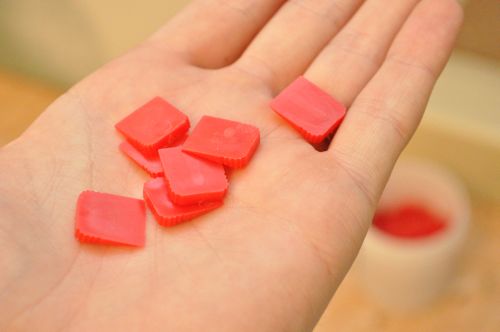
Rick used the red shims to align the tiles and make sure each row stayed level. At times he would remove a tile to add extra thinset to keep everything nice and even.

Cut to Size
To cut tiles Rick would scribe a line with his pencil and either use nippers or the cutter to trim the tile.

The tile cutter has a small blade that scores the front of the tile. The wings on either side of the cutter pivot allowing you to press down until the tile snaps.
After each cut (with the cutter or nippers), the guys would clean up the cut edge with the diamond pad.
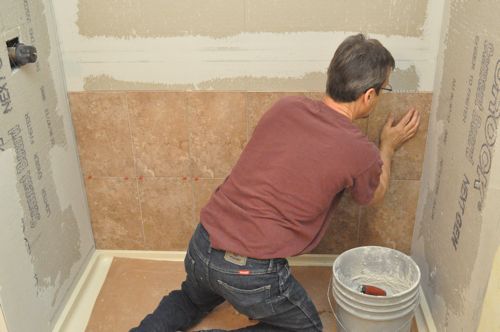
Check For Level
Rick would check on last time for level before moving on to the next section. If he found anything out of line, he would shift the tiles and/or place more shims.
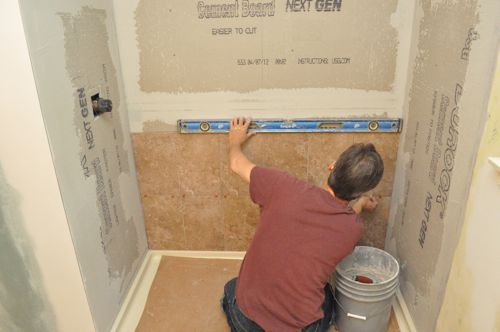
Move to Next Section
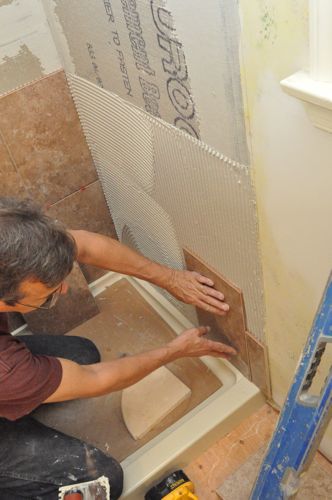
This picture shows how Rick continued that same spread line to the next section.

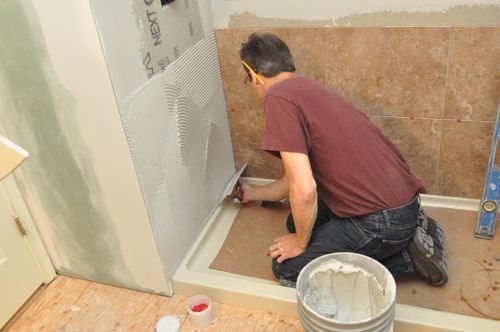
Pro-Talk: Back-buttering refers to the process of using the flat side of a trowel to skim coat the backside of a tile, and this is another technique to ensure good coverage.

For the front and back of the shower Rick started at the corner and worked toward the inside corner to better conceal cut edges.
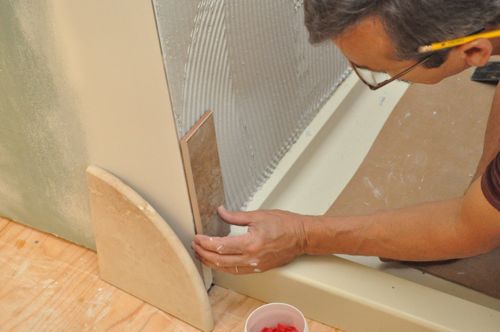
Pro-Talk: Bullnose refers to a rounded edge tile often used as a border because it does not expose a cut end.

Shower Shelves
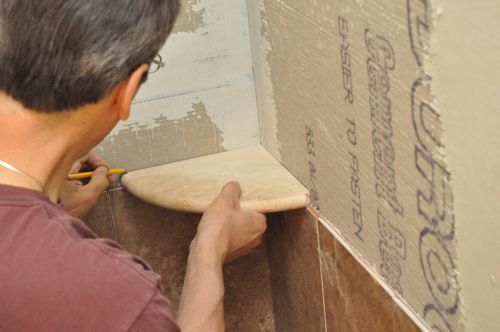
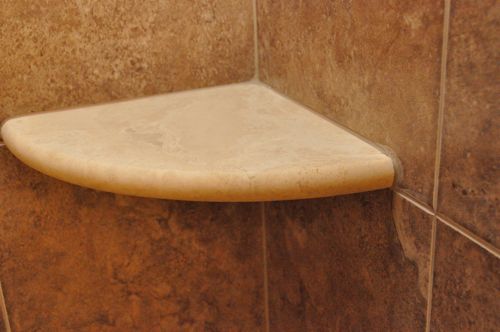
Incorporating shelves into the shower is a nice feature, and Rick started the process by notching the shelf with a grinder. He cut a shallow notch just wider than the width of a tile.


Next, he scribed the outline of the shelf and used that to cut the wall tile.

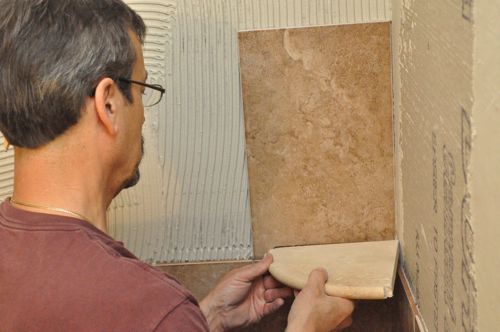
Next, Rick put the shelf in place with a gentle slant to prevent water from pooling.

Sponge Clean
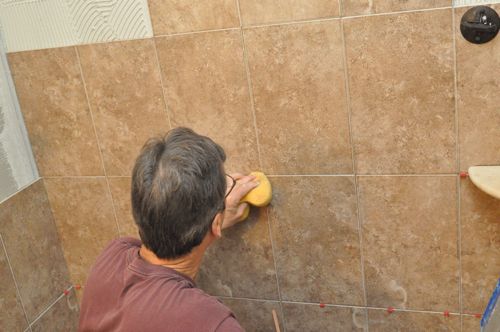
As he worked, Rick often cleaned the tile face with a sponge, and he cleaned his hands frequently too.
Cutting Holes
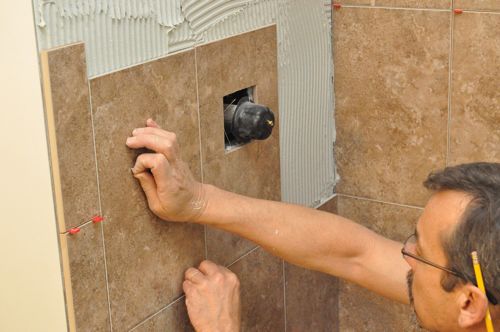
Rick and his crew had to cut holes in the tile for things like the shower controls. To do this, they started by measuring the location of the hole.
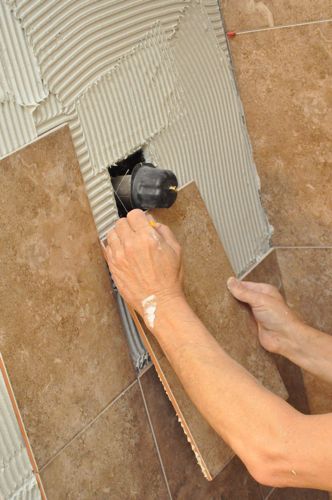
Rick used a grinder to carefully cut a square-shaped hole, starting on the face of the tile, and then completing the cut from the backside of the tile.


Decorative Stripping
It’s common to add a listello or decorative stripping to make a wall of tile more appealing, and the homeowners have opted for a glass tile stripe. Rick cut the mesh backing to create pieces four rows high.
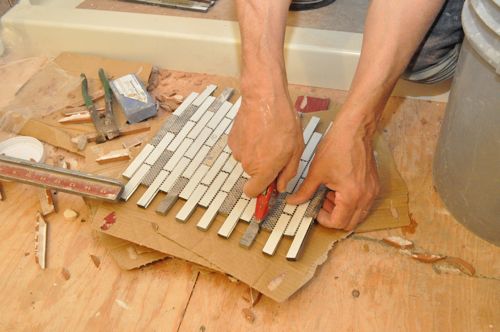

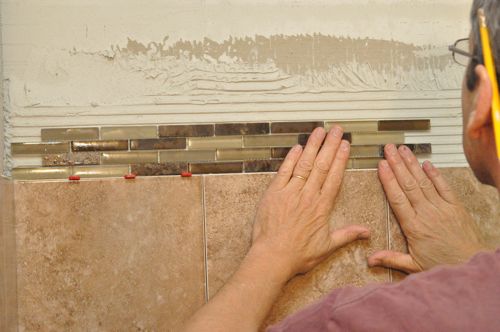

At this point, Rick and his crew could not continue with the wall tile until the thinset had cured overnight. Otherwise, the glass tiles would shift as new tiles were laid above them.

Floor Tile
Trim Door Jamb
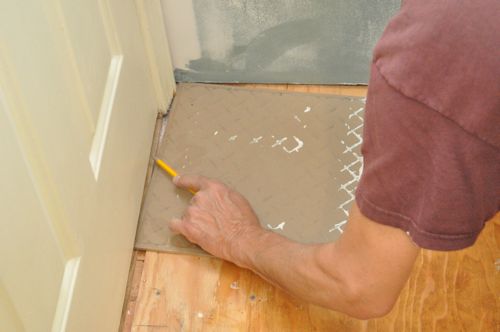
While the walls dried, Rick and his crew started on the floors, and they began by trimming the door jambs. They used a tile to mark the height, and then cut the jamb with a handsaw.
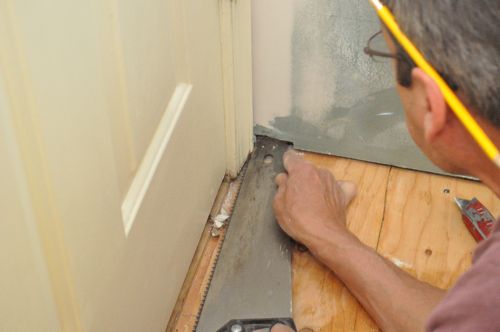
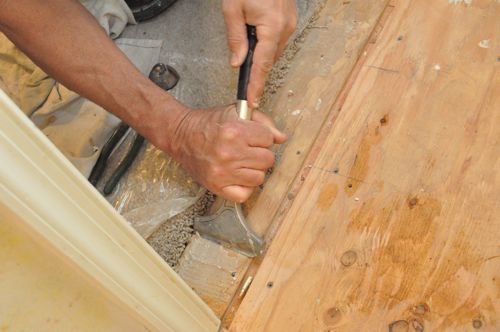
The guys also scraped away the old mortar from underneath the threshold.
Clean Floor
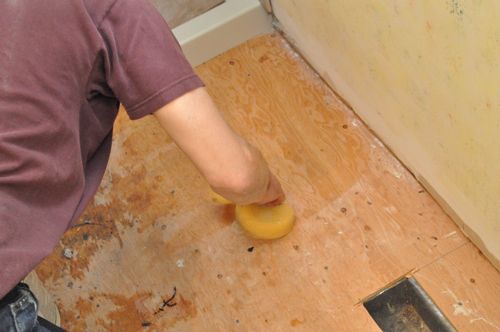
Rick used a sponge to clean the floors which had the added benefit of wetting the plywood, and that helps ensure a good bond.
Mark Guide Lines
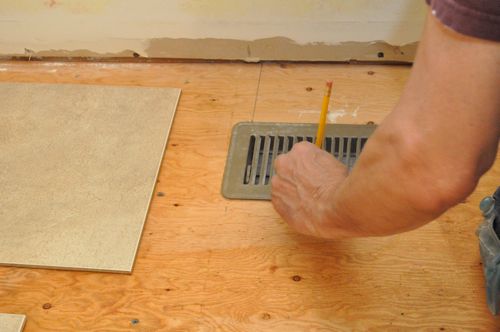
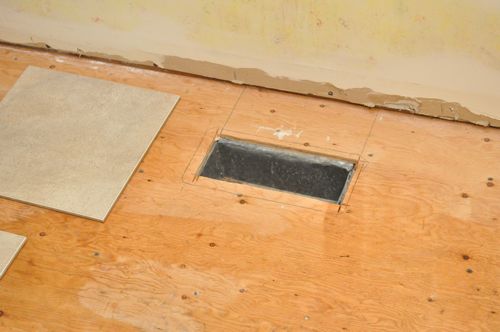
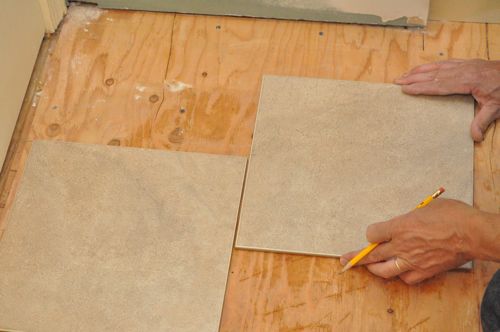
He traced the outline of the air register and measured a spread line off the exterior wall.

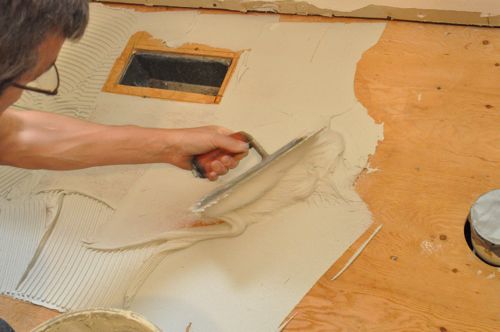
Spread Thinset
Just like with the walls, Rick spread thinset right up to his line using a notched trowel.

Lay Tile
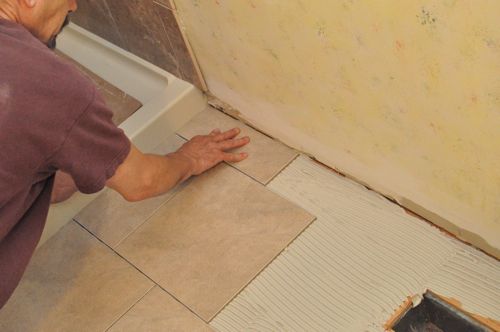
Floor tiles are usually separated with spacers to ensure a consistent joint. Rick doesn’t use spacers, and instead he visually sets the tile.
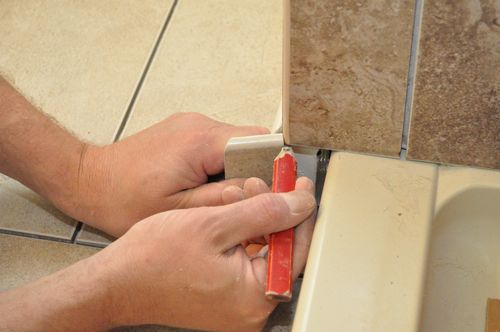
Pro-Tip: Leave a very small joint between the tile and the shower pan. Otherwise, even slight movement can create an irritating, squeaky noise.


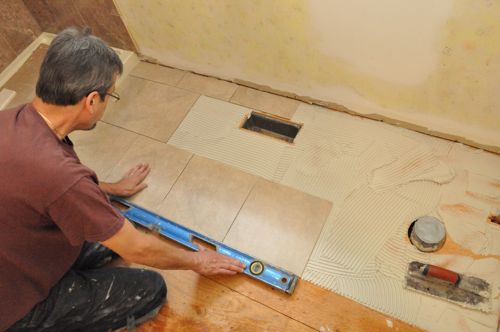
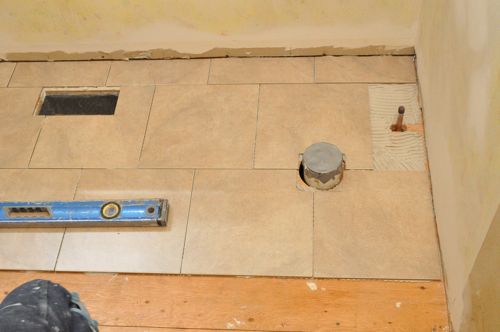
Pro-Tip: Remove excess thinset that has oozed up between the tiles. You want the thinset at least 1/8″ below the surface of the tile to make room for grout.
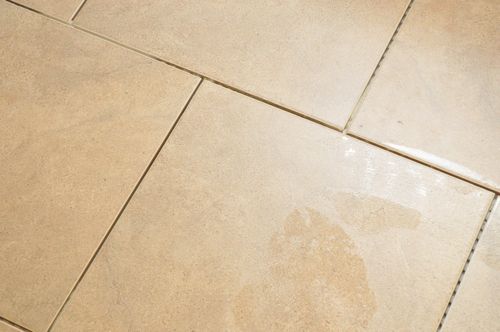
Finish Tiling Shower
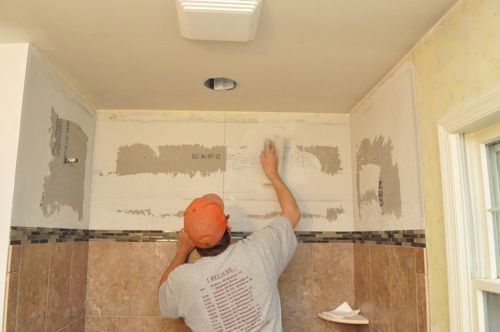
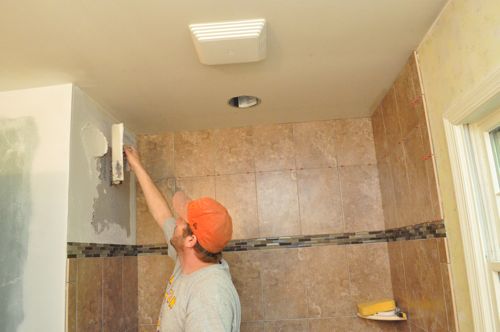
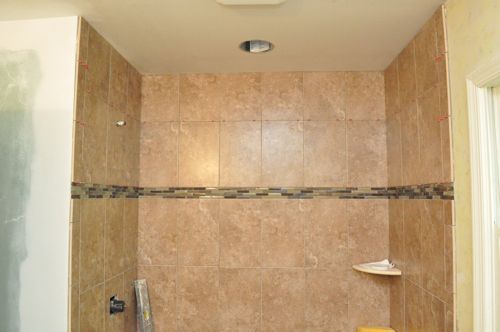
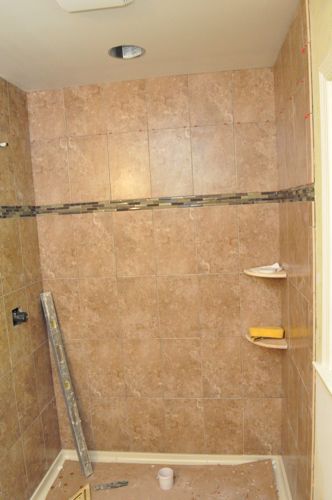
The next day, a member of Rick’s crew finished tiling the shower walls, and for the upper courses of tile he used mastic instead of thinset.

Baseboard Tile
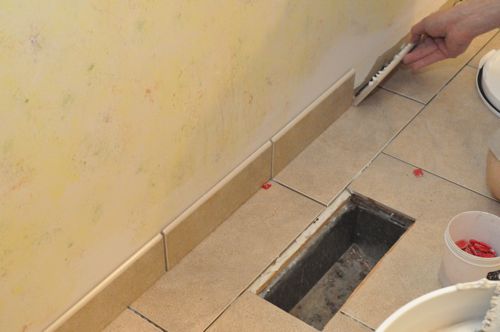
He also added a bullnose tile along the wall to act as a baseboard. For the bullnose, he back-buttered each piece rather than trying to spread mastic in such a small area.
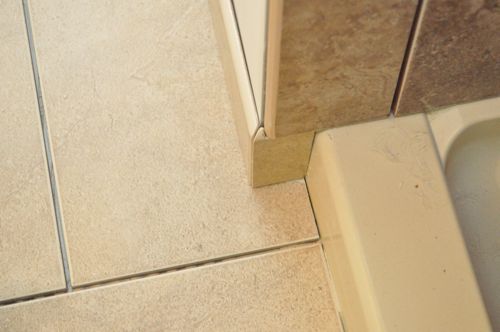
Grout
After the tile had set, one of Rick’s crew grouted the tile. For the shower walls, they used a unsanded grout, and they used a sanded grout for the floor.
Pro-Tip: Use sanded grout for grout joints 1/8″ or bigger and non sanded grout for smaller joints.
They packed the grout tightly into the joints using a grout trowel, scraping away as much excess as possible. After the grout set up, he wiped the tile with a damp sponge, cleaning it often. He also caulked all the corners of the shower (between walls, walls and ceiling, around shower pan).
Pro-Tip: Grout all the tile at the same time. Otherwise, you may see a slight color variation due to moisture differences.
Finished
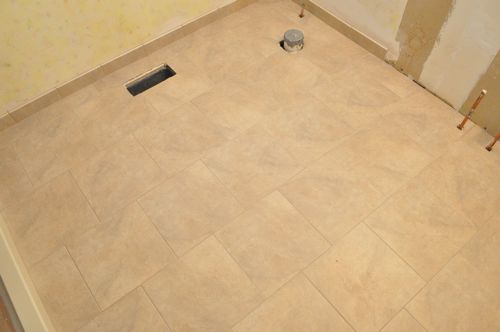
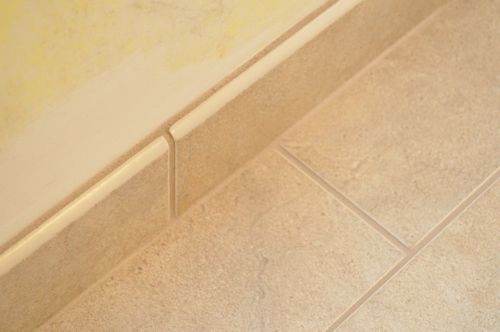
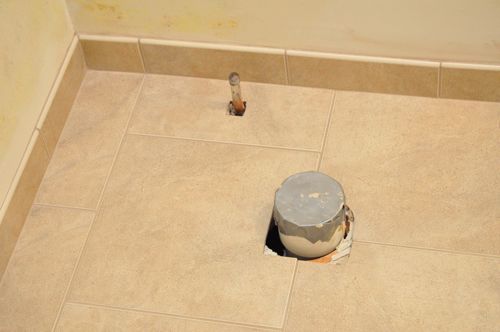
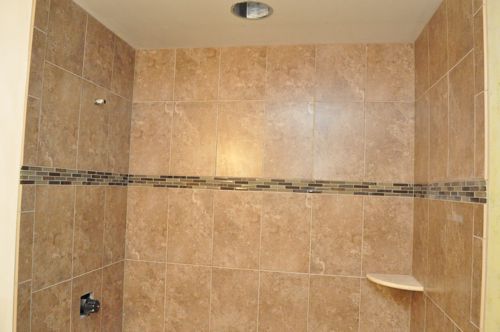

Pin For Later


It’s kind of creepy. This is almost exactly what my wife and I did in our bathroom. Except we used a different color glass and a little wider strip. Otherwise the field tile is the same color and the glass is in the same orientation. What I loved about this glass is that it had a color layer on the back of it (like a mirror). White thinset didn’t have to be used because it couldn’t be seen through the glass.
I’ve never heard of a color layer behind the glass…. that sounds very cool. I think it’d look really nice for a backsplash too. Did you tile the bathroom yourself?
Yeah I did it myself. Used bullnose as a base trim as well.
I didn’t realize that Mapei (and others) made colored caulks. I used almond and it is too bright. I’ll be tearing that out over the next few days and adding in the right color. Thanks for the tip!
NEVER, EVER, tile to wood. One of the first things you learn..you would think a “pro” would have a wet saw, and a jamb saw. Very bad to tell people this is a professional job. I have been a tile contractor specializing in super custom baths for over 35 years, and I have never seen a pro tile on wood.
What do you think about tiling over green Sheetrock with aqua guard on it. Would that be ok
Very professional tile job, I really like the tile baseboard (did they cope the inside corners? 🙂 )
When they left after the first day with the walls, was the little tub of something left on the upper shelf on purpose (to help keep it at the right angle for drainage) or is it completely irrelevant?
Hey Joe,
That’s a little container of red shims, and I’m pretty sure it was just convenient (and irrelevant).
Great photo journal. I tiled our bathroom shower area (above a tub) with subway tiles. Took me 7 days just to tile it. Using the larger tile would definitely make the job go faster! 🙂
Bigger tiles also have less joints to grout and keep clean afterward.
Why did they use mastic on the top portion of the shower? You mention that thinset should be used for high traffic and direct contact with water, but why not just continue and use that on the top as well? Is mastic cheaper than thinset?
I think it is the price difference. Plus, premixed product is faster since you’re not portioning it out. I’ll try and get more info….
Thanks. In the end it probably doesn’t matter for me. If I do a project like this I would prefer to have excess of one material with a wider range of uses instead of two materials. I was just curious.
I noticed the tile was laid directly on the plywood. I have seen concrete board used in other installations on top of the plywood, but it adds height. Do you know what the pros/cons are of the approach here? Is there a time when concrete board is needed vs. not needed?
When I asked Rick about it, he said that he prefers to tile over concrete board. However, fir plywood is an acceptable alternative for the bathroom floor (because if it wasn’t, he wouldn’t have laid the tile). I think it has to do with a slightly more reliable bond between the tile and subfloor. The take-home message is that concrete board is always appropriate so install concrete board when in doubt.
Great pro follow – learned something new – I did not know that mastic shouldn’t be used in areas where it can get wet. Thanks!
Thinking back over the few, small tile jobs I’ve done, I’m pretty sure I’ve made that mistake too. That’s one of the reasons I love these Pro-Follows- you get reliable information right from the source.
Thanks for doing this. The Pro Follows are a valuable resource for those of us who like to do it ourselves.
Wow, my husband and I are gearing up for a mostly DIY bathroom renovation starting in June so this series has been great so far. I’m learning so much and looking forward to seeing how this bathroom turns out in the end!
This couldn’t be better timing – I’m trying to plan and spec out the tiling for my bathroom remodel. I know it’s more to grout, but I’ll be using smaller 4×4 tiles, going for a 1930’s look consistent with the age of my house – but with a single row of glass tiles for a bit of modern flare. I don’t see anything that wouldn’t pertain to the smaller/thinner tiles – or is there something I should note?
Great write-up and very timely for me. I will apply a lot of what you discuss to the kitchen backsplash job we have coming up at some point soon. I was curious about the differences between thinset and mastic, and now I know I’ll be using thinset!
I like the shelves, very nice touch. Although it makes me angry to see how simple it is to do here yet the greedy builder/developer of my condo building couldn’t be bothered.
Are those little notches in the shelves really enough to hold those on? I can see that they will hold soap just fine, but what if someone leans on them?
The shelves are held in place with a combination of those notches, being sandwiched between tiles and caulk along all the entire joint. I didn’t test ’em out 🙂 but Steve was mentioning that often ladies use them as a foot rest while shaving so I’d imagine they’re designed to hold some weight.
I am in the middle of remodeling my bathroom now. My question is this…on the inside corners, how far from the wall is the tile closest to that corner? I’ve seen different opinions on the internet for this. I have heard that the inside corner tile should be 1/8″ away from the wall. Does the thickness of the tile factor into this? My tile is about 1/4″ thick so I was thinking if I did leave just 1/8″ inch, the top of the opposing corner tiles may touch anyway. Would love to hear your advice. Thanks
Hey Glenn,
Rick and his team tiled right into the corner. They didn’t leave any gap. Also, if you left any gap, I’d guess the sealant would have a hard time filling a 1/4″. These guys used ceramic tile for the walls. Are the opinions you’ve read for ceramic (or for another type of tile).
remove a bathtub , now will have a shower pan only. Question: the cement board that meets the shower pan goes on the top lip of the shower pan or behind the pan? I know tiles will lay on/ over the shower pan edge/lip for drainage purposes.
thanks/ gomez
They butted the concrete board right up to the lip of the shower pan (no overlap). Thanks for reading!
In August I’ll start my bathroom reno so finding this is timely… thanks.
I want this shower pan!
I’m determined to have a solid pan – no leaks and no grout to clean.
So far its between acrylic and Silestone but this one is visually less “bulky.”
Any chance of finding out what the shower pan is and who makes it?
I keep saying that I am going to try a project like this because my husband does all of the projects at home.- just haven’t gathered the guts to do it yet. Great timing on this article – love all the pictures because it helps me know what to expect. You have some great stuff on here!
just read the bathroom redo and it brought back great memories of a previous house we worked on. now onto this old house…need to update but don’t want to total the shower as the tiles are white and in great shape, however, the shower pan is shot! So, the question is … how, or can we remove and replace the pan with out gutting the walls? Suggestions cause I’m open to anything that will save the walls. Also, we’re gonna pull up the carpet (ugg!) and tile the floor, so that part was terrific. I know we can do that part with confidence.
You can replace the pan with not too much hassle. You’ll need to find tile that matches what you have installed already because you have to cut out the bottom foot or so of the current install. I’d start but buzzing off the drain from the inside, there’s a special mini saw blade that fits in your drill. Then cut up the pan into smaller pieces so it’s easier to remove. It may be set in a mortar bed though so be prepared to get out you “BFH”. Clear everything down to a clean floor. Then remove enough tile and backer board to give you room to either set a preformed pan or attach the polyurethane sheeting up the side walls if you are building your own pan. Try and preserve as much vapor barrier as possible (if you have it) so you can tie into it. Remove one more course of tile but preserve the backerboard, you’ll have to tape and mud that joint to continue the cement board after you get your shower pan sorted. Once you get the pan done and the drain installed then tie in the vapor barrier, then the backerboard, and then finally tile down to the pan. A lot of steps and a lot of work but definitely doable. OPC has an article on building your own mud pan if you’re interested. How to pour a shower pan base.
Tile directly on plywood?? No Ditra, no CBU? No waterproofing on the shower walls? Drywall mud in the shower area? Otherwise looks good. Generally you never start tiling a wall at the base of the shower, they must have had a perfectly level line on that shower pan.
Hey MJ,
From several tile installers I’ve worked with, plywood isn’t the best choice of underlayment but it’s still a viable option and can provide a long-lasting install. It’s important to use good plywood (no voids), and in very rare cases it can delaminate (which is why CBU is first choice). DITRA is a terrific product. However, it adds significant cost so most installer won’t use it unless necessary. Thanks for the comment.
I see you are shimming in your horizontal lines but I am curious why not in your vertical lines? It looks in the finished product that the grout is even between the two? Thanks!!
Thank you so much for this article. It helped me get through the process with few hiccups. Here’s a link to my pictures of the project.http://imgur.com/a/apUDW
My tiled shower has a rounded window of glass block about 5feet wide and the wall under it is of course also curved. I want to remodel my shower. I will use tile in multiple sizes for the wall. The window ledge is the problem I want to know if it is possible to use concrete poured into that ledge and can it be made waterproof. Thanks for your help.
So sorry to rain on your tutorial,but,tile is not water proof and cannot be made so,cement board is not affected by water but,again,is not water proof,every grout joint is a leak, not maybe,is a leak,sealing will not help,the substrate has to be 100% water proof before you set a single tile,I recomend a trowel,roller or brush on water proofing-anti fracture membrane,there are several on the market,they work out to be very cost effective insurance.I am a master tile setter with over 30 years of experience ,I have had no warranty claims or job re dos. Tile work is expensive,but if done right should be permanent,and never require regrouting,do it once,do it right.R.
Randall, i’m doing a similar project to this example on OPC. It sounds like you recommend using RedGuard or a similar product? How do you apply it to cement board? I’ve read 50:50 water/RedGuard for first application due to cement board absorbing water so fast.
Omg, waterproofing? Where is it? Is there an unmentioned plastic sheet without any holes behind that Durock? If you want to see the right way to tile a shower, google search Floor Elf and read his free manual. Traditional, topical, or membrane… you absolutely have to waterproof before ever touching a tile.
My current shower has a concrete floor because it was made in an attached garage that was converted into a family room & bathroom. Can I place the floor tile right on the concrete?
Yes, it needs waterproofing. No, you cannot cut Redguard (or any other) with water. Actually, I think it’s impossible to cut it with water. It is rolled on at 25 mil. Using a 3/8″ nap. Install two coats. Install mesh on all corners and any change of plane. I agree that I have never seen a tile job started from bottom row. Best to chalk a straight line. Use a modified thinset ANSI 118.4 and ANSI 118.11. Highly recommend a high performance grout. Funny that you are trying to save $.10 using mastic when the tile costs quite a bit more, not to mention the labor. Never use mastic in a wet area. Caulk all change of planes. Support that soap dish, or better build a niche. Easy to do and looks way better.
A good TEC System is…
Hydraflex
Ultimate Large Format Mortar
Power Grout
Always wait at least 24 hours before you grout.
The upper wall tile just leans forward. Is that normal?
Thanks for explaining how to divide the span of the floor joists. I have been thinking about installing some ceramic tiles in the kitchen and I’m sure these dimension tips will help them stay strong. Thank you so much for the helpful flooring tips.
There is so much wrong here. First there is no waterproofing in the shower at all. Concrete board is not going to work. You need to float the walls or some other waterproofing product. Second, setting tile directly to plywood doesn’t work either, especially in a bathroom. Hack job at best, good luck, it will rot
That was perfectly fine for builders like 10 years ago and new constraction would pass all inspections, they tiled over plywood (although maintained 1.25 thickness) and tiled shower surround with just green drywall not a cement board, zero waterproofing/memberae and that shower lasted 17 years on 3rd floor of 3 story building with 24in joist with no single leak. So it is all about skills and quality of materials of person who does work. I understand that nowadays code strengthened most of requirements, with no green drywall in tub surround (wet area) joist are 16in off-center, and etc. The point is, when it is done correctly and person with skills it lasts. Code added all those things to somehow protect consumer from non-savvy DYIer or not skilled contractors who barely can build dog house.
Nice tile work! ..but do yourself a favor and add a layer of 1/4” hardie board/concrete board on the floor before laying the tile. I’ve seen plenty of remodelling jobs where the subfloor was rotted away because tile was set directly onto wood. Hardie board is about $12 for a 3’x5’ sheet and the screws are about $25 for a big box. Doesn’t take much time or money but worth the added protection. Make sure the joints don’t align with the tile joints otherwise the tiles can pop or water can penetrate
im remodeling my friends bathroom and we are not going to have a shower pan since he is a parapeligic and will be rolling into the shower with his wheelchair. we were just going to do a slight slope on the whole floor. i was wondering what the proper slope would be as to not compromise the tiles. and what would be best to do that with concrete, or just the mortar?