Editor’s note: we subsequently reviewed Kichler’s Design Pro LED Lighting as this article suggests. You can find the full review at that link, but the product overview information is still covered here.
—-
We told you last week that coming up soon on our list of articles would be a tutorial for installing under cabinet lighting, a project we’ll be tackling next in our ongoing kitchen remodel. Coincidentally, as we were planning the project, Kichler Lighting reached out to us and asked if we’d like to try their new Design Pro LED Under Cabinet Lighting solution in the space.
We like the idea of installing an LED-based under cabinet system for two reasons: (1) it uses less energy than incandescent or halogen alternatives; and, (2) the LED light bulbs last for 40,000 hours (or in practical terms, forever).
Kichler gave us access to Jeff Dross, their senior product manager for the Design Pro series and a veteran of the lighting industry. Jeff told us to treat him like we would any sales person, and helped us select the components that would work best with our kitchen. I asked Jeff some tough questions: would the Kichler Design Pro system add sufficient brightness to our under cabinet area? He assured me it would, and that the only brighter solution would be a florescent fixture. I asked if the system would be easy to install and reliable. He said without question it would. This system is designed for ease of use.
We intend to put Kichler’s claims to the test in our upcoming installation. You canBut first, we wanted to show you what things look like right out of the box in their raw form. After all, you aren’t supposed to see under cabinet lighting components, just their effects. So consider this a look under the hood of Kichler’s latest LED product. Our initial impression: we are impressed with just how simple the system actually appears to be.
Here’s a picture of all the components we’ll be using. Below we describe each one with some close-up shots.
Kichler Design Pro LED Lighting Components
Power Supply & Leads: The black box on the upper right is the power supply for the system. The power supply takes in 120 Volts AC (standard household wiring) and outputs 24Volts DC. Kichler sells power supplies in several sizes depending on the load of the panels you need. This one serves up 100 watts. The two rather thick coils of wire on the left are 25′ leads that will connect the power supply to the first panels under the cabinets. We will be installing the power supply in the basement, connected to 120VAC off a switch in the kitchen, with the leads going up the wall and through the back of the cabinets to the panels.
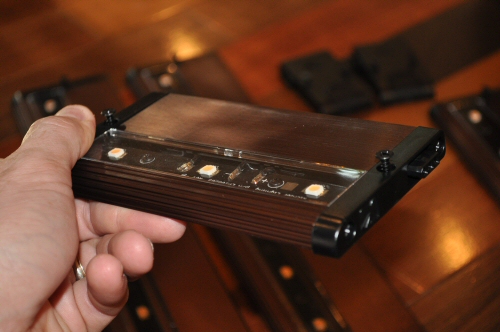
LED Lighting Panels: The five bronze panels in the middle are the LED lights themselves. While somewhat deep (all are about 3.25″), they are only 3/8″ thick, and will be easily concealed on the underside of our cabinets. Each panel has two connectors–one on each end–so they can be daisy chained together. These panels are available in a variety of colors including black, white, brushed nickel, and bronze. Kichler recommends selecting panels that closely match your cabinet color. Since we’re installing mid-tone wood cabinets, bronze is the right choice for us.
Kichler makes the Design Pro LED panels in three sizes: 6″, 12″, and 18″ (all three are shown in the picture above). Below you can see a shot of the panel up close. From the looks of it, installation will be a snap, with just two screws to tighten to the underside of the cabinet and interconnect wires connecting both ends.

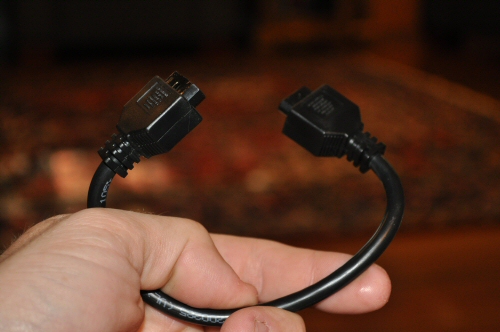
Connector Wires: Each panel can be either directly connected to the panel next to it (they will flush mount against one another–a cool feature) or they are connected with wires. You select wire lengths based on how far you will be traveling from one lighting unit to the next (9″, 14″ and 21″ wires are available). Kichler designed the panels so that the power supply wire can be connected to either side of the units for maximum flexibility. This allows you to bring power up on the right side or left side of the first cabinet depending on which side of the kitchen you start on. If you are making an extremely long run, the 8″ and 25″ lead wires can also double as an interconnect.

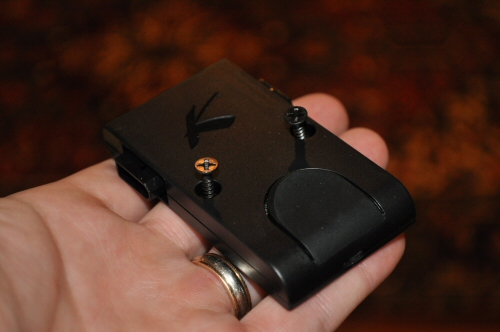
Dimmer Switches: The two small black boxes sitting above the panels in the first picture are small dimmer switches that can be installed anywhere in the circuit. They feature a single button that lets you set the lighting to one of three levels (low, medium, high) or off. These are good if you don’t already have a switch on your 120VAC line going to the transformer, or if you have a switch on the AC line but want to have the lights set to a lower level. The dimmer will remember the lighting level even when the AC switch is cycled. Unfortunately, with LED lighting you cannot use a dimmer on the AC side.

Selecting Kichler Under Cabinet Lighting Components
Kichler has designed the system to make it easy to select the right modular components for your installation. Essentially, you want to fit the largest possible panels under each cabinet without leaving any cabinet blank. Note that the space available under a cabinet is always shorter than the cabinet’s nominal length. For example, our 24″ cabinets actually have about 22.5 inches of available under cabinet space, making the 18″ panel an ideal choice, especially after you consider the space required for the interconnect wires.
Each component in the system uses a set amount of under cabinet space that is generally measured in whole numbers. For example, the 12″ LED panel takes up 12 inches + 0.25″ for a male connector. Unless the panel is the last one in the series, you can ignore the space taken by the male connector because it will be accounted for in the adjacent component or wire. The 6″ and 18″ LED panels work the same for their respective lengths. The dimmer switches are 2″ wide + the male connector length if they are the last unit in the chain.
Interconnect wire ends consumes about 1.5″ of under cabinet space adjacent to the panel. Assuming you are exiting the underside of the cabinet through a cutout, you can ignore any additional length that might be needed to bend the wire. If not, you’ll need to reserve about 1/2 to 3/4 inch to make the bend.
You can see all of the Kichler Modular LED products using the search feature on their site. (That link takes you to the right results page).
Stay Tuned for Installation and a Final Review
We’ll be installing and reviewing the Kichler system in the next few weeks, so stay tuned for the full articles.


I really like that there are three power levels (low, med, and full). They are going on my short list for under cab lights for my upcoming kitchen remodel.
I don’t belive in coincidences but I was looking for a simple lighting system to be installed under my kitchen’s wall cabinets and I found this article. Very good.