
I’ve been shadowing Mike on a few Pro-Follows, and we’ve also been working on some built-in cabinets and shelves. If you read Part 1 or Part 2 of the Pro-Follow, you know that Mike is a big fan of Kreg woodworking tools. He’s got the Kreg Pocket Hole jig, Kreg clamps, Kreg router and table, and more! Mike really feels that these Kreg products make it easy to complete some beautiful woodworking projects.
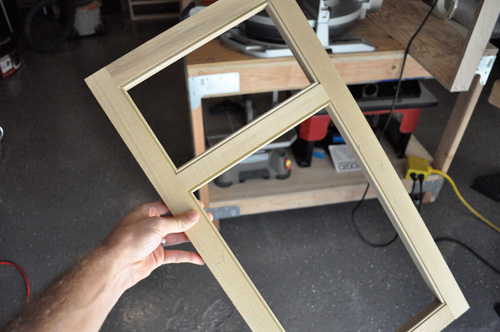
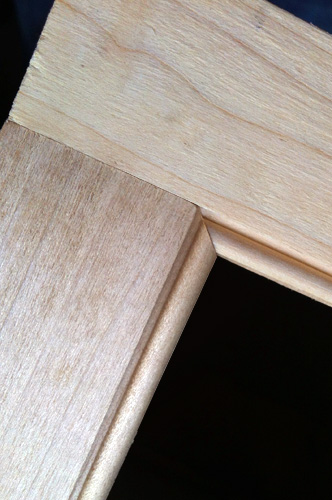
The toughest part to these built-in cabinets is making the face frame (the frame fixed to the front of a cabinet or shelf), and that’s where the Kreg Precision Beaded Face-Framer comes into play. This face-framer is so exceptional because it makes notching rails and stiles effortless, eliminating tedious cuts on a table saw. Furthermore, the Precision Beaded Face-Framer enables you to cut a decorative bead right on the workpiece rather than mitering and gluing a separate piece afterward.
If you’re thinking about making custom kitchen or bathroom cabinets, built-in shelves or a number of other woodworking applications, consider the Kreg Precision Beaded Face-Framer. This product is great for the hobbyist or production shop, and worth every penny. You can find the Precision Beaded Face-Framer and other Kreg products at your local Lowe’s.
Setup
Since this face-framer is a precision tool the setup needs to be carefully dialed-in. The sliding base installs on almost any full-sized router table (not just Kreg tables) with a t-slot.
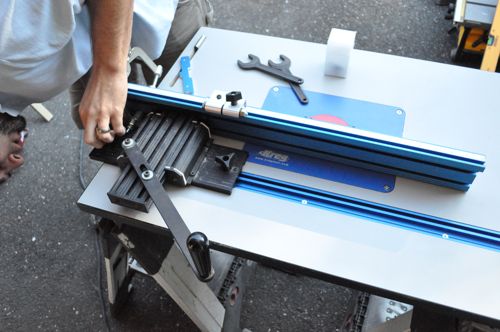
The fence is attached to the sliding base.

Kreg included a 1/2″ dowel pin for centering the fence.
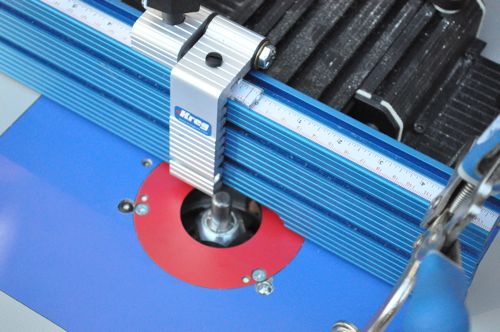
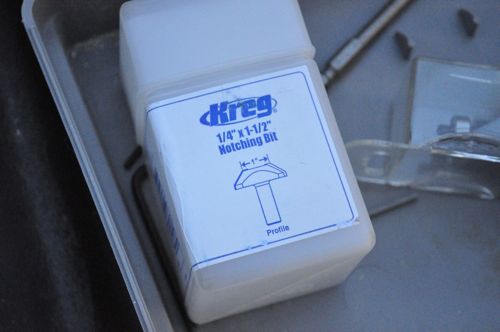
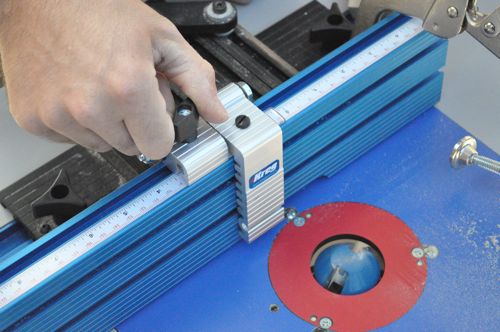
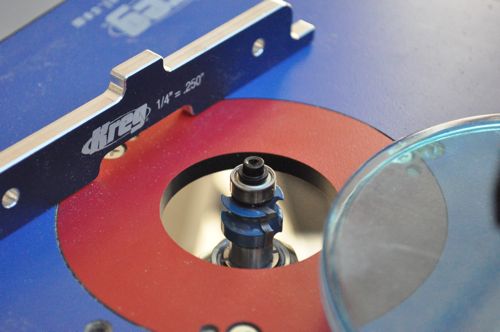
Since the height of the router bit must be exact, Kreg also includes this setup bar to check the bit height.
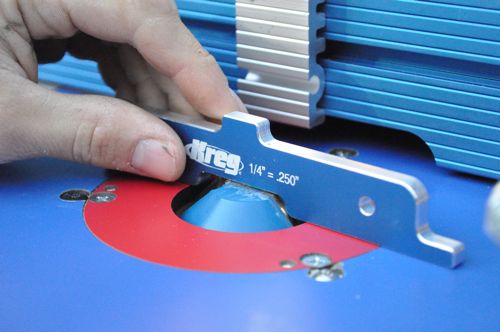
After running a test piece through, Mike also used the setup bar to verify the bit height and make any necessary adjustments.
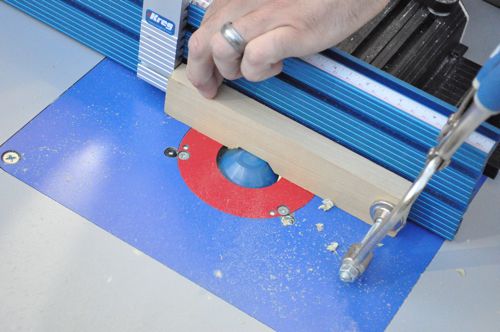

Using the Kreg Precision Beaded Face-Framer
The face-framer enables you to make accurate plunge cuts, notching the rails (horizontal pieces) and stiles (vertical pieces) of a face frame. This may seem unimpressive until you consider the alternatives. Imagine how difficult it would be to set up a jig and table saw to achieve similar results. Without this tool (or an expensive equivalent), you’re really limited to plain, shaker-style frames. Especially in a production shop, speed is another important consideration, and this product makes building beaded face frames so quick.
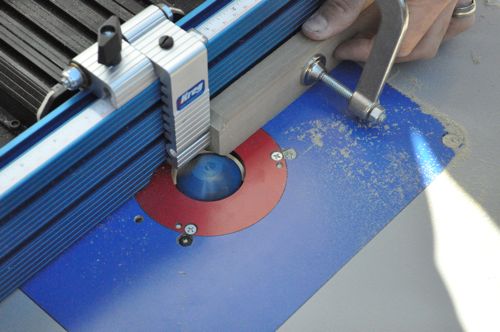
Here’s a look at Mike cutting notches into the stiles for our built-in cabinets.
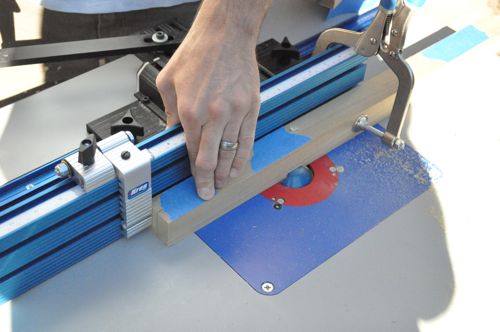
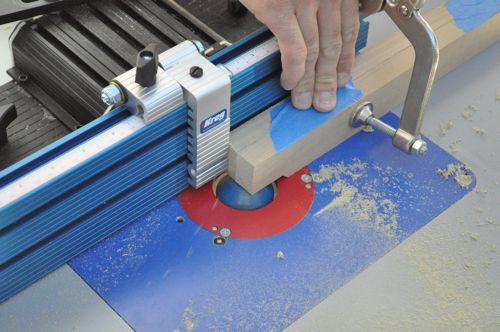
After Mike repositions the stop, he cuts the notches on the rails.
Once all the notches are cut, it’s time to rout a decorative bead. Mike swaps in his standard router fence, sets up the beading bit and runs each piece through.

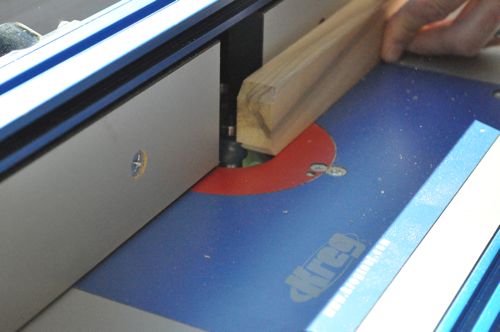
Again, consider the alternative here. If a carpenter wanted a beaded face frame without this tool, they would take a separate workpiece, route a bead, fit and refit mitered corners and glue and/or nail it in place.
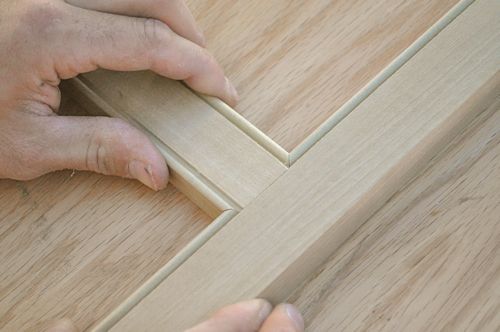
Mike used a handful of pocket holes to secure all the pieces together, and in short order he built an elegant drawer cabinet frame. The joints are tight and the beads are perfectly mitered.
Head over to Lowe’s to purchase a Kreg Precision Beaded Face-Framer and don’t forget to check our Lowe’s Coupons first.


I love Kreg tools too. Looks like a (fairly) no hassle way to make beautiful cabinets. What wood is he using?
He used poplar for this project since it was going to be painted over.
Almost looks like there is a little tear-out issue on test piece (pic DSC_0024) Is that the case?
As an aside, that’s a pretty low file number for pictures. New Camera? I wouldn’t mind seeing a howto on your post process sometime. Cameras you use, a little bit about your software and image host. Sort of behind the scenes of OPC.
Hey Jeff,
There was a little tear out on the test piece. Mike cut it pretty quickly. For the actual workpieces Mike tapes similar pieces together (face inward) and cuts them a little slower.
Actually, I’ve been using the same camera for years now- Nikon D90. The pic count resets every time I unload the card. I hadn’t though about a behind-the-scenes. I’ll keep that in mind.
This is a really cool tool, but I think I’m still going to leave this one to professionals.
Reuben, if you can cut a square board you can totally do this. All of the jigs and gauges make it really easy, strong, and professional. I knocked out a face frame for a bathroom linen cabinet in not even 20 minutes. It is so easy.
I agree with Jeff. With even just the pocket hole jig you start to see easy projects like building a shelf.
Reuben, are the auctions working again for you yet? You’re one of the few folks who hadn’t given us the thumbs up. I’m still working some optimization stuff. Thanks!
This is probably just my lack of knowledge, but $380 (on Kreg) for this? Couldn’t the same things be accomplished by adding a few stabilizers with clamps to a normal router fence and then buying some extra bits? Unless I’m missing something couldn’t someone jimmy-rig essentially the same thing on existing router hardware?
The real meat and potatoes of this thing is the mechanism that keeps the fence perpendicular to its direction of travel. If that can be duplicated then you can build your own. My router table is built into my table saw and the router fence attaches to the table saw fence. I can move my fence right over the top of a bit while being square to the direction of travel. I’d have to pick up the appropriate bits and fabricate a stop but it is totally doable and for a fraction of the cost.
Great explanation. Thanks
I thought about that too! However, it would be tough to emulate the precision that Kreg brings. For Jeff’s solution you’d need a better fence than most to prevent any wobble.
Or a better solution would be to build a sled that fits in the miter slot of the router table. It could have a good length fence so that the workpiece would be fully supported and the notch in the fence from the bit could be used as a future setup bar to make sure the bit is the same height every time.
That is a really good idea…. Use some MDF and you can even put in a track for the Kreg clamp. I’ll bet you can find a stop that fits a t-slot too. If you could find an extended miter gauge that would be perfect.
Took 30 mins, a dollar worth of hardware, and scrap to make a sled. Works great with a straight bit. Still takes $80 worth of bits though to duplicate the kreg.
That’s awesome! Send in some pics?
Great post. I’m gonna have a hard time justifying picking one of these up to Mrs Icarus. Maybe in a few years when I have a bigger space and do more of this type of work.
While I like the system, Everyone should take a few minutes to look into a mortise and tenon joint or a floating tenon joint – and a scratch stock if you want some beading. There are some great traditional ways to create these frames – without buying a single purpose jig (they might not take as long as you’d think!).
Heck you could even build something similar to this with dowels and a scratch stock.
These are not bad ideas at all, Joe… Potentially the one downfall of the Kreg system is the weaker joints compared with something like a mortise and tenon… And I suppose if you can’t hide the pocket-hold you’ve got that problem. But if you glue the joints (as Todd suggested on another article), and if you’re work allows a pocket hole, I think you’re probably is very good shape and have a much easier time with it with the Kreg system…. All that said, I’m looking forward to Ethan giving us an article on mortise and tenon joints to complement this one… maybe a compare and contrast article with a video! (Now I’m asking for a lot).
Bring on the video! 🙂
On my face frames, I have gone with as little as one screw per joint and no glue. Have had no problems with them coming apart since they are primarily held together by their attachment to the cases (using biscuits and glue). I know what you are saying, but froma structural standpoint, there is nothing wrong with pocket screws on face frames. Using scratch stock is indeed a great way to create the beaded look as well.
I love the look of those Kreg jigs, but I have to agree with trebor in that the price for the majority of their items is a bit rediculous. The mechanism that makes the fence move prepindicular to the frame stile does not need to be any more complicated than a dadoed slot in the router table to use a table slaw miter slide. Pretty simple. Their stuff may look great, but I like to try to come up with a simpler solution wherever possible, since simple typically means better.
Sorry guys, but I just built beaded face frames for some cabinets the old fashioned way…by cutting and mitering the beads on a table saw. At $545, a system like this is truly only beneficial for a production shop. For the weekend woodworker, this system is simply not cost effective. I truly like the design, but Kreg went way overboard on the effective price point. It’s really not THAT hard to produce quality beaded face frames with a few more steps.
i’m not sure about the difficulty, but the price is just tough to swallow
I made drawings for a face frame to be done the old way (adding 1/4″ beaded strips inside the openings). How do my dimensions change if I do this Kreg’s way? Am I just adding 1/2″ to the length of each rail? (1/4″ at each end)
That old way is annoying. The old, old way is to build a scratch stock with a few inches of old band saw blade and a block of scrap. Fun to do with an easier wood like poplar you plan to paint. Working with cherry and walnut, I reach for the Kreg system. You can do much more than beads with it, like precise cutting of wainscoting.