
The other day I shared how I replaced a missing shutter. Today, we focus on painting the aluminum covering overtop our bay window.
A few years ago, Jocie and I had all of our windows replaced, and the new ones have a white frame. They look great except when they’re sitting next to dingy, off-white aluminum (or need to be cleaned). Last week I went about repainting the overhang to match.


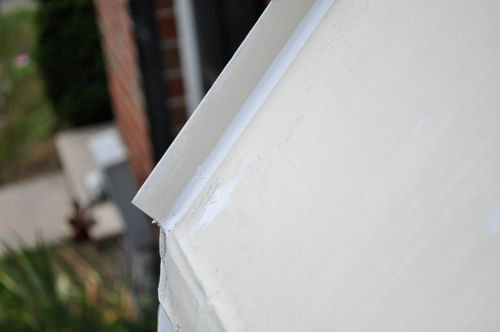
If you can’t tell, the paint is flaking in several place, some of the aluminum is bent, many of the nails have popped out a little and the whole thing is pretty dirty. Here are some close-ups of what I’m up against.

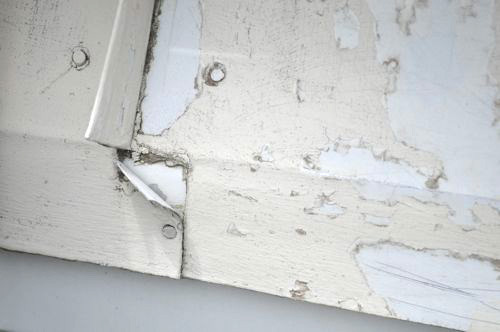
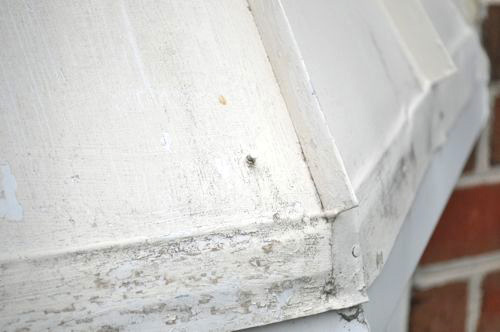
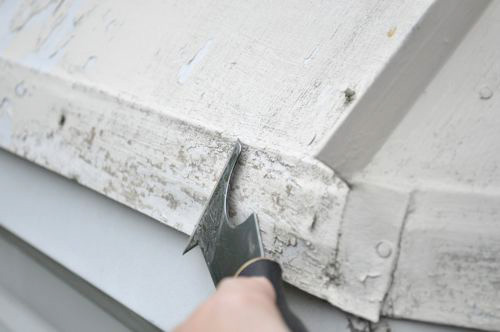
Half of this project is making the right preparations to paint. I’ve come to realize that most failed paint jobs are the result of poor prep. It’s important that everything is clean, caulked, scraped and sanded before you grab that paint brush. I started with my handy painters tool to scrape away all the flaking paint.
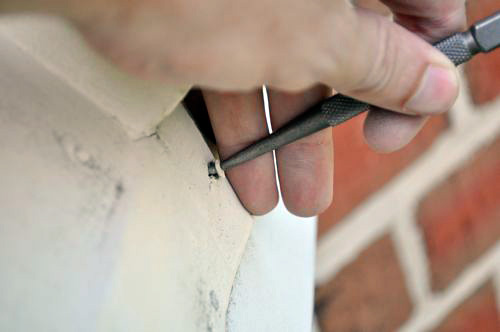
I mentioned that many of the nails had popped out a little. In reality, just about all the nails needed a little nudge back into place. I reseated all the nails with a nail set and used a rubber mallet to encourage some of the bent aluminum back to its original form.
Next up, I grabbed some course, 60 grit sandpaper and went to town. About five minutes into this, I retrieved my palm sander, and things went much quicker. The course sandpaper roughed up the surface and removed even more paint. This is important because it helps the new paint adhere better. I followed the course sandpaper with some fine, 160 grit sandpaper to smooth out any noticeable edges.

The next step was to ensure everything was clean and dry. I grabbed a garden hose and spare cloth to make sure all the dirt and dust were washed away. In the heat, everything dried pretty quickly. There aren’t any pictures of this step because it’s hard enough to manage a hose on top of a ladder without operating a camera too. Safety first people.
To waterproof and conceal the nail heads, I used some DAP 3.0. This stuff is great for sealing windows, doors and lots more. You can use it inside or outside, and it’ll adhere to almost everything including your hands. This caulk is paintable (very important for our paint project), and it’s mold and mildew resistant. I was generous with the caulk because nobody likes a leaky bay window.

I purchased Valspar Duramax semi-gloss exterior paint for this project. The big incentive was that I could avoid having to prime anything as that would have added at least a few hours of drying time. Initially, I use a small roller to apply the paint, but that left a noticeable texture. Since I’d have to go over everything with a paint brush anyway, I ditched the roller. It was right about then that I remembered how much I hate painting. Why did I pick this project again?
The proof is in the pudding, and I’d say everything turned out well. The overhang looks fresh and clean, and you can’t even see most of the nail heads. Best of all, I won’t have to look at that eyesore every time I come home!


Here I was thinking that it was because both of them hurt when they fall on you.
Anyways, this is relevant to your explanation.
http://thereifixedit.failblog.org/2010/05/19/epic-kludge-photo-when-you039re-a-welder-everything-is-a-hammer/
I love the picture!
Looks great! Mind if I include a link to it on our HOA website?
Link away!
Very nice job & and I love picture on diy projects. Any suggestion on painting a new poured concrete garage floor. I keeping track a white powder from the garage onto my new hardwood floors. I will not be using the garage for a car.
Best to you–great site
Bud, stay tuned. We’re going to be epoxy coating our garage workshop floor in the next 2 months during a major conversion. We’re using this product that Quikrete supplied for us to test and review. We have a few steps between here and the floors – the most significant one being a shed we ordered is about 2 weeks past delivery at this point and we need that to move stuff out of the garage.
http://www.quikretecoatings.com/products/Clear%20Top%20Coats%20&%20Sealers/Premium-Clear-Epoxy-Coating.html
This needs to be done here too. Much of an improvement.
Ethan, I’m sitting here stumped a bit … but you got me to read the full article, and I even forgot about the title until you brought it up at the end (I forget too when writing and often my topic takes a turn mid-stream).
Honestly I wondered why the bay window overtop was ever painted white, or why it was white as aluminum stock comes in other colors? Was someone trying to match the color of the mortar? While I tend to link the step flashing on a chimney, it’s black and subtle but here it sticks out and it would be so much better in a dark color, that didn’t beg for ongoing maintenance. Even painting it black to match your shutters could reduce the frequency of painting although it was good that you caught & dealt with popping nails.
Hi Tinaglesiner,
Thanks for stopping by and commenting! I hope to see you back.
Overtop the bay window was painted when we moved in- a builders choice I believe as every other townhouse has the same thing. Also, off-hand I don’t know what HOA rules dictate.
Yea, the HOA would flip out if you guys had a different color (copper) on the bay window. 🙂 Although, I think it would look nice.
This maintenance isn’t much fun & that is likely behind the trend in copper roof accents (they’re also using the new metal roof materials) for front doors, bay windows and such.
You are right on both counts but I worked with what we had. If we every replace that, I’ll consider copper but I doubt it would look right with the rest of the house.