I mentioned in my last post that my plumber came out to reroute the shower controls. We had a separate hot & cold knob before but the new controls are combined- necessitating a few changes to the pipes. It was a job I was glad to pass along to a pro. The last thing I need is a leaky joint or an improperly installed rough-in. Plus, the job gets done a whole lot faster!
Creating Access
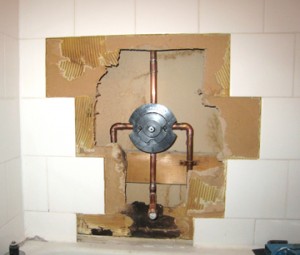
To gain access to the pipes, the plumber needed to cut a hole. There were two options. He could cut through the drywall in my hallway or remove shower tiles around the existing controls. I asked him to remove shower tiles because either choice resulted in replacing at least a few tiles. Here’s the hole that I need to patch.

Patching the Hole
This is a tough hole to patch- wall studs are mostly obscured, irregular shaped hole, and I have to cut-out around the controls and faucet. I don’t want to remove more shower tiles only to replace them but I need to anchor my greenboard to something. After some thought (and a tip) I have this solution. Here it is, beautifully illustrated.
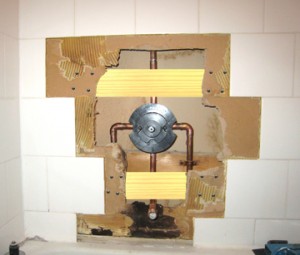
Step 1: Install 1 x 4’s
I’ll start by cutting some 1 x 4’s just short enough to maneuver into the hole. These will be attached to the backside of the existing greenboard by a combination of liquid nail and screws.

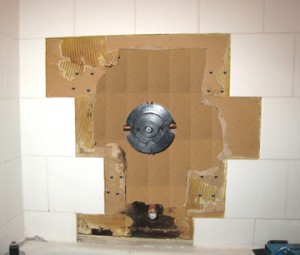
Step 2: Patch hole
I’ll fill the hole with (hopefully) one continuous piece of greenboard, screwed in place with mesh tape over the joints.

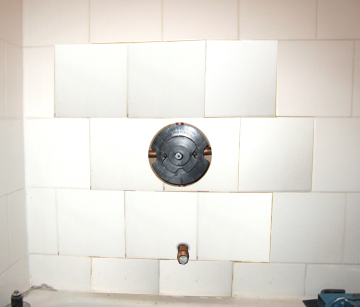
Step 3: Re-Tile
The last step will be to replace the missing shower tiles. Of course that means tiling, grouting, sealing, and caulking. I’ve already been over to Big Orange and found the same 6″ x 6″, bright white tiles. Finding matching tiles was my biggest concern. The caulk and grout will be easy to find.

I’m not sure when I’ll begin this project but that’s my plan. Any readers have a better solution?
What do you think? Will my plan work?


Ethan,
Is the existing wall just green board and not cement board?
Regardless, I would cut the whole to a more uniform shape if possible before trying to re-install what ever backer you’re going to use.
Like Todd says, square the hole first. Put a brace behind the shower pipe with a copper strap as well. I would apply tar paper strips to the 1×4’s
http://www.lemurzone.com/rfg/index.php/2008/08/31/drywall-screwblocks/
to provide a small recess that can be filled with compound around the shield to bring the surface flat rather than proud for re-tiling. Use mesh tape and ‘speed set’ compound to seal.
Thanks for the tips guys. I’m sure it’ll make this patch job go smoother.
Ethan,
They are both right. You want that hole big enough to get to the valve in the future and as my bother [a master pluber] always says, don’t be cheap with the pipe clips.
ROB
what was the reason for combining/replacing the shower controls? I’ll try searching for the previous and subsequent posts to this. I guess my only question is how long do you have to live without your shower while the grout and caulk dry? Any suggestions if you only have 1 bathroom?