Editor’s Note: This article was provided by Kohler. We reviewed the article and feel it meets our guest posting standards; however, this is not authored by one of our writers or editors.
Every year, millions of homes lose power for hours – even days – at a time. Being prepared is the best defense for such energy emergencies. And for many homeowners, that means investing in a standby generator – one that is fully automatic and permanently installed outside the home.
While virtually all home owners can benefit from having a standby unit, reliable power is especially important in homes with elderly residents or young children who are more dependent upon heating, air conditioning and other of life’s necessities. It’s also important for home businesses and for travelers who are not home to deal with the damaging consequences of a power outage.
If you’ve made the decision to purchase a standby generator for your home, it’s helpful to be familiar with what is involved in regards to the installation process. This article IS NOT intended to serve as a step-by-step guide. It is highly recommended that all standby generators be installed by a licensed contractor – not the homeowner. Improper installation can cause damage to the unit and could potentially void the warranty. However, knowledge is power and understanding the installation process will help you properly screen and oversee a contractor during the installation process.

In this article, we’ll go through the key steps involved in installing an air-cooled home generator, which operates on the same fuel source that currently runs the appliances in your home (LP or natural gas). We’ll discuss the key components of the system, including:
- Selecting a generator
- Where to place a generator
- Making power connections
- Connecting to fuel sources
- Pre-start checks
- Remote monitoring
- Basic maintenance
Selecting a Generator
Permanent standby generators are different from portable generators, which are designed to power worksites. With a standby generator – which is specifically designed for the home – there’s no need to fill the gas tank every few hours or change the oil. In addition, portable generators can only back up appliances that can be plugged in via an extension cord run outside to the generator. Standby generators are hard-wired into your home and can back up the circuits you choose without running extension cords. Furthermore, standby generators don’t have exposed engine parts that could lead to burns or hazardous conditions such refilling/spilling gasoline onto hot engines. Permanent standby generators are also better suited for delicate electronics like big-screen TVs or computers due to better voltage and frequency regulation and lower total harmonic distortion.
Standby generators range from 8 to 125 kilowatts. It’s important to choose a standby generator that meets your lifestyle and needs. If you simply want to power a few key appliances in a large home, or everything in a smaller home, an 8- to 20-kilowatt generator may serve you well. If you have a large home and want to keep everything powered up, a larger generator will be required.
To determine what size generator you need, contact a local power professional (dealer) or licensed electrical contractor familiar with standby generators. Before you meet with a contractor, you may want to get some estimates from an online sizing tool such as the calculator found here.
However, enlisting a licensed power professional is essential to determine the right size for your needs. They will also help you comply with any municipal codes governing proper installation, including:
- Noise ordinances (typically under 70 dBA)
- Positioning of the generator (flood risks)
- Electrical codes
In addition to selecting the size of the generator, don’t forget about its appearance. A generator sits outside your home – permanently, so look for a unit with a bold, clean look and one that is corrosion resistant, particularly in salty air or moist environments.

Where to Position a Generator
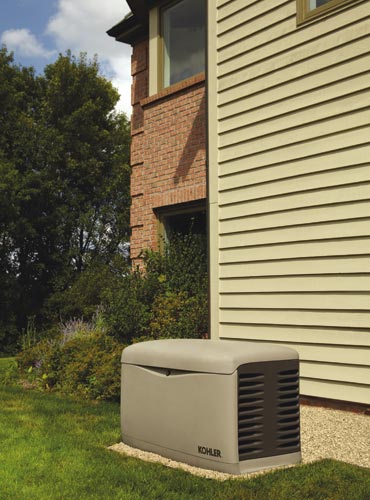
Once you’ve purchased a standby generator, the next step is to find an ideal location for installation. Similar to where your central air conditioning unit is placed, select an area where hot exhaust gases don’t blow on plants or other combustible materials. Also, be sure your contractor allows the minimum clearance provided in the installation manual. Clearance refers to the minimum distance from the home and/or any other structures that may affect airflow.
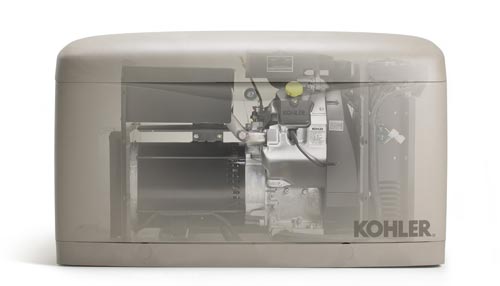
Some generators, like Kohler’s air-cooled models, come with a built-in composite mounting pad. This eliminates the need for pouring a concrete pad in most locations. Just place it on a level area covered with pea gravel. In some coastal areas with high-wind conditions, it may be desirable to place it on a concrete pad and bolt it down.
To move the generator, your contractor will want to insert two metal bars in the lifting holes found in the base of the product and use them to lift the unit into place. The lifting holes allow four strong people to lift a 20-kilowatt generator (approximately 500 pounds). Straps or a lift can also be used if available.
Making Power Connections
For purposes of this article, we will assume the unit is being placed on a concrete slab with electrical stub feeding wires through the bottom of the unit. In most installations, which don’t include the concrete slab, your contractor will need to drill a hole in the access panel located in the lower part of the cabinet for electrical leads. Be sure to drill the hole in this area, and not through the upper part of the cabinet.
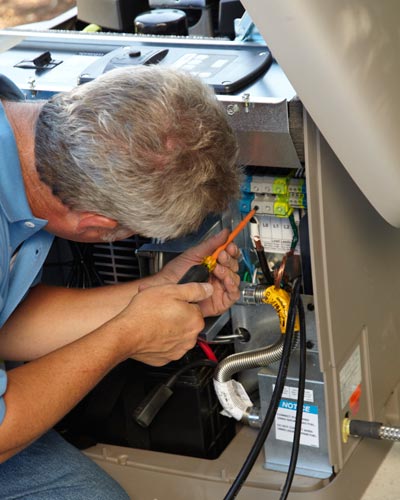
Kohler generators come with a field-connection terminal block, streamlining the wiring process. Route the AC leads through flexible conduit. Then feed the wires through the opening drilled in the cabinet.
If installing a model RDT automatic transfer switch, connect the emergency source to the terminal block labeled “load leads.” Also, connect the automatic transfer switch (ATS) or remote start/stop leads. If connecting a model RRT transfer switch, be sure to route low-voltage communication leads through a separate conduit. Connect the leads from the utility power for accessories. Then connect the neutral and ground leads from the ATS and the main panel. Ground the generator according to methods that comply with NEC and local codes.
All Kohler generators come with a factory-installed battery charger that’s designed to keep the starting battery fully charged. Plug the battery charger’s power cord into the AC receptacle on the bottom of the controller junction box. Utility leads brought to the customer connection terminal block that supply this receptacle should be on a circuit that is backed-up by the generator. You will need to place a 12-volt battery in the controller.
Once these steps have been completed, verify that the generator is off. Make sure the “OFF” LED on the controller is flashing. Also, verify that the battery is fully charged before placing it in the unit.
Kohler typically recommends an optional carburetor heater for improved starting in locations where the temperature drops below freezing. The heater requires a continuous source of power. Plug the carburetor heater into the other AC receptacle. Some generators may also recommend battery warmers, or other cold weather aids. Check the manufacturer’s guidelines for your particular climate.

Connecting to Fuel Sources
Your generator operates on either natural gas or liquid propane (LP) vapor fuel. It is EPA-certified for both types of fuel. When shipped, the unit is typically set for natural gas, with the loose LP orifice tied near the fuel solenoid valve. To convert to LP vapor, install the orifice and disconnect the spark advance leads as described in the installation manual. Then verify that the output pressure from the primary gas utility – or LP tank pressure regulator – is adequate. Also, check that the utility gas meter flow rate is sufficient. Have your contractor refer to the manual for guidelines. Once all the pipe connections are made, check for fuel leaks.
Pre-Start Checks
Before starting up the generator, go through the items in the pre-start checklist. Inspect the air cleaner, air inlets and make sure there are tight connections on the battery. Also inspect the exhaust system for leaks and blockages. Be sure to check oil levels on a regular basis. Oil should be at or near the “Full” mark on the dipstick – not over.
Once you’ve completed the pre-start checks, start the generator by pressing the “Run” button on the control panel. Then turn the system off. Press the “Auto” button on the control panel. At this point, the unit is in “Auto,” and is monitoring the utility – ready to react in the event of a power outage. Kohler Generators are faster than most brands and can restore power to the home within 10 seconds of an outage. Most other brands will restore power in 20-30 seconds. The automatic transfer switch (ATS) transfers electrical load from a normal source of electrical power (utility) to an emergency source (generator). Refer to the manual for compatibility between ATS modes and Kohler generator sets.
The ATS can be wired to supply all of your home’s electrical load, or just essential systems, such as the furnace, refrigerator and sump pump. If the generator powers the whole house, you will want an ATS without a load center. If you’re planning to power only the essential systems in your home, choose an ATS with a built-in load center. A load center allows you wire just the circuits from your main distribution panel that you want to power during an outage.
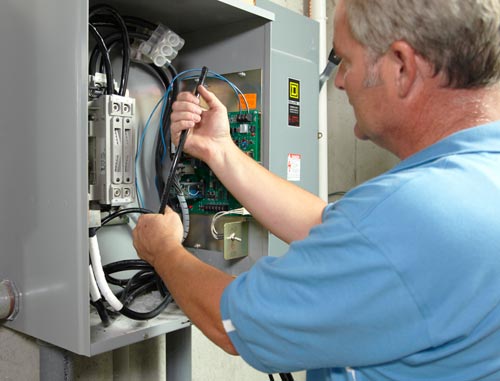
The 100 amp Model RRT transfer switch shown in this picture includes a built-in load center with room for up to 16 single-pole circuit breakers. Verify that the total rating for all breakers in the load center does not exceed the rating of the transfer switch.

Connect the “Normal Source,” which is typically the utility power, to the lugs labeled NA and NB. Connect the “Emergency Source,” which is typically the generator, to the lugs labeled EA and EB. Then connect the neutral from the main panel to the neutral in the ATS enclosure. Ground the system according to NEC and local codes and connect the start wires from the generator set.
To test the system, simulate a disruption of power from the utility by turning off the breaker that feeds the normal side of the ATS. The ATS will send a signal to start the generator. When the generator reaches its rated voltage and frequency, the ATS will transfer generator power to the emergency load. At this point, the generator will power all loads in the essential loads sub-panel.
To simulate utility power coming back on, close the breaker in the main panel. There will be a short delay as the unit verifies that utility power is back on and flowing strong. When this is verified, the ATS will transfer back to the main source of power. The generator will continue running for a cool down period. This should take no longer than five minutes based on engine oil temperatures.
Basic Maintenance
Refer to your installation and operation manuals for recommended maintenance and service intervals. In general, if your generator is running for extended periods of time, you should check your oil regularly and add oil as needed. The service schedule will address how often oil, oil filters, spark plugs and air cleaners should be changed as well as other cleaning, inspection and service suggestions. Some home owners may be comfortable with the basic maintenance, while others will prefer to set up a service contract with a professional to take care of it all for them.
Remote Monitoring
Now that your generator has been properly installed and tested, it’s important to monitor its functionality. This is particularly important for those who are routinely away from home and want to make sure a generator is working properly. A couple of generator manufacturers like Kohler now offer remote monitoring capabilities. Kohler’s OnCue™ Home Generator Management System software loads directly onto a PC, laptop or smart phone. Once installed, you can check the status and test your system from anywhere in the world. You can even set up text message or email alerts to keep you informed while on the move.
The OnCue Home Generator Management System also makes it easy to implement service contracts. The service provider can monitor and test the generator from their business and see any fault codes and history prior to going out for a service call. This gives you a higher level of attention and service while creating efficiencies that ultimately cut costs.
For more information on how to install a residential generator, consult the installation manual that came with your system, or call your nearest distributor. You can also learn more about residential generators and the installation process at KohlerSmartPower.com.
Source: Kohler Generators
If you have specific questions and would like to contact a residential generator expert, click this link to find a Kohler power professional in your area.


Do you need to install a disconnect in between the ATS and generator for servicing purposes?