
There’s a couple of projects on my “no-fly list”, and usually it’s because I don’t have the proper equipment, and sometimes it’s because I don’t want to die. Today’s post shares a venture that doesn’t fall into either of those categories. Even so, it was out of my league. What’s this dangerous, mysterious job, you ask? Upholstery. I have no idea how to reupholster furniture!
Fortunately, Jocie and her mom let me tag along as they gave our dining room chairs a much-needed makeover. The results are great, and I’ve captured the DIY instructions for you in this article.
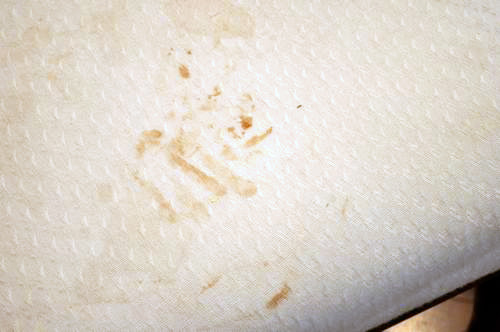
As you can see, the original fabric was an off-white color that doesn’t play well with small children. The years have taken their toll, and eventually we gave up on trying to remove all the stains.
Step 1: Remove the cushions from their frames.
Some cushions will just pop off, while others are fastened with screws. The four screws in our chairs weren’t readily evident, but after a little investigation, we found these four holes that provide access.
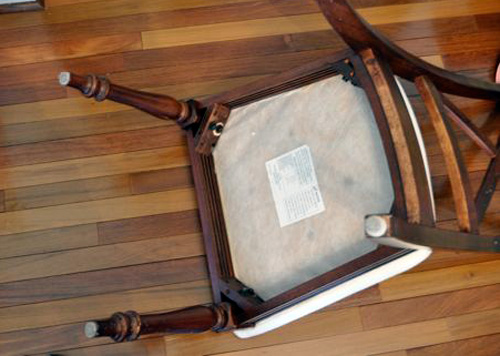
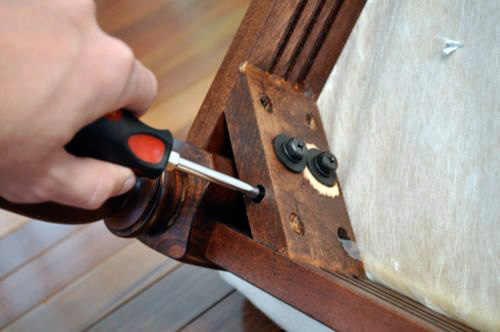
We’re happy to see the frames are solidly built and still in very good repair.
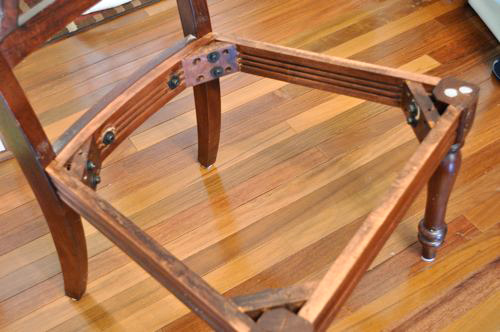
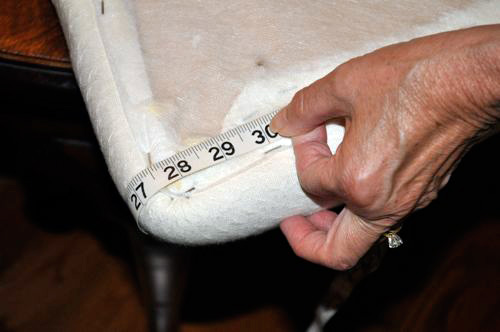
Step 2: Measure the cushions and account for overlap.
Jocie and her mom went to Jo-Ann Fabrics (they had a 50% off coupon) to pickup some upholstery fabric. I’m told that upholstery fabric is much thicker than other fabrics so that it will hold up better. Before heading out they measured the cushions, adding an extra 2-4 inches for the overlap.
Jocie selected a fun, green Zebra pattern that complements our teal walls. A couple of days later I recognized that same fabric on a few pillows in this post by Sherry at Young House Love. Small world.
Step 3: Using the cushion as a guide, cut the fabric to size.
If you’re following along, make sure you orient everything the same way. You wouldn’t want Zebra stripes going in the wrong direction.
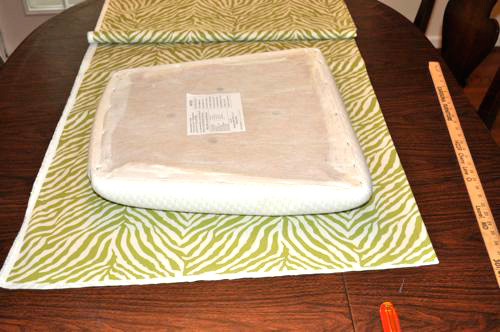
Step 4: Fasten the new fabric.
Starting with opposite sides, use a 1/2″, heavy-duty stapler to secure the fabric in place. Keep everything nice and tight (but not too tight) over the cushion. We stapled every few inches, and folded the cut edge underneath so it wouldn’t be visible. Leave the corners open- we’ll get to those in a minute. You can tell our stapler is heavy duty because of that nice little sticker on the side that says “Heavy Duty.”
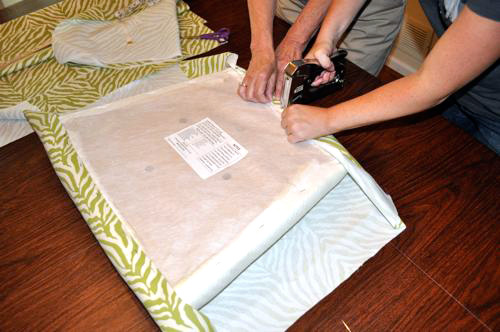
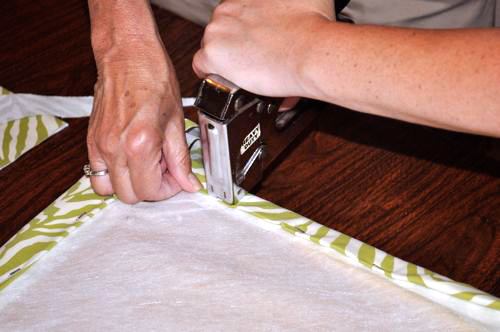
The trickiest part of reupholstering chairs is the corners because it’s tough to prevent wrinkles. We used several, overlapping pleats to keep everything smooth. Cut away any excess fabric after you finish stapling.
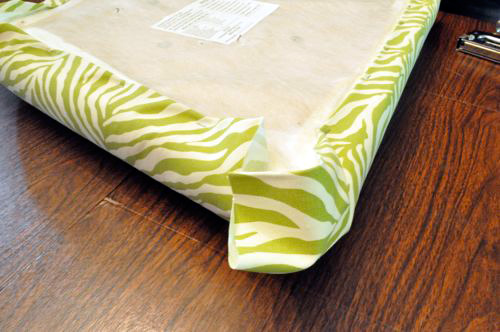

Step 5: Apply stain treatment and refasten the cushion.
Before screwing the seats back onto the chair frames, we used some ScotchGuard to help prevent any future stains.
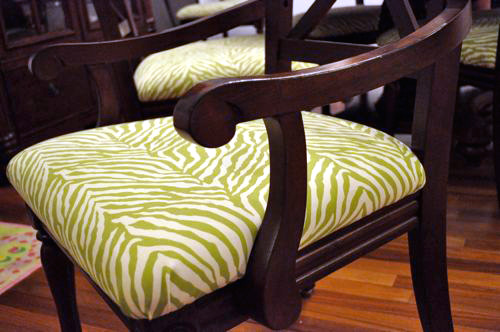
I’m really pleased with how everything turned out. The chairs are like new again, and they look awesome in our dining room. Wouldn’t you agree?
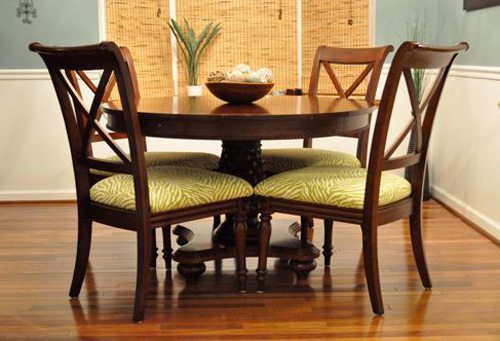
If you follow our Facebook page, you know the big dilemma now is that none of our table cloths match. Jocie is looking for ideas, so feel free to make a suggestion! Do you have any upholstering tips?


Looks good! Great fabric choice!
I think the colors and pattern are really fun. But is it just me? The zebra pattern running sideways on the seat looks a bit odd.
It takes a real man to admit there are some projects that he just cannot or should not attempt. Future wife wants to reupholster our dinning room chairs and now that I see it’s not as bad as I thought, we may do it this winter.
Wow! At first I was thinking “I don’t know about green zebra print” but now I think it’s absolutely stunning and perfect!
We need to do this with our kitchen chairs. Not likely going to do any animal prints, was thinking of using leather since it cleans up nice! A solid print is more goof friendly when you get into prints you have to worry about how they line up. Either way white seat cushions are a no no unless in a dining room thats barely used but even then I would probably not purchase a set like this.
Hi melissa, you are right, the fabric would look much better running in the other direction, but my frugal side won out! Upholstery fabric is 54″ wide, and because our chairs are so wide we would have had to buy twice the fabric to make the zebra print go the “right” way. This way we were able to use only 2.5 yards to cover 6 chairs. One day maybe my style side will win over my frugality! Haha.
Looks awesome! I love the fabric choice!
Well done! I too have not been one to re do furniture. That said, however, now, I may consider it in the future. The order and way you had outlined the proccess seems to highlight the more critical points in the process. And it does not look too hard either! Thanks for bringing this to light! Dave
This is a good idea and I’m going to keep in mind when I’m trift store shopping — just because the fabric is messed up, doesn’t mean it’s not salvagable!
This is one of the quickest ways to add color to the dining area. I am starting to get the itch again to switch mine out.
Have you thought of painting the chairs, as well? Mine are painted white, but I am starting to dream of them in a rich turquoise color.
I too have cream colored chairs that have seen better days. You’ve given me the will and the way to complete this project.
Let me know how it goes! I have really enjoyed my chairs, and they have held up really well, even with izzie and Lucy spills. I think the scotch guard has helped with that too. 🙂
I believe a nice tablecloth choice would be a fuscia leopard print, but my wife doesn’t let me make many home decorating choices. Thanks for an outlet for my unique creativity!
This is something that’s been on my list since we bought our dining set seventeen years ago. Yes, I’m that far behind! I’ve bought fabric twice, but something always got in the way.
First time I got as far as removing the screws from one chair. Second time, more than a decade later, it took a few years to remove the fabric from the chair seat I removed the screws from. That was a few weeks ago. It took way too long to get all the staples out of just one chair so I gave up being it was just a week before our daughter’s wedding and there were more important things that still needed doing to get the house ready for guest.
One week to recover from six months of wedding preparation with a daughter more often than not known as Bridezilla and the past few days ill from stress from another big family change and I’m finally ready to cover all the chairs thanks to your posting this awesome transformation!
Oh and with a table that gorgeous, I wouldn’t worry about covering it with a table cloth.