As I have shared before, I am super lucky to have a real-life bloggy friend 5 minutes from my house – Liz from Naptime Decorator. She is sweet, kind, and has a wonderful sense of style. When we first connected a few months ago, she invited me to her Craft Night that she hosts for her friends (this is a real party, not the linky kind, lol!). Liz also has some pretty wonderful friends who have been very kind to this insecure crafter. 🙂
This past week was my third Craft Night and each time I have even more fun! Liz threw out some Valentine’s craft ideas and everyone chose their own (sometimes everyone does the same craft). I brought three crafts so I could make the most of my time crafting without kids. I was slowed down a bit by the great conversation and wine, so I only completed two.
Be sure to check out Liz and all her cool friend’s Valentine crafts over at Naptime Decorator.
Valentine’s Wreath
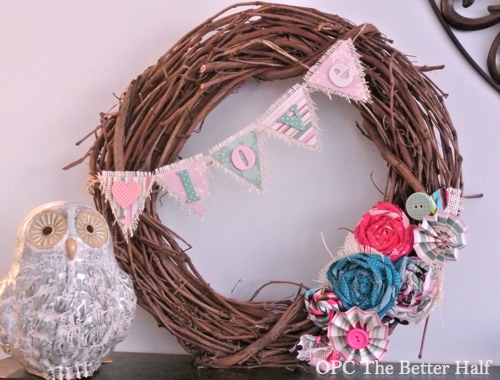
My first was a Valentine’s Day wreath. I’ve had this grapevine wreath in the back of my basement for months because I got in way on sale and I really liked it! I brought the wreath, twine, scraps of fabric and scrapbook paper I had on hand, some buttons, and a lot of hot glue. I didn’t really have anything too specific in mind, just planning on doing bunting and flowers and this is what I came up with.

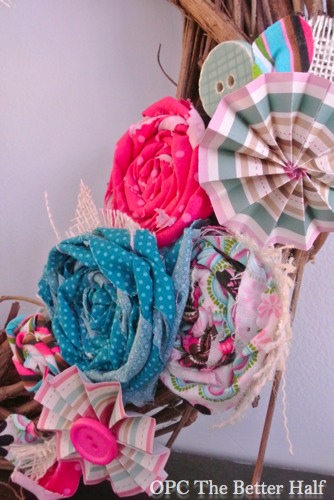
Fabric Rosettes
The flowers were really simple to make. Here is how I made this fabric rosette, but also be sure to check out my fabric flower tutorial on making six different kinds of flowers.
I started with a long strip of fabric and folded it in half lengthwise.


Then, I began to roll one end in on itself –

And kept wrapping it around and around and around. For a more texture in the flower, I twisted as I went around.


I wanted the flowers to look a little more rustic, so I didn’t worry about frayed edges or the backsides of the fabric showing.
When I was happy with the size of my flower, I inserted a few pins to hold everything in place.

I then hot glued the backside and placed a scrap on the back to hold it in place while it cooled completely.


I removed the pins when the glue was still soft and then glued it to the wreath.

Paper Accordion Flowers
I have made these before in the past and they are SUPER easy. I mean really, really easy!
I took a small strip of paper. The width of the paper will be the radius of the flower. The thicker the paper the bigger the flower.

Then I folded it like an accordion.

Once it was folded all the way, I put both the ends together. For one of the flowers, the strip of paper was too long (and the flower didn’t spread out enough), so I cut some of the length off and tried again.

Once happy with the flower, I used hot glue to fasten the two ends together and added a button.

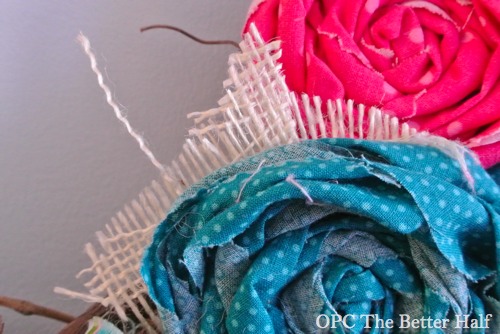
Here’s a close-up of the grouping of fabric, paper flowers, buttons, and little bit of burlap.


Bunting
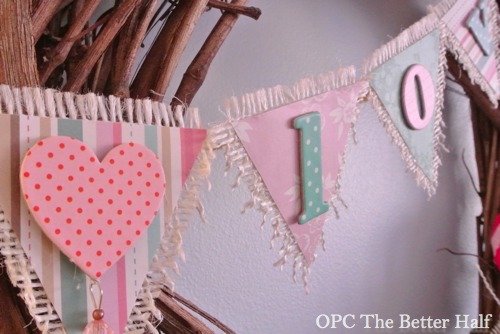
I made the bunting using chipboard letters out of the dollar section at Michael’s, a little burlap, scrapbook paper, and twine. No magic here, just cut some triangles and starting gluing! 🙂

Felt Rose Frame
This was one of the ideas Liz threw out to the group as a possible craft. She got the idea off Pinterest from Embellishing Life. I used a $4 square frame from Joann’s, a piece of metallic dotted scrapbook paper, and red felt.
I made the rosettes in the same way as the rosettes on the wreath, just a lot smaller and with felt.

What do you think? What have you made for Valentine’s decor this year?
As always, thanks for reading!


This is the cutest Valentine’s wreath! Thank you for sharing the great tutorial! I love the colors you chose; it’s a perfect touch for Valentine’s!
Ahhh…pink overload! 🙂
There’s a chance I’m closing on my house on the 14th…a happy Valentine’s Day it would be! (If not then…the week after)
Thank you for breaking down the process for the fabric roses- I am terrible at these but I think you have inspired me to try again:)
It’s absolutely gorgeous, Jocie! I’ve tried to email you back after you comment on my blog and it says you are a no reply blogger. I wasn’t sure if it was how you wanted it set up, I know mine has changed sometimes. But, I just wanted to say thanks for your kind words. 🙂
Megan
You KNOW how much I love your crafts! 😉 Thanks for the sweet words – so glad we’re real life buddies now:)
Love this. I have a wreath just calling for this decor! 🙂
I’ve only made a little garland out of hearts. Nothing to exciting or over the top, but more than I’ve ever done!
The tutorial on the roses was very good!
I was so inspired by your framed heart, that I made one this afternoon!! I love it!
Isn’t this just the cutest wreath ever? I love the twisted fabric roses and the adorable banner. What fun to have a craft party. I’d love to start one. You’ve given me a great idea. A double thanks Josie!
So far the only preparations that I have done are a dinner reservation and cards. Eek!